-
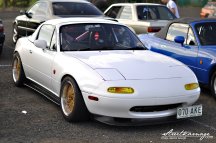
2,000 rpm - light wheelspin, no bog here!


Velocity Stacks & Airbox - http://omgpham.com/velocity-stacks-airbox-prototyping
This is going to be a big photo dump of my latest adventures into 3D printing, both for prototyping and hopefully end usage. I purchased myself a 3D printer, Wanhao Duplicator i3, and I'll do a separate post for that soon. For now let's talk about my experiences with the intake parts I'm prototyping 
I have no real knowledge in both 3D printing/modelling and engine intake theory, I'm just learning as I go, so there will be mistakes here and there. And therefore, not entirely sure if these parts/designs will make any measurable performance gains, but it's all fun anyway!
In my last post, I had just commissioned some prints of velocity stacks. Well I did some redesigns, and they*can now be found on thingiverse.com, again it's still all a work in progress and I'm not expert in the design theory.
The velocity stacks are 105mm tall and designed for Silvertop AE101 throttle bodies.


Next up was designing an airbox for the ITBs and 105mm tall stacks, I pretty much modelled it using the same external dimensions as my Pipercross filter. I did this because I know for sure that it would clear all the brake and clutch parts in the engine bay and I also wanted the ability to easily change from filter to airbox. I can and will make a better design once I have this design fitted and tested.
For the Pipercross filter and this airbox to clear the stacks, a new mounting plate needed to be made. So I chose to print out a spacer that would be sandwiched between two laser cut plates, you can see it in the previous screenshot.

Below*is my ideal design, will work on that soon.

The printed spacer for the filter mounting plate, had to be printed in multiple pieces due to the limited build volume of my printer (200mm x 200mm x 180mm).

Before doing the actual prototype print I decided to use some rubbish filament for a test print without support material, just to see how far it could go. It failed pretty quick when it got to the dome part, it recovered slightly towards the end though.


Here you can see the rear section of the airbox being printed, tried to minimise the usage of plastic and support material. This was printed at mostly 200micron layer height and the curved sections were printed at 100micron layer height, varying the layer height like this helps reduce print time as well as reduce support material for the sections with overhang.


Mid section being printed, by far the easiest part. Only needed support material for the mount flanges, this was printed at 280micron layer height.


And this is the front section being printed, all printed at 280micron layer height. This part had some design modifications to improve print-ability, also to reduce plastic usage and support material.


Since this is a prototype for test fitting, sections are glued together using*Cyanoacrylate. Final part will either be epoxied or plastic welded together, not sure yet. Or maybe just use the print as a mold for carbon fibre?


It's amazing seeing this all come together as one piece, nearly 500mm total length. So happy!


Continued below....
-
The Following 8 Users Say Thank You to mrpham For This Useful Post:
Agent☣Orange (06-05-2017),freedomgli (03-28-2017),fwdtamiya (03-26-2017),Greasemonkey2000 (06-05-2017),kung fu jesus (03-25-2017),MiataQuest (12-07-2017),NCGreasemonkey (03-26-2017),Tee (06-06-2017)
 Posting Permissions
- You may not post new threads
- You may not post replies
- You may not post attachments
- You may not edit your posts
-
Forum Rules


 Reply With Quote