Just went through all the pictures. Can't believe there is a green Rx7 FB in the Museum. Thanks for all the stuff!


Just went through all the pictures. Can't believe there is a green Rx7 FB in the Museum. Thanks for all the stuff!
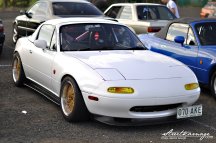
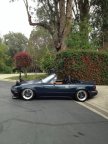
1990 Miata, she was red but now she is Spirit Green!
http://mazdaroadster.net/showthread....d-a-love-story <--- build thread!
Also check out the facebook page http://www.facebook.com/IHeartFlippyHeadlights !!! Its a facebook page dedicated to the awesomeness which is flippyheadlights! Not me, but the actual headlights! High time someone noticed how awesome these things are; check it out!


No worries mate, really enjoyed the Mazda Museum and factory tour, it's free of charge too. Only wished that they didn't have to rush us through the tour.
Yeah mate, the ends of the screws were secured and thread locker used. Had to get my mate to do it because I didn't have a punch.
My MX-5 Build - http://mazdaroadster.net/showthread....mrpham-s-build


They rushed you!? That's such a shame.
1990 Miata, she was red but now she is Spirit Green!
http://mazdaroadster.net/showthread....d-a-love-story <--- build thread!
Also check out the facebook page http://www.facebook.com/IHeartFlippyHeadlights !!! Its a facebook page dedicated to the awesomeness which is flippyheadlights! Not me, but the actual headlights! High time someone noticed how awesome these things are; check it out!


Miata Low-Profile Headlight Kit Install - http://omgpham.com/low-profile-headlight-install
This is a install walk-through of the Low-Profile Headlight Kit. It's quite straight forward to get everything bolted into the car, but it does take a bit of time to make minor adjustments so that both headlights are level with each other.
The supplied instructions can be found below, please use it together with this guide:
http://omgpham.com/wp-content/upload...11/low-pro.pdf
Before you start, have your headlights popped up than remove the retractor fuse/relay.
1.Remove the factory headlight and it's frame. This consists of 3 small screws, 2 large screws and a spring.


2.Using a pen, outline the brackets holding the headlight lid to the assemble. This will be used as a guide when you re-assemble.

3.Using a 14mm spanner, remove the nut and spring washer that holds the control arm to the retractor motor.

4.Remove the bolts/nuts on both sides of the assembly, this is the pivot point of the headlight assembly.


5.Remove entire headlight assembly from the car.

6.Remove the control arm from the assembly, carefully pry it evenly at the ball joint.

7.Drill two 6mm holes for the new control arm bracket.

8.Use one of the original factory screws, slip the supplied washer and spring onto the screw. Attach to the adapter frame and screw into bottom plastic clip.


9.Top holes of the frame are attached to the assembly using the supplied counter-sunk screws, washer, spring and nut.

10.Attach the Hella lense to the frame using the self tapping screws.

11.Loosen the locking nut and remove the factory stopper, install the supplied curved stopper.

12.Re-install the assembly into the car, plug headlight cable back in.

13.Loosen the bottom stopper, set the top stopper temporarily down.

14.With the retractor motor in the UP position, attach the control arm to the retractor motor shaft. Make sure the control arm is as straight as possible and the assembly is in the UP position too. Tighten the nut just enough so that you can do some tests by popping the headlights up and down a few times and make sure that the headlight is lifted to the highest point. Tighten the nut when done.

15.With the headlight up, set the top stopper so it just pushes against the assembly. With the headlights in the down position, set the bottom stopper so it just pushes back against the assembly. In both up/down positions, there should be very little movement, this ensures that the assembly will not bounce around whether the lights are up or down.
16.Repeat the instructions for the other side, and make minor adjustments to ensure both headlight heights are equal.

Last edited by mrpham; 12-22-2012 at 08:56 AM.
My MX-5 Build - http://mazdaroadster.net/showthread....mrpham-s-build


17.Adjustments are made using the control arm, remove it from the retractor motor shaft to do so. Lengthening the control arm will raise the headlight, shortening the control arm will lower the height.

18.You can now install the headlight lid and the side panels, the outer panel uses 1 short screw towards the back and the front uses a long screw with the supplied plastic spacer. Inner panels uses 2 short screws, the front screw uses a washer as a spacer.

19.Aligning the beam is done using the 2 top screws on the lense housing, black plastic surround. These screws allow adjustments for vertical and horizontal alignment. For any reason you need more vertical alignment, the bottom screw that holds the adapter bracket to theassemblycan be adjust to raise/lower the lense.
20.Enjoy your new low-profile headlights!


My MX-5 Build - http://mazdaroadster.net/showthread....mrpham-s-build


loving it dude..those headlgihts are awesome!


COPs Bracket - http://omgpham.com/cops-bracket
Just some quick photos of the COPs Bracket installed on my engine, I gave it a quick coat of satin black enamel paint too. Came out great and really suits my painted valve cover.
Now with the COPs bolted onto the bracket.

My MX-5 Build - http://mazdaroadster.net/showthread....mrpham-s-build


Monday Bump!
Painting Engine Block - http://omgpham.com/painting-engine-block
I felt I needed to work on my car this weekend, so I went out and purchased supplies to paint up my block and a few other parts. Nothing like wire wheeling and paint fumes on a Sunday arvo!
First up was to mask the deck and start removing parts from the block.
Prep work is important so I wire wheeled/brushed the old surface. Had to sand a few spots and than everything cleaned up with presol/wax grease remover.
Water pump removed, front of block and sump masked off. Did a few coats of primer.
Than the gloss black coats went on, still needs a few heat cycles to fully cure the paint.
All done!
Also spent some time painting one of the water outlets.
Pulled apart the alternator to paint. Wire brushed and cleaned with prepsol.
The finished parts!

My MX-5 Build - http://mazdaroadster.net/showthread....mrpham-s-build


You sir are my idol, my inspiration & what you do is what my dreams are made of.
Really hanging out to see what it looks like when its all put back into one piece again
~Gareth~
-ROADSTERZOKU-


the attention to detail amazes me, love this build!


My MX-5 Build - http://mazdaroadster.net/showthread....mrpham-s-build


Subbed, I need to take a few hours to read through this properly


So I got some good news today, my built cylinder head will be back with me by end of the week! So excited
I've decided on The Torque Team to install the head and degree in my camshafts.
My MX-5 Build - http://mazdaroadster.net/showthread....mrpham-s-build


Eeeeeeeeeeek!!
Haha. That's very exciting. When do you expect to drive the car?