This really motivates me to put up a paint booth at the back of my house and just hire painters on their off day to do the job.
Can't wait to see the final result.......

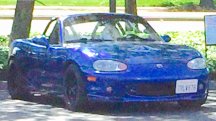
This really motivates me to put up a paint booth at the back of my house and just hire painters on their off day to do the job.
Can't wait to see the final result.......


Back Home! - http://omgpham.com/back-home
Happy day! Car has been towed back home and first thing we did was remove all the front panelsStoring them in a spare bedroom for now, don't want to scratch anything during assembly.
Colour is Audi's Aviator Grey.
The entire engine bay was covered in blankets during the engine install.
Hnnnnggggggggggg!!!
Colour looks amazing in sunlight, the Audi paint code has a bit of pearl through it but can only be seen in direct sunlight.
The freshly powder coated radiator and sway-bar brackets fitted up with new bolts.
A quick mock up panel for the engine harness Deutsch bulkhead connectors.
I had the front lip painted gloss black, will be interesting to see how well it holds up from all the abuse it cops

My MX-5 Build - http://mazdaroadster.net/showthread....mrpham-s-build


such an amazing build!! crazy amount of work put into this... build is gonna be sensational once its put back together.
btw, do you have any suggestion, how to fit the AE101 itbs on RHD car without moving the brake bits? I have some ae101 itbs, but I know the T3 manifold will have clearance issues on rhd cars (thanks to your documentation), is there no other manifold that will fit the B6? (besides all the discont. ones)...


Damn this is going to be beautiful.


http://omgpham.com/lots-of-photos-wire-tuck
OK, a decent update. Lot's of photos.
Because I'm planning to use bulkhead connectors on the firewall for the engine harness, I drew up this plate to mount the connectors. It allows easy disassembly if any changes need to be made or replacing connectors etc. Because I'm recycling parts for this section, the connectors used are Deutsch 12-way DT and Deutsch 31-way HDP.
Had it 3D printed so I could start the wiring while I wait for the real thing to get laser cut from stainless steel.
Headlight assemblies in.
Brake booster, clutch master and radiator in.
Installed these Garage Star Fender Braces too. Pretty straight forward, comes with all new stainless steel bolts.
Because I had the valve cover sandblasted and painted, all the baffles need to be removed so the blast media can be cleaned out. Garage Star machined stainless steel valve cover bolts. I've got a whole engine bay dress up bolt kit to go on too.
Started on the body wiring tuck, wires are coming out of the side behind the front guards. This has been drilled, painted and sealed to keep moisture out.
Slowly cleaning it up and routing. I've used loom tubing for exterior sections, they provide more protection than just braided sleeving alone.
The wires re-enter the body from the side, drilled a 24mm hole and than sealed any bare metal. Ideally I should have done all the cutting/drilling before paint, lesson learned. I also picked up these wiring grommets from Clark Rubber.
I've had to make a few extensions to tuck the body wiring. Instead of soldering, I've been using these uninsulated butt-splice crimps and than heat-shrinking over it.
Using a factory hole to tuck the wiper motor wiring. I think the hole is normally used for the washer hose, but I'm relocating the washer bottle... More details on that later.

My MX-5 Build - http://mazdaroadster.net/showthread....mrpham-s-build
OBD1 kenobi (10-05-2015),Phatmiata (01-28-2017),tsingson (10-05-2015)


These exposed wires have been wrapped and loom tubed now. Interior sections are covered in a braided sleeving with heat-shrink on the ends.
The headlight assemblies back in, most of the wires are out of sight.
The dual horns installed, and the body harness is done!
Just so everyone knows, this part of the build is on a strict on budget, won't be MIL Spec or anything like that. Every part was either given to me for free or simply re-used from my old harness. It'll do for now, and I'll look into doing a concentric twisted MIL Spec harness later.
Below is the wiring for the coils, it is being terminated into a Deutsch 12-way DT connector. This connector contains wiring for the coil triggers (x4), coil power (x4) and the ECU grounds (x4).
For shielded wires (TPS, crank and cam sensors), what I did was strip the cable further back and unbraided the shield. I than twisted it up and heat-shrinked. It gets terminated into the bulk-head connector and continues onto the other side.
Finished the crank and cam sensors. This is all a dry fit, once I have it mostly sorted, the wires will be sleeved and heat-shrinked.
To tuck the starter and charge wires, I had to a slight extraction and feed them through the tunnel.
So my ITB manifold is shit... The factory Toyota manifold has two dowels per throttle body to locate everything into perfect alignment. If the throttle bodies aren't correctly aligned than they don't open equally no matter how many linkage adjustments are made, not great at all!
Below is my solution. I mounted my throttle bodies to the Toyota manifold, adjust everything and confirm their alignment. I than bolt the tops of the throttle bodies to a thick plate of steel. The throttle bodies are removed from the Toyota manifold and transferred to my Techno Toy Tuning manifold. DONE! Everything is spot on now.
Many late nights...

My MX-5 Build - http://mazdaroadster.net/showthread....mrpham-s-build
Dandy (10-05-2015),Greasemonkey2000 (10-07-2015),tsingson (10-05-2015)


Just. Plain. WOW!


This is one of , if not the best Miata build I have ever seen.
HarryB (10-07-2015)


Thanks guys!
Made some more progress today, the engine harness is complete. I also ran four extra wires sitting under the tunnel, just in case I decide to add idle control. Definitely not Mil Spec, but I'm OK with that
I'll seal everything up once the engine is tuned and running.

My MX-5 Build - http://mazdaroadster.net/showthread....mrpham-s-build
Demon I Am (10-07-2015),HarryB (10-07-2015),Paul B (10-09-2015),tsingson (10-07-2015)


This is a nice resource for wiring stuff:
http://www.rbracing-rsr.com/wiring_ecu.html
Whenever I feel like I am doing a good job with my wiring, I go visit this page and come back down to reality.


My MX-5 Build - http://mazdaroadster.net/showthread....mrpham-s-build

LOL, we use that exact website as a guide on building our FSAE harnesses.
Back to topic, mrpham I wanted to tidy up my OEM wiring a bit, but this puts me to shame, awesome level of work, keep the updates coming!


Wiring Complete! - http://omgpham.com/wiring-complete
So here we are, all done.. All those early mornings before work and late nights after work building the engine harness and tucking the body wiring. Pretty happy overall with the finish product, just a few changes I will make later. Just want to get the car running for now.
The 3D printed plate will be replaced with a laser cut stainless steel piece.
Engine harness complete!
Dummy fitted the intake so I could cut the injector wiring to length.
The start of the ECU side of the engine harness. All this is being recycled from the previous wiring setup. So handy having everything done with Deutsch connectors.
Terminating the shielded wires for the crank, cam and TPS sensors.
Completed!
The washer bottle has been relocated to under the guard, I think it should clear everything on full lock and compression. It's a bit awkward to refill, but probably only needs to be topped up once a year. This washer bottle is from a Holden HQ I believe.

My MX-5 Build - http://mazdaroadster.net/showthread....mrpham-s-build


Washer bottle out of sight for a clean look and lower center of gravity. Win Win