See page 3, Stack ST8130 dash. Factory? Bah!


See page 3, Stack ST8130 dash. Factory? Bah!


Originally Posted by druz

hahaha I like the factory for the sleeper effect. But seeing as this Miata is orange im guessing you don't want it to be a sleeper? hahaaa
I'm almost done with the wiring.
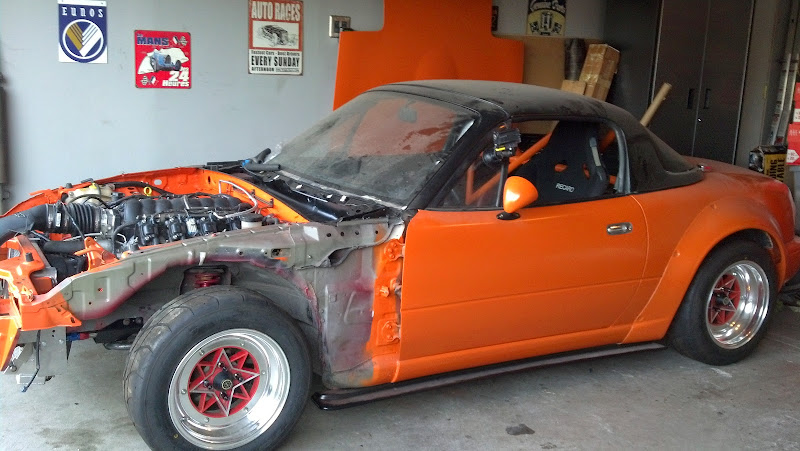
Actually although that doesn't look like it, I'm getting pretty close. The engine bay looks much better.
I've got to move the wires that run behind the engine a bit but that's about what it'll look like. The GTO has the PCM (GM speak for ECU) on the drivers side, in the engine bay. I'm putting mine in the factory NA6 location of the pax foot well. To do so I've had to reroute that main harness loom that goes to the PCM to go thru the big grommet on the pass side. Doing that is taking up most of what little space I had behind the intake manifold. That is where some run their heater hoses so I've had to do a heater reroute also. Since I needed to check clearances for a couple other things in that area I decided to take a small break from wiring and tackle that.
The LSx heater hoses exit the water pump on the passenger side. To get to the stock Miata heater core connections on the drivers side there are a few options: just run them over the IM (ugly), behind the IM (no space for mine with the wiring harness back there), get an NB core which is aluminum and weld AN fittings and go full AN hoses (baller!), solder copper fittings and pipe to the NA core and run them behind the heater assembly (probably the best option but I didn't want to bother with soldering copper although I may revisit it), and finally just use rubber hose and clamps to do the same.
There is some concern with hose clamps potentially leaking in the car, but after prepping the heater core I found there already is one from the factory.
As luck would have it, the hose I ordered thinking it was just 5/8" with a 90 bend actually had another bend that almost perfectly replaced that pipe union also. Dayco #80403
So at this point I've added 1 extra hose clamp, not too bad. After the hoses run behind the heater I want them to go thru the firewall there the stock AC lines went.
My idea was to use an elbow fitting thru a grommet and have the hoses from the water pump then connect right at the firewall. Unfortunately that didn't work out. Just to the left of the openings the firewall steps back about an inch. That doesn't allow the fitting to point left and still fit through the firewall, it's too short. I'm going to have to make the connection inside the firewall. The factory AC grommets fit the hose almost perfectly. Now I have 6 hose clamps and I'll have to monitor their condition and if it bugs me enough go with the copper pipe reroute.
The holes where the stock heater hoses went are 30mm, which is an odd size for body plugs apparently. I found some metal 1 1/8" hole plugs at Lowe's that will work with a little modification, plus they can be easily painted.
Now back to wiring.
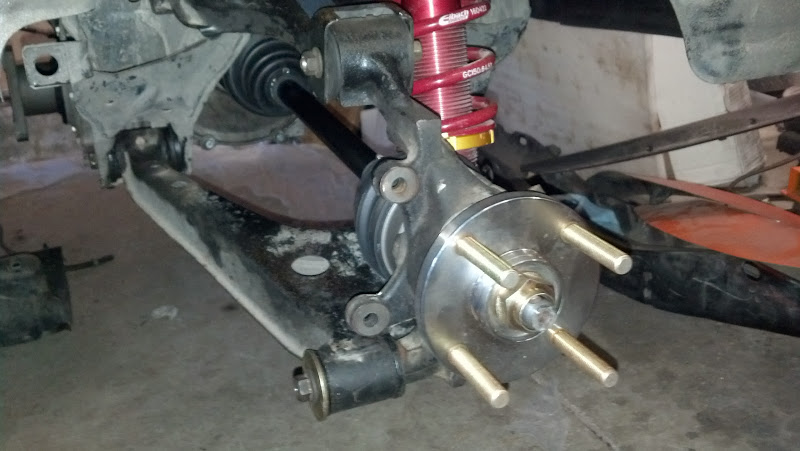
It's only been a week so not a whole lot done but I did get a new drivers side axle from V8R and it fits like a glove. Thankfully my fitment issue was as simple as just getting 2 passenger side axles the first time.
So the rear is done, just need to install the driveshaft. Stock brakes are back on temporarily as I continue to decide what setup I want for the rear, Wilwoods vs Sport. A bit more wiring and it should start again and then theoretically move under its own power.

NICE! Nothing like that first ignition. Hope it goes well.
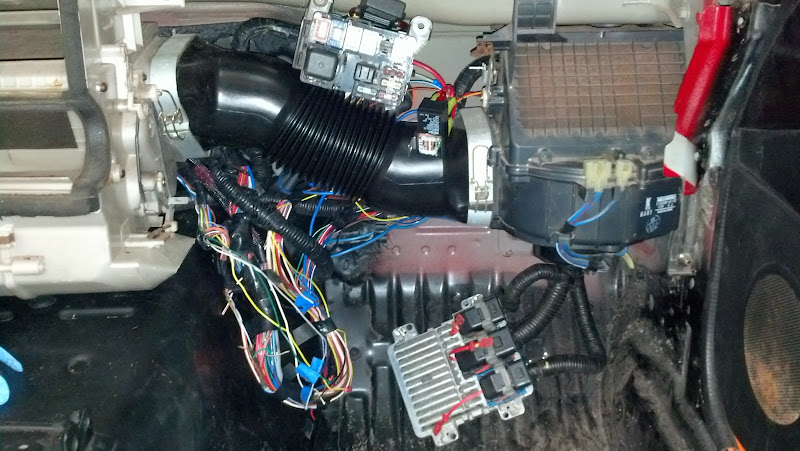
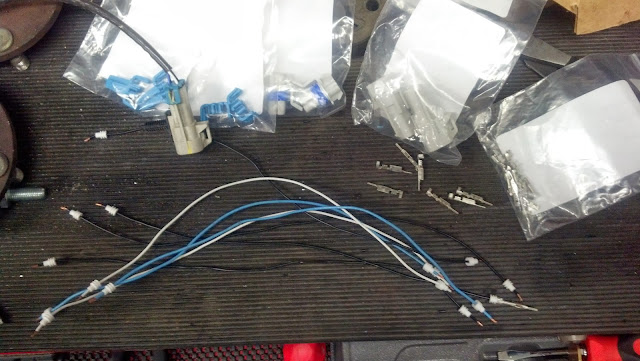
Long overdue update. The basic wiring is done. I could have done a lot more thinning out of both harnesses, shortening, etc but for now I'm just going to get it going.
When the dash goes back in shortly I'll make a mount for the fuse box and fan relays in the glove box. I'll also make a mount for the pcm in the foot well like stock and modify the stock cover.
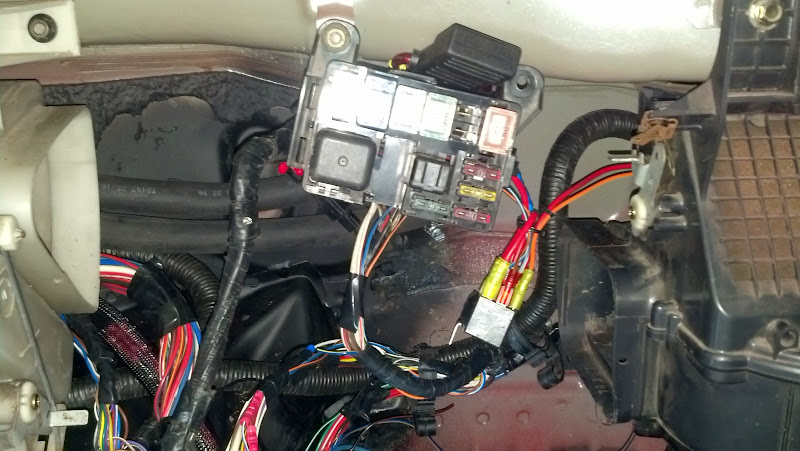
Surprisingly very few of the GTO harness wires needed to be spliced in. For switched 12v power to the harness I connected pins 14 and 19 from the blue C1 connector to the whi/red wires from the 30A fuel injection fuse and main relay. This was also connected to the GTO C101 connector (near the left headlight) red, lt grn, and pnk/blu wires which supplies power to the injectors, coils, and skipshift and reverse lockout solenoids. On the LS2 each bank is run off its own 15A fuse and numerous relays.
Pin 20 is for constant 12v and went to whi/grn from the airbag system. This also went to pin 16 in the obd connector.
Pin 45 for the fuel pump relay went to the violet wire on the Miata relay.
That's about all that is needed to power it all. Wiring for the gauges is still pending but everything is pulled, only a few wires from LS2 C1 harness. The other 2 connectors on the E40 pcm are basically for the sensors, signals, etc.
I decided to use the venerable Taurus 2 speed fan so needed to also wire that in. It creates a massive amount of CFM in high speed but also draws a massive amount of power. I used this schematic.
I made one change and swapped 87 and 30 on the low speed relay to keep connections consistent. My setup has a 80A maxi-blade fuse connected to main battery input on the fuse box. That feeds a 80A SPDT which is normally closed to a 30A SPST low speed relay. 12v power to pins 86 come from the now unused 10A airbag fuse. Then power from 87 goes out to the fans and grounds come from the pcm to switch them on. This way the low speed is turned off when high speed kicks on.
The Taurus fan fit my PRC radiator very well. I mounted it upside down of the original orientation and made a few brackets.
I did have to cut up a bit of the top of the shroud to fit the upper radiator hose. I'll see about sealing it up again if it seems to cause any issues.
With the radiator and fans done I finished the heater hoses. The swirl pot is inline with the water pump output and the steam vent is tee'd into the input. I had some -5 SS hose laying around so I used that for the steam vent. I covered the other hoses in heat sleeve since they run very close to the headers. I still need to make a small bracket to hold the swirl pot.
Very, very close ...
Last edited by druz; 12-22-2013 at 05:54 AM.

Love this car

I love a clean install............looks great!
"My For Sale Items"
"My 2014 Club"
1994 Laguna Blue - (Runabout)
2005 BM MSM #751 of 1428 - someone else is playing with her now
"Nardi Steering Wheel Restore"
91 SD Italia
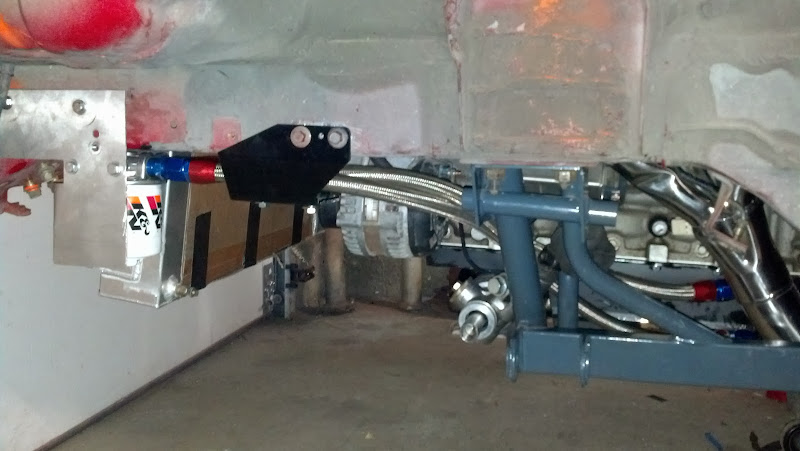
Busy, busy, but not on the car. I decided on a final mounting place for my oil filter, slightly different than originally planned.
Since I had to make a small bracket to attach it I decided to incorporate a shield for the filter in case the area was susceptible to debris. The only drawback Ive found so far is that the hoses are in the way of the control arm bolt. I found this out after getting the ES bushings in the arms along with new ball joint boots and installing the front suspension. I also got the steering in with R/LE tie rod ends.
So I filled it with Mobil 1 and ...
There's a vacuum leak and no O2 sensors so its super rough but it runs again.
Next up is installing the rest of the FM exhaust, creating O2 extensions, filling the trans and diff with fluid, torquing all the subframe and suspension bolts and finally taking it for a quick spin around the block.
NCGreasemonkey (10-16-2015),WASABI (01-16-2014)
Oh I bet will be a quick SPIN!!!!!!!!!!!!!!
"My For Sale Items"
"My 2014 Club"
1994 Laguna Blue - (Runabout)
2005 BM MSM #751 of 1428 - someone else is playing with her now
"Nardi Steering Wheel Restore"
91 SD Italia
About a week late for my monthly update. I unpackaged the FM exhaust and got that installed. It went very smoothly as to be expected with FM products. Cutting the rear bumper took a bit to get the template lined up right though.
It's almost impossible to take an under car shot without a lift, but it looks good! The O2 sensors are way down in the collectors and would have been a pretty good stretch for stock harness so I decided to make a couple of 12" extensions. One of the nice things about LSx harnesses is that most of the Metripack connectors are readily available and Mouser has a nice selection and catalog. I already needed to order a couple other connectors so I added to O2 stuff to the list.
Simple as that. My knock sensor connectors were pretty beat up somehow so I swapped those out for new as well. Even easier.
Then I checked the torque on the subframe and suspension and was ready to fill her up. Getting excited!
Bled the brakes and clutch with my Motive. The 1100 adapter works with the Wilwood clutch master from V8R.
I decided to test first and reverse on the jack stands just in case so I won't have any issues getting it back in the garage if there's a tranny problem. I didnt even get that far. Push the clutch, nothing. Well that's normal since I just bled it. Pump it a few times and still nothing. Couple more, no luck. Look under the car and clutch fluid is starting to come down, leaky slave. On a Miata this wouldn't be that big of a deal, but on a T56 the slave cylinder is attached to the throwout bearing, inside the bell housingTrying to slide this 100+ lbs tranny into place in the tight trans tunnel would likely cause me to start kicking and breaking things very quickly, so it's all going to have to come back out again.

Torture. I'm sure there are many more ultra frustrating setbacks in store also. The initial assembly that I've finished is the easy part.
WASABI (03-18-2014)
getting closer !!!!
After the huge fail that was my slave cylinder I needed to take a bit of time off. After I finally pulled the front subframe with the engine and trans and looked at the slave I needed to take even more time off. The slave wasn't leaking, I didn't tighten the feed lineI was planning on swapping the feed and bleeder that I got with trans with the new pieces from the V8R clutch master kit. I forgot to do that. There were a myriad of other issues that caused that I worked out, but I forgot that I didn't tighten the hose. Since I bought a new slave I put it on anyway. I like the older bleeder better since it has a nipple so I just kept the old hoses on. Total cost of forgetting to swap out the hoses (which I didn't end up doing anyway) - $150 and 12 work hours, i.e. 1 month.
But the time finally arrived, on the ground and ready for a test.
The test was just a very short 2nd gear drive around the block. My fans aren't working so temps got up to 200F very quickly. I tested the wiring and it's good, so I appears to be a pcm issue. Also it seems like my Bank 1 is running lean so I didn't want to do too much, just make sure it can move on its own. The video came out poorly, so I just pulled a few screenshots from it. The next one will be better!
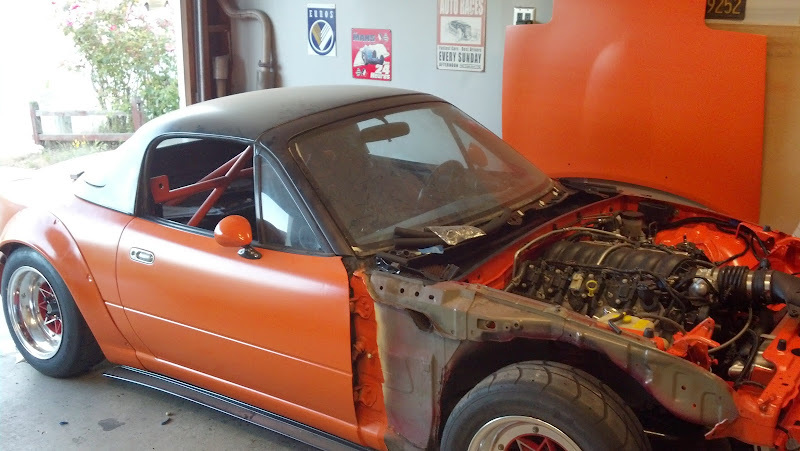
And finally, nose in into the garage for the first time in 23 months.
As I mentioned in the first post this Miata is a very early model, so it is one of the 2500 or so that is actually having its 25th birthday this month. I'm glad I was able to get it out on the road, no matter how short, to celebrate it.
Next on the to do list is working on some tuning issues like getting the fans working, figuring out why my vss isn't reading, and why it's lean in bank 1. Then I need to fix a few brackets and also install the LS7 intake. I have the LS2 on right now but it won't fit under the hood or bumper, it's much bigger than the LS7. That involves switching to the LS7 MAF also. Then I get the rest of the body work on.

Nice to get her moving again. Happy 25th Anniversary to you!!!
Happy 25th!!! Excellent progress.
So... what do you plan to do for rubber? I'm having a hard time with the 14" selection. I'm actually considering rebarreling my Star Sharks up to 15x9.

 Reply With Quote