-
3,000 rpm - starting to feel the power


I will one day own an fd. I still remember spending hours sitting in one at a dealership back in 93 when my dad was dealing with a salesman at a mazda dealer buying a truck. That desire has never left
-
The Following 2 Users Say Thank You to Tkblazer For This Useful Post:
Phatmiata (09-17-2014),WASABI (09-16-2014)
-
4,000 rpm - entering the fun zone


Please.
-
The Following 5 Users Say Thank You to Ihatecars For This Useful Post:
Agent☣Orange (06-12-2015),Nyaa (09-13-2014),Phatmiata (09-17-2014),This is a Lamp (11-23-2015),WASABI (09-16-2014)
-
4,000 rpm - entering the fun zone

-
The Following 2 Users Say Thank You to mini_fd For This Useful Post:
Dandy (09-16-2014),Phatmiata (09-17-2014)
-
2,000 rpm - light wheelspin, no bog here!


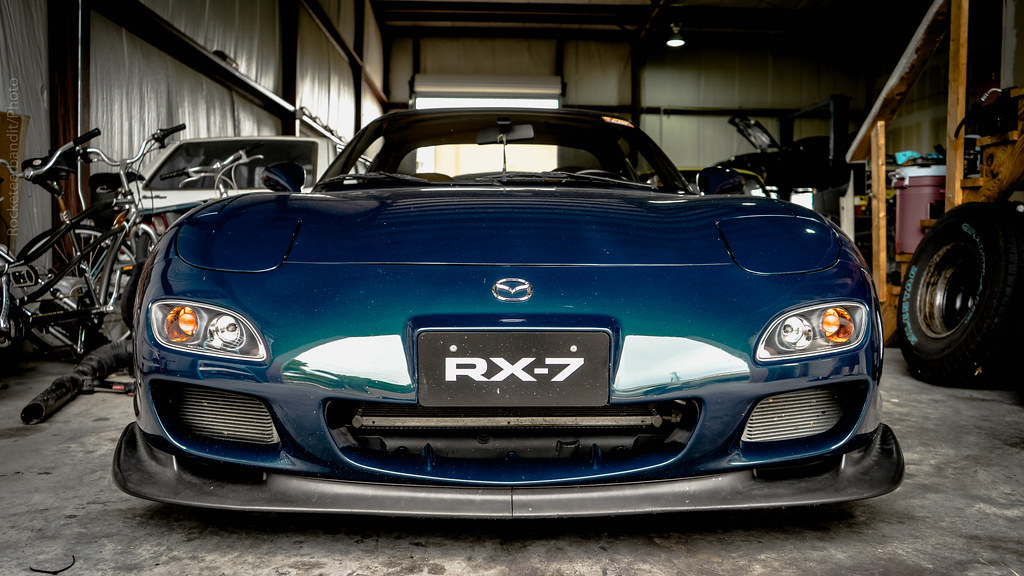
I love sealants, that is incredibly shiny.
-
-
4,000 rpm - entering the fun zone
the car made people stop walking and letting me drive by in parking lots lol never had that happened
-
-
3,000 rpm - starting to feel the power

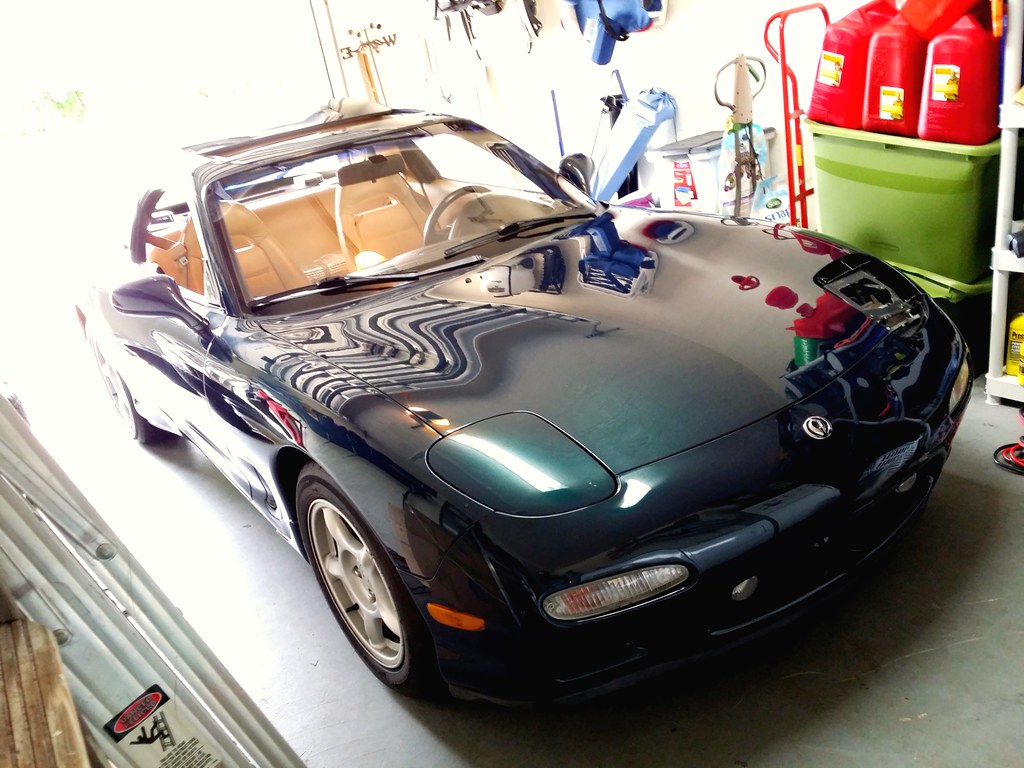
Just needs some facelift tail lights
-
-
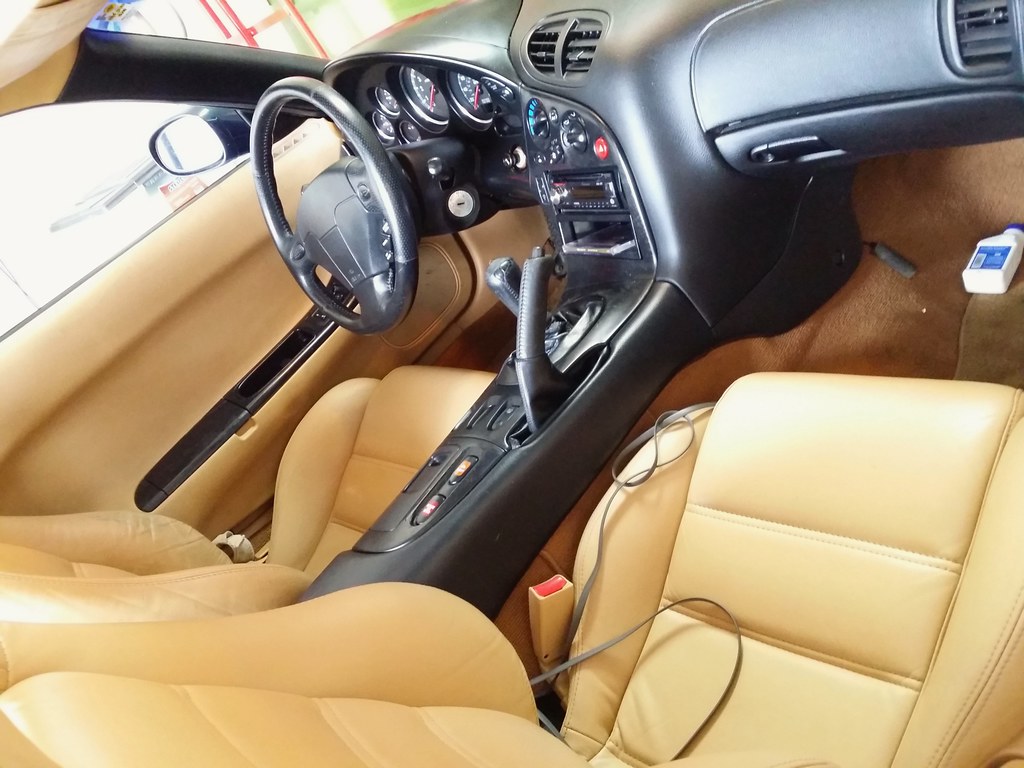
If I had one of these I would be totally broke, RS-Limited Kevlar seats, RE-Amemiya areo, the list could go on forever.
-
-
4,000 rpm - entering the fun zone
-
The Following 2 Users Say Thank You to mini_fd For This Useful Post:
This is a Lamp (11-23-2015),ZOOMX5 (09-25-2014)
-
4,000 rpm - entering the fun zone

-
-
4,000 rpm - entering the fun zone
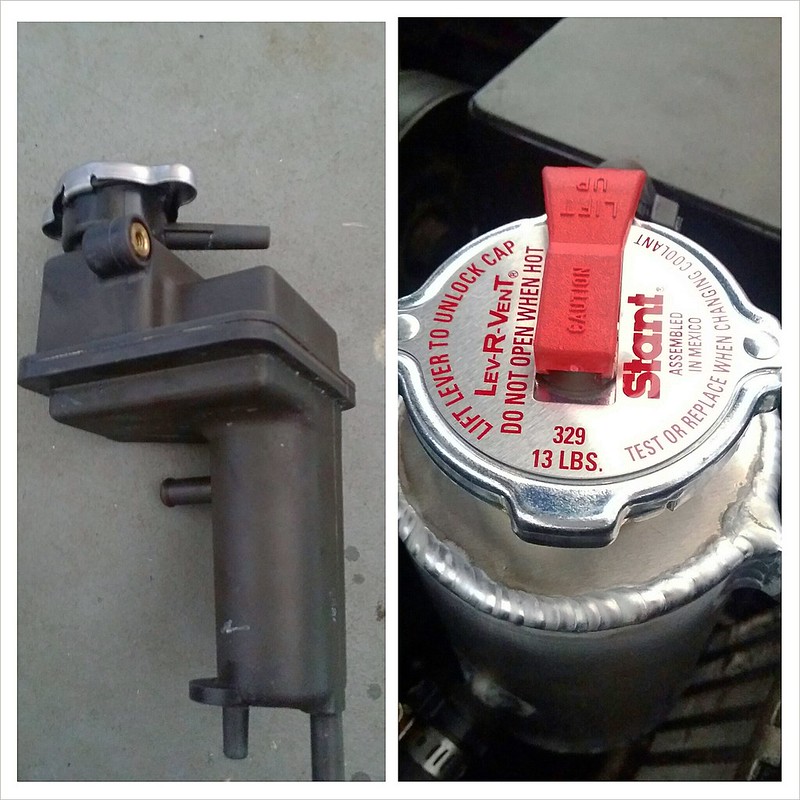
I installed two new Mazda belts. Sucked because I did it all on no knowledge. In doing so I did break a bolt head off the airpump which we tried to extract. Made a new tap and the new bolt pattern wouldn't fit through the bracket underneath the airpump. So I said fuck it. I'll get one at pettit racing for cheap.
Not so much, it cost 100 but it was a low mileage pump. I could have deleted the pump but I'd rather do so with a powerfc so the car runs better if I did a delete without the powerfc. Anyways I got everything together and it's running perfect. I also installed a new mazda fuel filter.
Tomorrow the aluminum air separator tank will go in with a new from mazda center console bezel.
-
-
-
-
6,000 rpm - mere mortals would shift


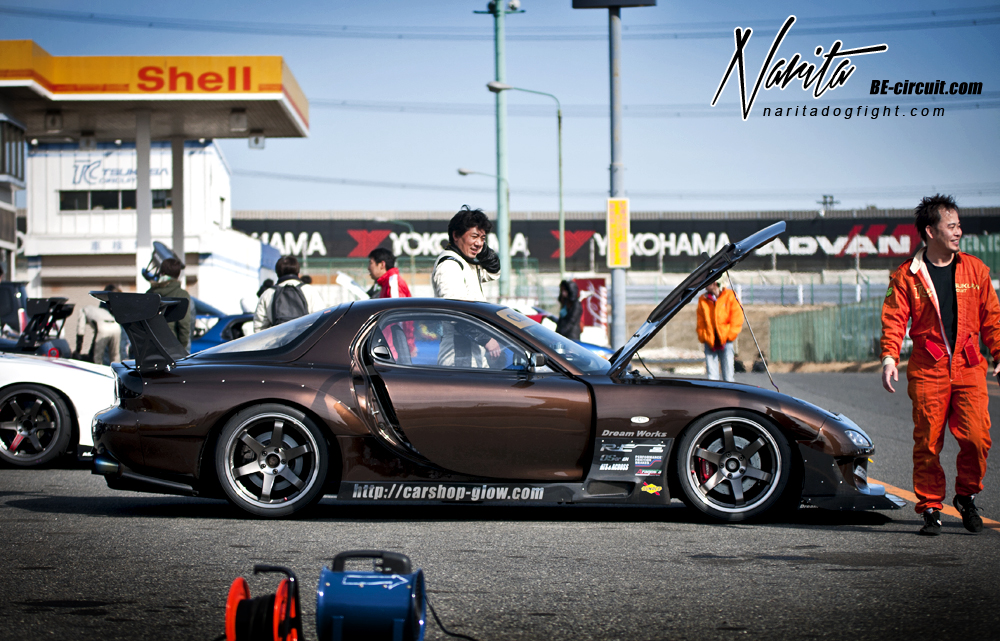
Rotories are retarded, but that one is just retarded stupid clean.
Ugh, Montego is such the perfect stock color for a FD.
-
-
4,000 rpm - entering the fun zone
-
-
4,000 rpm - entering the fun zone
I have contributed my first "How to Thread" on a shifter rebuild.
This is what I performed this morning"
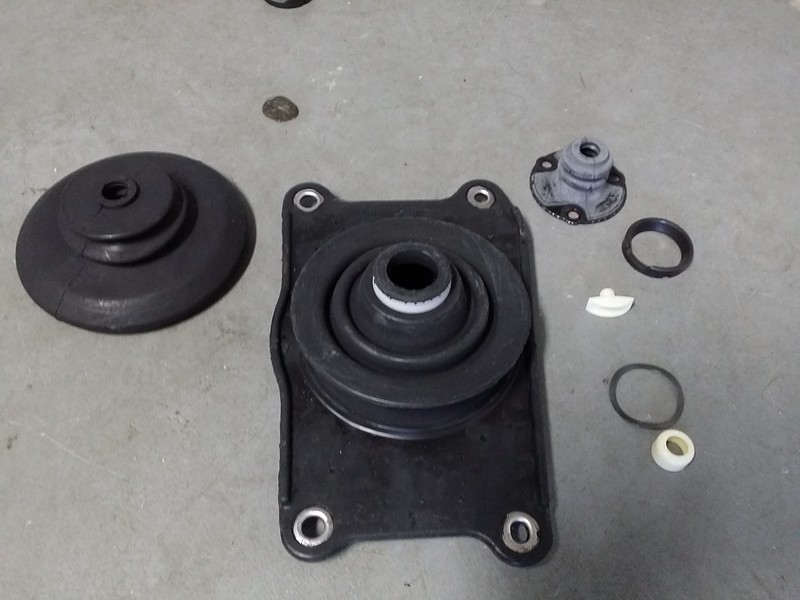
This morning I gathered the parts to rebuild the shifter top to bottom.
 20140930_074513 by rocketeerbandit, on Flickr
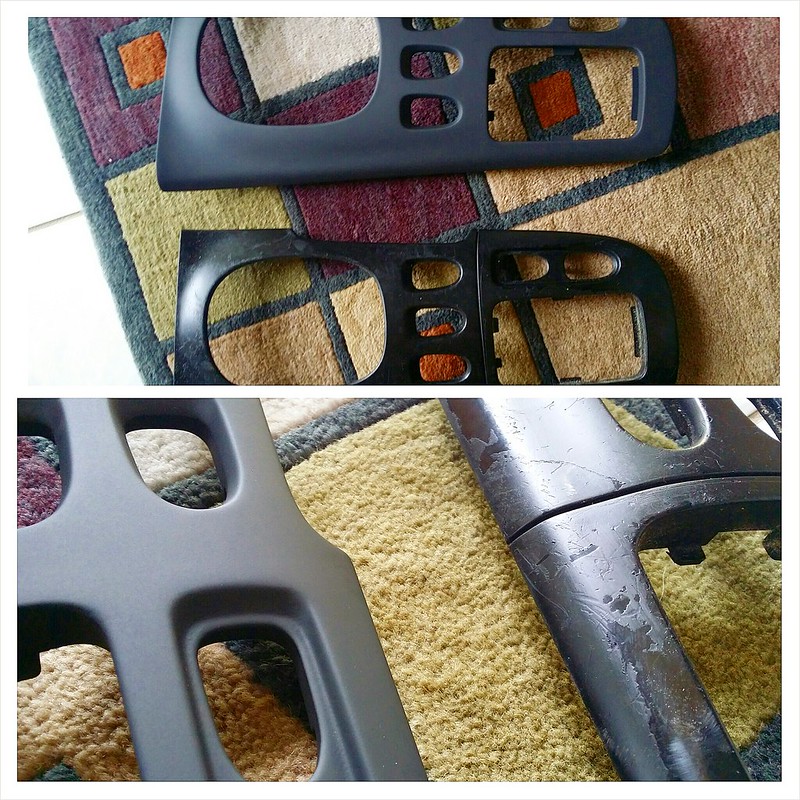
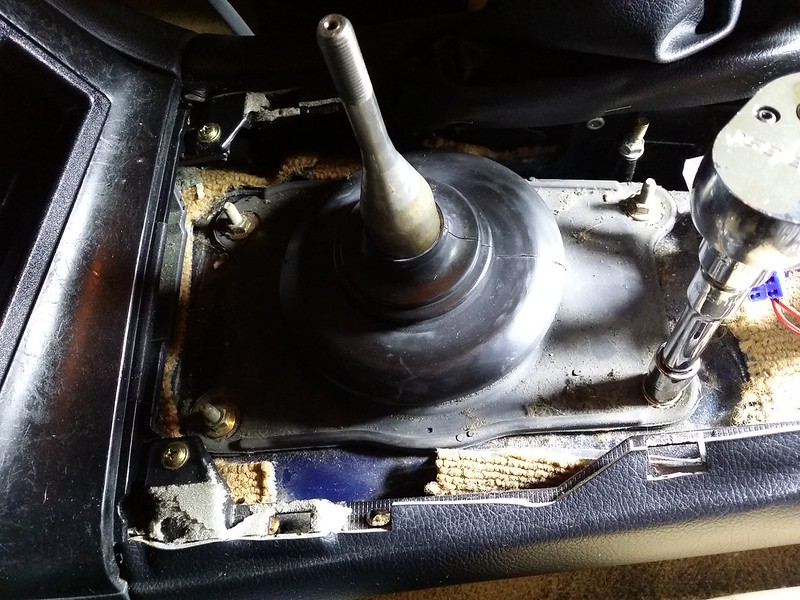
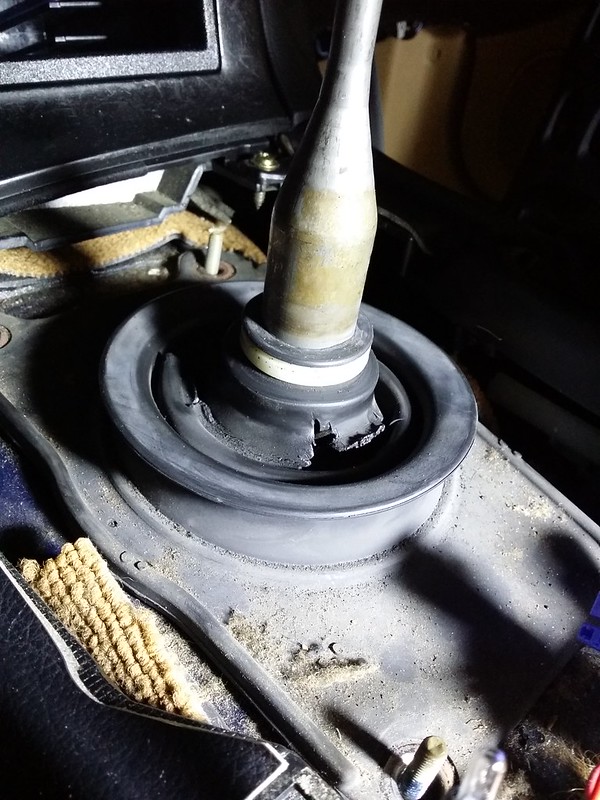
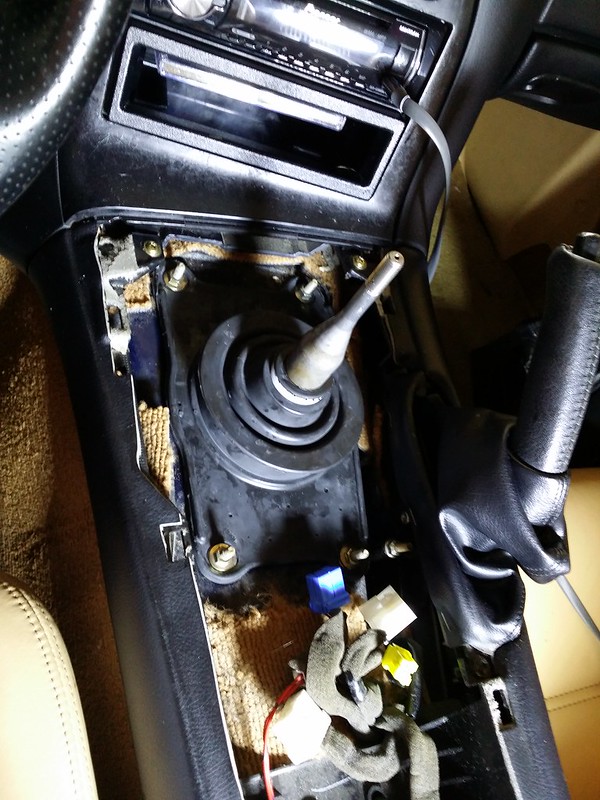
I started by removing the Center Console Bezel and un-clipping the connectors to the fog lights, defroster, bulb to the ashtray etc.
There are 4 10 mm bolts for the upper dust boot.
 20140930_071956 by rocketeerbandit, on Flickr
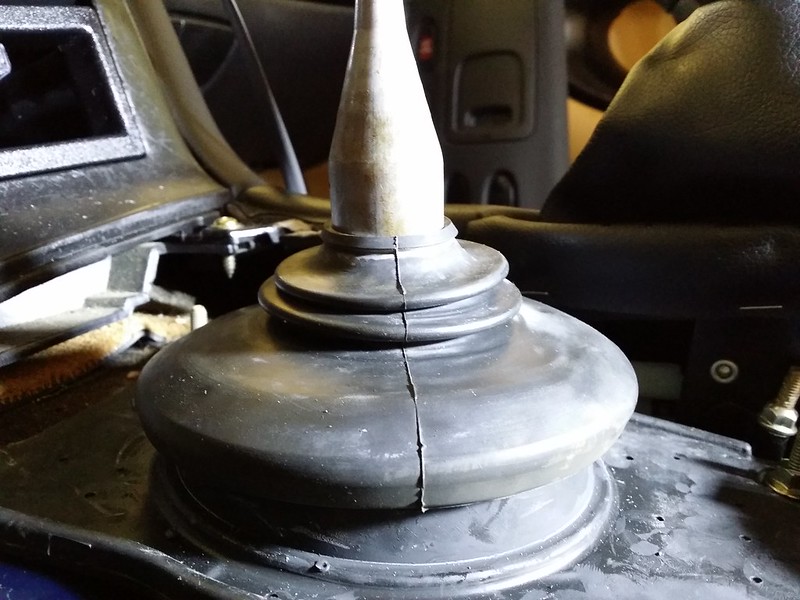
One of the reason why I am rebuilding the shifter is because I know how 21 years is on rubber. Especially brittle mazdas' shifts boots from my previous ownership of a 99 miata. They are very similar in design and parts. So this rebuild is very familiar to me.
 20140930_072301 by rocketeerbandit, on Flickr
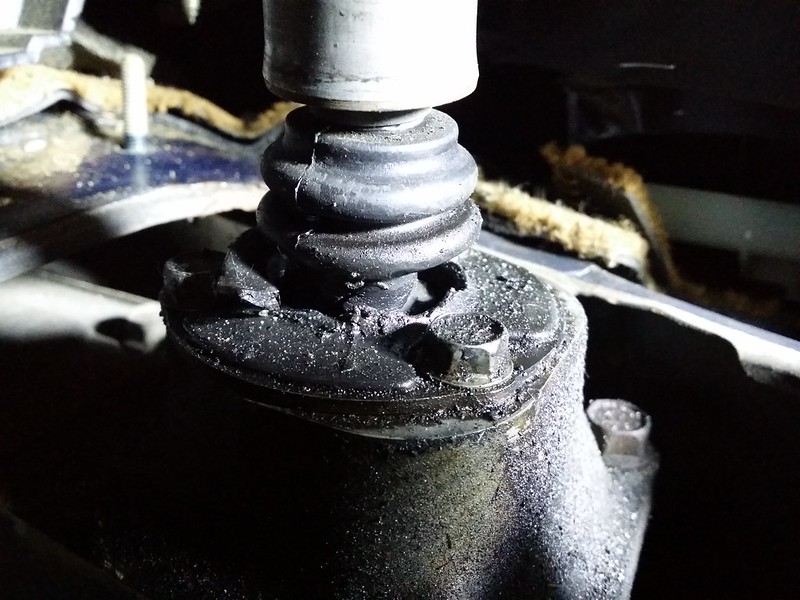
After removing the upper boot, you can see the lower boot torn as well being held in place with 3 10mm bolts.
 20140930_072405 by rocketeerbandit, on Flickr
In the file folder of receipts that I inherited with the purchase of my rx7 last month from the one owner who saved everything, I saw that the bushings were replaced a while back but still wanted to do the job myself to have that security of knowing it is new and done in my ownership of the vehicle.
 20140930_072944 by rocketeerbandit, on Flickr
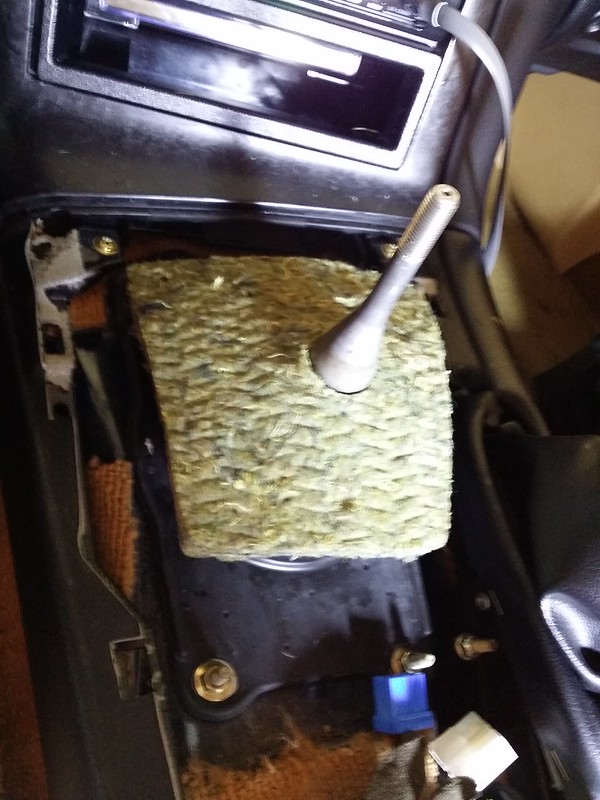
The Paper Gasket that is married to the lower dust boot from factory is now stuck on the turret. I had to scrape it off carefully
 20140930_073058 by rocketeerbandit, on Flickr
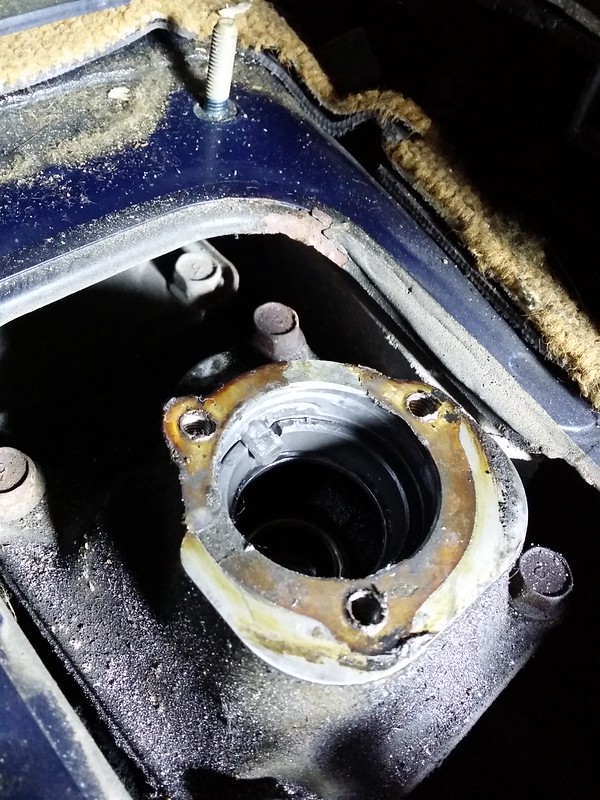
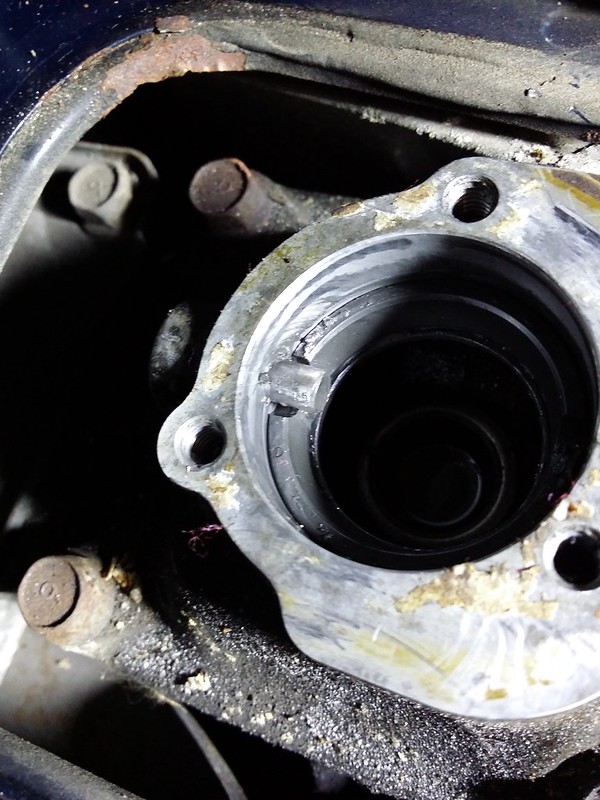
Down in the turret you can see a bushing and underneath that is a spring washer. To get this out I need to use a hammer and a socket extension that fit perfectly to nudge that pin back.
replace the broken spring washer on the bottom of the lip first then the bushing. The cutout of the bushing should be facing where the pin will be reinserted. I used a crowbar to push the pin back in. This was the only part that I felt need attention.
 20140930_073811 by rocketeerbandit, on Flickr
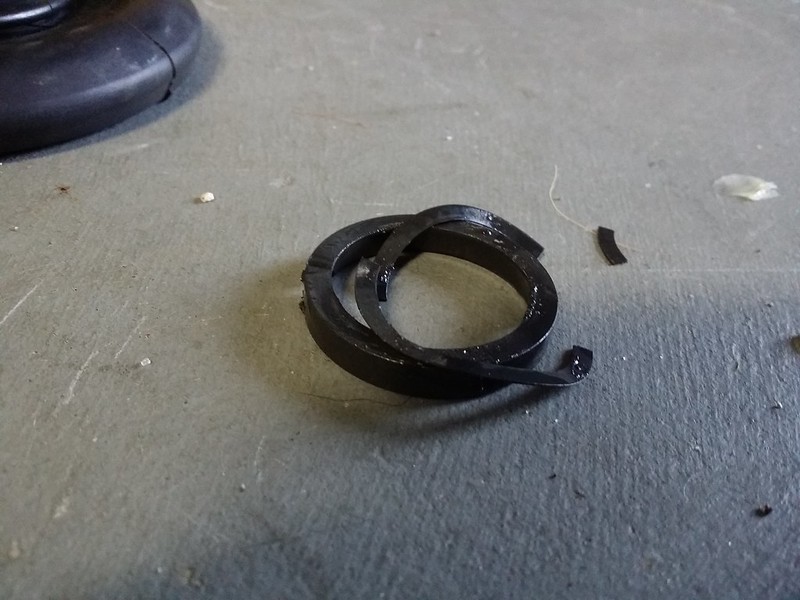
When I removed the bushing the flex washer was broken so be careful not letting the fragmented parts fall in the turret. This is what I pulled out
 20140930_074159 by rocketeerbandit, on Flickr
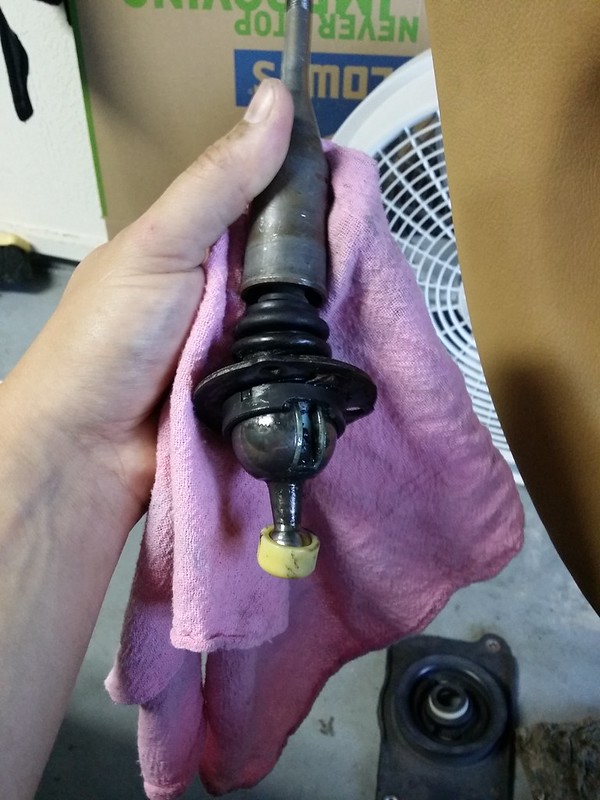
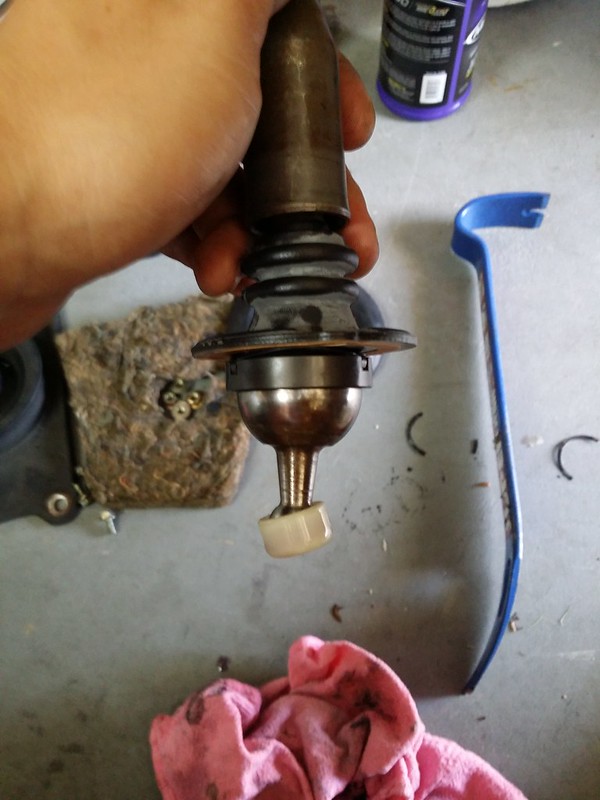
I reassembled the shifter with new parts and very mildly lubed the shifter to slide the lower dust boot over. Prior to doing so make sure the new bushing and clamp flexed washer is connected. You can see indention on the bushing where the washer clamps over. Be gently not to bend the clamps. The was faces up.
I put 4oz. of transmission fluid in the turret.
 20140930_080925 by rocketeerbandit, on Flickr
Now we need to make sure the bushing that we inserted on the side of the shifter ball is facing that Pin we talked about earlier. I used a rubber mallet to tap the shifter back in place with the bottom bushing inserting into the turret. Again, gentle.
I slipped the upper boot over the shifter with some lube so it was easy to slide over and tightend the nuts done in a star formation.
 20140930_082529 by rocketeerbandit, on Flickr
The top boot I received goes over the shifter and has a lip to go over the dust boot/middle boot and fits perfect
 20140930_082657 by rocketeerbandit, on Flickr
Place the new heat shield over the shifter like so and reassemble the connectors to the center console and were done.
 20140930_082749 by rocketeerbandit, on Flickr
-
The Following User Says Thank You to mini_fd For This Useful Post:
Agent☣Orange (10-22-2014)
-
Super Moderator


-
 Posting Permissions
- You may not post new threads
- You may not post replies
- You may not post attachments
- You may not edit your posts
-
Forum Rules


wetsanded by rocketeerbandit, on Flickr
DSC02554 by rocketeerbandit, on Flickr
DSC02547 by rocketeerbandit, on Flickr


 Reply With Quote