Page 3 of 7 FirstFirst 1234567 LastLast
Results 31 to 45 of 95

Thread: Tree's Roadster

  1. #31
    3,000 rpm - starting to feel the power treeafodo's Avatar
    Drives
    a rustbucket.
    Location
    Windsor, Ontario
    Join Date
    Jan 2012
    Posts
    660
    Thanks Given
    9
    Thanked 97 Times in 61 Posts
    Quote Originally Posted by Golden Stallion View Post
    been loving your progress so far. What are your goals as of right now and what do you plan on doing with removing the engine?
    Thanks!
    As for the goals I only want to do everything once. So I'll be building the car to handle as much power as I could ever want to throw at it.
    Get rid of the frame damage with a new front end
    Replace the rocker panel to fix the rust
    Full roll cage
    Flares
    Paint
    Then comes engine work. I don't really want to say anything this early on since plans could change, but I do have an engine lined up to be built.

    I will be taking my time with this build so everything I just stated is probably the next year's worth, or more, of work.

    Quote Originally Posted by John J View Post
    You might want to consider seam welding the frame. FM has a great set of pictures for doing this while the car is disassemble.
    I actually stumbled across that article the other day and saved the pictures. I will be doing that once the rocker is fixed. The reason why I'm not doing it now is because from what I've seen replacement rocker panels meet up at the door jamb seam. I just don't want to weld that only to create a hassle come replacement time.

    After class I removed the rad and coolant hoses. I placed a bucket under the drain plug and accidentally let the drain plug fall into the bucket. The coolant was filling up the bucket very quickly! With no signs of it stopping I started frantically searching for another bucket with no success.
    The first thing that comes into my head is this:


    I run into the house to find something to use, and I couldn't find anything. So then I go back into the garage to see that it stopped. The bucket was JUST large enough.
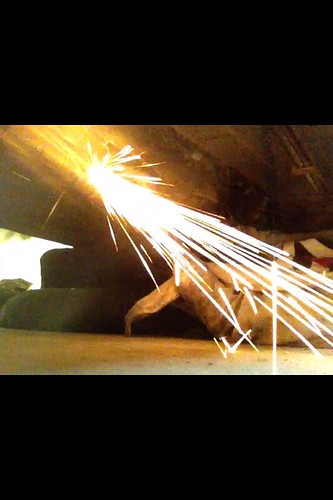
    Almost Spilled by Austin Rajki, on Flickr

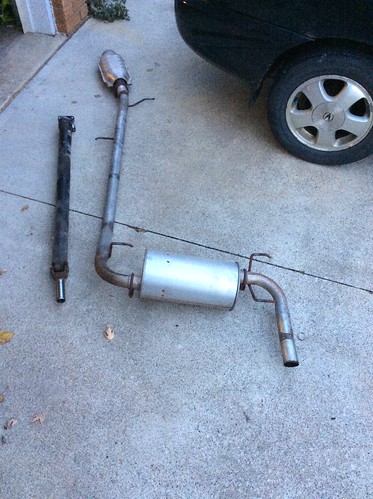
    Rad and hoses are out now.
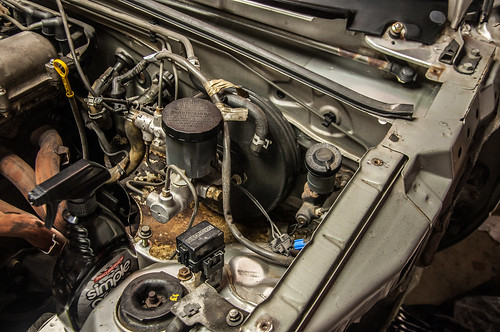
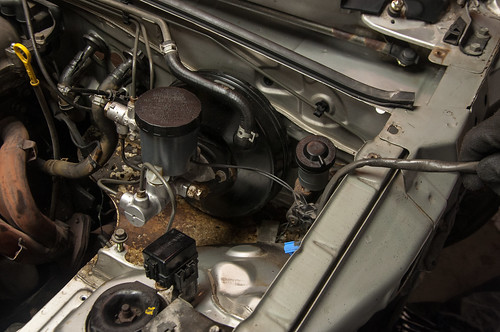
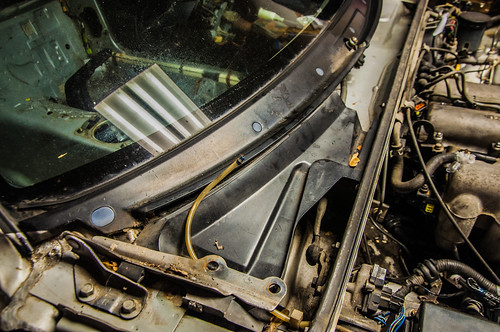
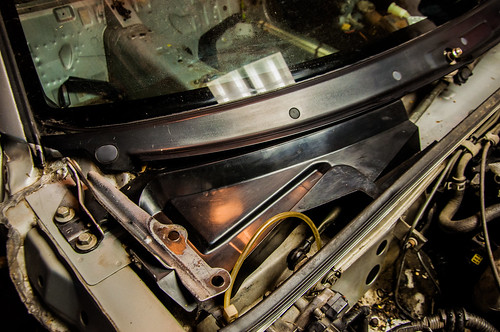
    Top Side is Ready by Austin Rajki, on Flickr

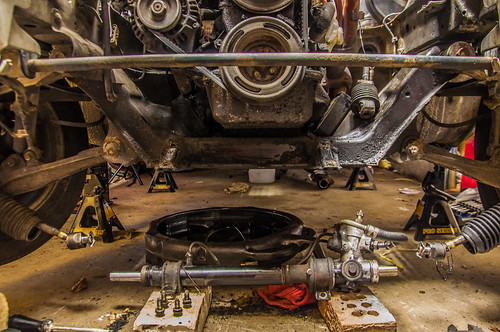
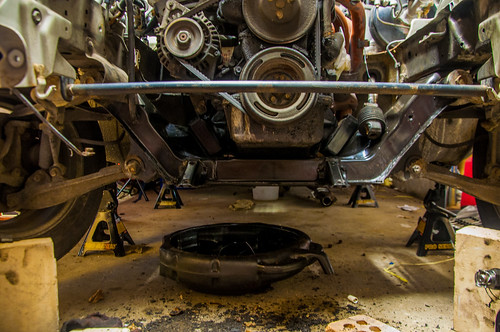
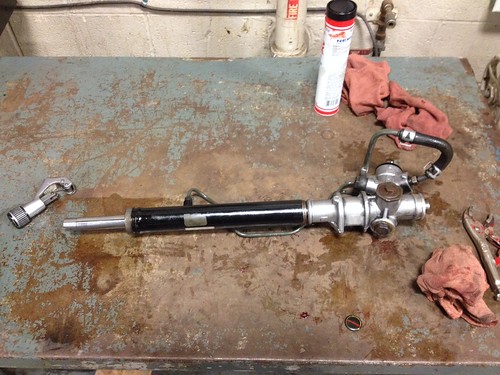
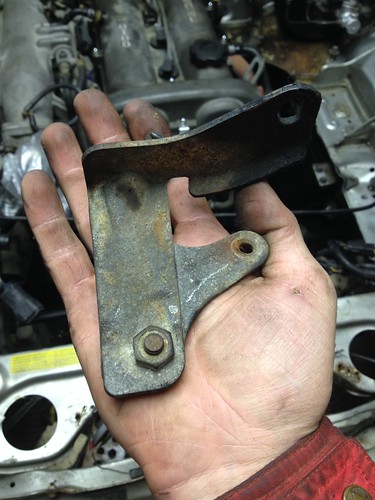
    Unless I'm forgetting something everything in the engine bay is done minus the exhaust manifold. All I have to do now is unbolt the slave cylinder from the transmission, remove 2 PPF bolts and take the driveshaft out. Once I'm ready to remove them I will undo the motor mounts.
    Austin.
    Lexy (Little Hobo) - Transforming from Wreck to Race Car.
    Quote Originally Posted by Blueiii View Post
    Your priorities seem a bit messed up to me, although that's because I try to get my lap times to decrease.

  2. #32
    3,000 rpm - starting to feel the power treeafodo's Avatar
    Drives
    a rustbucket.
    Location
    Windsor, Ontario
    Join Date
    Jan 2012
    Posts
    660
    Thanks Given
    9
    Thanked 97 Times in 61 Posts
    Our jack is getting old, and I think the seal is going out on it, it doesn't go up too high. I went to my work and bought a set of jack stands, jacked the car up and got to work. When I say the jack doesn't go up high, I mean it. Floor to pinch weld is 13 inches. :suicide: It's really tight under the car, but I don't want to spend $100+ on a new jack if I don't absolutely need it. I need to save all my money for fabrication.
    I still need to remove the driveshaft and slave, but that'll need to happen tomorrow since I have photography club tonight then need to study for a big test I have tomorrow morning.
    I spent quite a bit of time looking under the car for any damage and rust. I didn't see anything other than light surface rust that should come off with a wire wheel Even then it's very scarce. hillyb: The only place I couldn't see was above heat shields. Transmission is drained, speedometer cable is removed, all electrical connections are undone, and 2 out of 4 driveshaft bolts are cracked loose.
    Jack Stands by Austin Rajki, on Flickr
    Austin.
    Lexy (Little Hobo) - Transforming from Wreck to Race Car.
    Quote Originally Posted by Blueiii View Post
    Your priorities seem a bit messed up to me, although that's because I try to get my lap times to decrease.

  3. The Following User Says Thank You to treeafodo For This Useful Post:

    Agent☣Orange (12-20-2014)

  4. #33
    3,000 rpm - starting to feel the power treeafodo's Avatar
    Drives
    a rustbucket.
    Location
    Windsor, Ontario
    Join Date
    Jan 2012
    Posts
    660
    Thanks Given
    9
    Thanked 97 Times in 61 Posts
    I was hoping to have everything done so I can have the engine out tomorrow after school. I was trying to squeeze as much work in as possible on the car, but of course you run into set backs. Everything is undone now except the mounts and the darn exhaust. One of the 2 previous owners had new sections welded in ( new cat, and muffler for sure). There's a U-bolt that is on, but the slip joint is welded! Completely defeats the purpose of that U-bolt! I was going to remove the bracket that holds the exhaust to the bell housing, but one bolt head is rounded a bit. I'd rather leave it until it's out of the car to prevent it from rounding any more. I'm going to see if I can borrow an angle grinder with a cut off wheel from school to cut the stupid exhaust out because I can't think of any other way of getting it undone.

    Oh and to summarize the drivetrain:
    Meme by Austin Rajki, on Flickr
    Austin.
    Lexy (Little Hobo) - Transforming from Wreck to Race Car.
    Quote Originally Posted by Blueiii View Post
    Your priorities seem a bit messed up to me, although that's because I try to get my lap times to decrease.

  5. #34
    5,000 rpm - there be torque here! psulja's Avatar
    Drives
    1999 Twilight Blue/1991 Mariner Blue
    Location
    Windsor, Ontario
    Join Date
    Mar 2011
    Posts
    2,583
    Thanks Given
    62
    Thanked 237 Times in 158 Posts
    Didn't realize you were pulling this apart so much. Should've said something. I could've been over and we'd have that thing out in a few hours.
    Paul | IG- @psulja
    Build thread:
    1991 Mariner Blue - Built 1.8 swap, EFR, Fab9Tuning, Tii drivetrain

  6. #35
    3,000 rpm - starting to feel the power treeafodo's Avatar
    Drives
    a rustbucket.
    Location
    Windsor, Ontario
    Join Date
    Jan 2012
    Posts
    660
    Thanks Given
    9
    Thanked 97 Times in 61 Posts
    Well, if the offer still stands I could use some help guiding the assembly out of the car.lol
    Austin.
    Lexy (Little Hobo) - Transforming from Wreck to Race Car.
    Quote Originally Posted by Blueiii View Post
    Your priorities seem a bit messed up to me, although that's because I try to get my lap times to decrease.

  7. #36
    3,000 rpm - starting to feel the power treeafodo's Avatar
    Drives
    a rustbucket.
    Location
    Windsor, Ontario
    Join Date
    Jan 2012
    Posts
    660
    Thanks Given
    9
    Thanked 97 Times in 61 Posts
    No "fancy" pictures today. Just iPhone 4s pictures/screenshots
    Today was a pretty fun day. I bought the airbag to school and blew it up with some friends. We blew it up bagside-down.
    Boom by Austin Rajki, on Flickr
    A friend of mine lent me a diegrinder with a cut off wheel so I could remove the exhaust.
    Cutting Off Exhaust by Austin Rajki, on Flickr

    I also removed the driveshaft and both heat shields on the car to find no rust under them
    Removed by Austin Rajki, on Flickr

    Everything is now ready for the engine to come out. I was hoping my Dad wasn't busy tonight so he could help guide me, but he had sidejobs planned. So I'm just waiting for a day when were both free so we can guide it out of the car.
    Austin.
    Lexy (Little Hobo) - Transforming from Wreck to Race Car.
    Quote Originally Posted by Blueiii View Post
    Your priorities seem a bit messed up to me, although that's because I try to get my lap times to decrease.

  8. #37
    5,000 rpm - there be torque here! psulja's Avatar
    Drives
    1999 Twilight Blue/1991 Mariner Blue
    Location
    Windsor, Ontario
    Join Date
    Mar 2011
    Posts
    2,583
    Thanks Given
    62
    Thanked 237 Times in 158 Posts
    Quote Originally Posted by treeafodo View Post
    Well, if the offer still stands I could use some help guiding the assembly out of the car.lol
    Lol, last weekend was my birthday weekend which meant I was in no shape to work on a car.

    This week is pretty open though unless parts start showing up for me
    Paul | IG- @psulja
    Build thread:
    1991 Mariner Blue - Built 1.8 swap, EFR, Fab9Tuning, Tii drivetrain

  9. #38
    3,000 rpm - starting to feel the power treeafodo's Avatar
    Drives
    a rustbucket.
    Location
    Windsor, Ontario
    Join Date
    Jan 2012
    Posts
    660
    Thanks Given
    9
    Thanked 97 Times in 61 Posts
    Quote Originally Posted by psulja View Post
    Lol, last weekend was my birthday weekend which meant I was in no shape to work on a car.

    This week is pretty open though unless parts start showing up for me
    I figured you were busy. I feel like I bug you enough with random questions let alone asking to help.
    Austin.
    Lexy (Little Hobo) - Transforming from Wreck to Race Car.
    Quote Originally Posted by Blueiii View Post
    Your priorities seem a bit messed up to me, although that's because I try to get my lap times to decrease.

  10. #39
    3,000 rpm - starting to feel the power treeafodo's Avatar
    Drives
    a rustbucket.
    Location
    Windsor, Ontario
    Join Date
    Jan 2012
    Posts
    660
    Thanks Given
    9
    Thanked 97 Times in 61 Posts
    I picked a few things up today. Grease and snap ring pliers to depower the steering rack.
    New Purchases by Austin Rajki, on Flickr

    So much oil.... :smile1:
    Oil Leaks by Austin Rajki, on Flickr

    Rack out.
    Rack Removed by Austin Rajki, on Flickr

    I gave the subframe crossmember a quick wipe down. There is so much dirt under the car.
    Cleaner Subframe by Austin Rajki, on Flickr

    I also gave the rack a quick cleaning to help reduce the chance of dirt getting inside it. It's still pretty dirty, but a huge improvement. (Look back to when I looped it). I went to remove the lock ring off the rack only to find I don't have a wrench or adjustable big enough at home. I'll bring it to school one day this week to do it.
    Cleaner Rack by Austin Rajki, on Flickr

    I wasn't quite ready to stop working on the car yet, so I just did some quick cleaning. Nothing drastic, but progress is progress. The more I clean this car the dirtier it feels.
    Dirty by Austin Rajki, on Flickr
    Slightly Cleaner by Austin Rajki, on Flickr
    Dirty by Austin Rajki, on Flickr
    Slightly Cleaner by Austin Rajki, on Flickr

    Oh and I also bought an auto darkening welding helmet and a set of gloves. Why you might ask? I'm pricing out and researching to possibly purchase a TIG welder. hillyb:
    Welding Stuffs by Austin Rajki, on Flickr
    Austin.
    Lexy (Little Hobo) - Transforming from Wreck to Race Car.
    Quote Originally Posted by Blueiii View Post
    Your priorities seem a bit messed up to me, although that's because I try to get my lap times to decrease.

  11. The Following User Says Thank You to treeafodo For This Useful Post:

    Agent☣Orange (12-20-2014)

  12. #40
    3,000 rpm - starting to feel the power treeafodo's Avatar
    Drives
    a rustbucket.
    Location
    Windsor, Ontario
    Join Date
    Jan 2012
    Posts
    660
    Thanks Given
    9
    Thanked 97 Times in 61 Posts
    I brought the rack to school today to depower.
    Disassembled by Austin Rajki, on Flickr

    The seal to be cut
    Ready Cut the Seal by Austin Rajki, on Flickr

    Weight Reduction
    Seal Removed by Austin Rajki, on Flickr
    Parts by Austin Rajki, on Flickr

    Greasing everything up and reassembling.
    Lubed Up by Austin Rajki, on Flickr

    Reassembled with everything torqued to OEM spec. ;)
    Assembled by Austin Rajki, on Flickr

    I removed the lines and crimped them shut for the mean time. I will be buying the MiataRoadster plugging kit for some bling factor. Also to remove the super sharp ends. haha
    Lines Cut and Crimped by Austin Rajki, on Flickr

    Then I reinstalled the rack in the car.
    Austin.
    Lexy (Little Hobo) - Transforming from Wreck to Race Car.
    Quote Originally Posted by Blueiii View Post
    Your priorities seem a bit messed up to me, although that's because I try to get my lap times to decrease.

  13. #41
    2,000 rpm - light wheelspin, no bog here! Imontalto's Avatar
    Drives
    93 Brilliant Black Miata
    Location
    Charlotte, NC
    Join Date
    May 2014
    Posts
    283
    Thanks Given
    91
    Thanked 148 Times in 81 Posts
    So weird! I just discussed this with my mechanic today because my rack needs to be replaced or redone. How difficult was this undertaking?

  14. #42
    3,000 rpm - starting to feel the power treeafodo's Avatar
    Drives
    a rustbucket.
    Location
    Windsor, Ontario
    Join Date
    Jan 2012
    Posts
    660
    Thanks Given
    9
    Thanked 97 Times in 61 Posts
    Quote Originally Posted by Imontalto View Post
    So weird! I just discussed this with my mechanic today because my rack needs to be replaced or redone. How difficult was this undertaking?
    Very easy actually. There is pretty much only 2 snap rings and 2 nuts holding it together. It took me 2 hours, but I was also helping other people out with their labs. If I spent the whole time working on the rack the whole process would be about an hour once removed from the car.
    Make sure you have a torque wrench that reads inch pounds for the adjusting nut.

    I followed these instructions.
    http://flyinmiata.com/tech/depower.php
    Austin.
    Lexy (Little Hobo) - Transforming from Wreck to Race Car.
    Quote Originally Posted by Blueiii View Post
    Your priorities seem a bit messed up to me, although that's because I try to get my lap times to decrease.

  15. The Following User Says Thank You to treeafodo For This Useful Post:

    Imontalto (11-12-2014)

  16. #43
    2,000 rpm - light wheelspin, no bog here! Imontalto's Avatar
    Drives
    93 Brilliant Black Miata
    Location
    Charlotte, NC
    Join Date
    May 2014
    Posts
    283
    Thanks Given
    91
    Thanked 148 Times in 81 Posts
    Quote Originally Posted by treeafodo View Post
    Very easy actually. There is pretty much only 2 snap rings and 2 nuts holding it together. It took me 2 hours, but I was also helping other people out with their labs. If I spent the whole time working on the rack the whole process would be about an hour once removed from the car.
    Make sure you have a torque wrench that reads inch pounds for the adjusting nut.

    I followed these instructions.
    http://flyinmiata.com/tech/depower.php
    I know you've got your car taken apart and all that fun stuff, but do you know what it's like to drive with it de-powered? Maybe experienced it on another roadster? Sorry for the inquisition lol. I tend to over research things before I take the leap...

    Your car is coming along great by the way! I've enjoyed keeping up with its progress!

  17. #44
    3,000 rpm - starting to feel the power treeafodo's Avatar
    Drives
    a rustbucket.
    Location
    Windsor, Ontario
    Join Date
    Jan 2012
    Posts
    660
    Thanks Given
    9
    Thanked 97 Times in 61 Posts
    Thanks for the compliments!

    I have no idea what it's like to drive a Miata with no powersteering. Mine is the only one I've ever driven and I only put about 100 miles on it. I did take loop the power steering on my daily, and I like it. At low speeds you need to put more effort in, but cruising down the road isn't bad at all. Even at low speed I can 1 hand it. IMHO road feel is really enhanced without it and you can tell what your wheels are doing a lot easier.
    Austin.
    Lexy (Little Hobo) - Transforming from Wreck to Race Car.
    Quote Originally Posted by Blueiii View Post
    Your priorities seem a bit messed up to me, although that's because I try to get my lap times to decrease.

  18. The Following 2 Users Say Thank You to treeafodo For This Useful Post:

    Dave737 (11-13-2014),Imontalto (11-12-2014)

  19. #45
    3,000 rpm - starting to feel the power treeafodo's Avatar
    Drives
    a rustbucket.
    Location
    Windsor, Ontario
    Join Date
    Jan 2012
    Posts
    660
    Thanks Given
    9
    Thanked 97 Times in 61 Posts
    Not a whole lot of progress.

    This is that random bracket I was talking about earlier. It was held on by one very loose nut on the starter. I removed it since it was just flopping around anyways.
    Random Bracket by Austin Rajki, on Flickr

    Today I bought 10 lbs of this
    Dry Ice by Austin Rajki, on Flickr
    Dry Ice by Austin Rajki, on Flickr

    To remove this
    Sound Deadning by Austin Rajki, on Flickr
    Sound Deadning by Austin Rajki, on Flickr
    Apply by Austin Rajki, on Flickr
    Apply by Austin Rajki, on Flickr

    If you're wondering, I did turn the Hobo around as well as undoing the fuel lines, removing the PPF and motor mount bolts. Psulja is coming over tomorrow morning to help me guide the engine and tranny out. My dad was going to help me, but ended up hurting his back at work. Loading the cherry picker in and out of the truck by myself was NOT fun...
    Ready for the Morning by Austin Rajki, on Flickr
    Austin.
    Lexy (Little Hobo) - Transforming from Wreck to Race Car.
    Quote Originally Posted by Blueiii View Post
    Your priorities seem a bit messed up to me, although that's because I try to get my lap times to decrease.

  20. The Following User Says Thank You to treeafodo For This Useful Post:

    Agent☣Orange (12-20-2014)

Page 3 of 7 FirstFirst 1234567 LastLast

Posting Permissions

  • You may not post new threads
  • You may not post replies
  • You may not post attachments
  • You may not edit your posts
  •