Page 2 of 2 FirstFirst 12
Results 16 to 23 of 23

Thread: Cluster Hood and heater matrix

  1. #16
    Idling - Listen to it purr...
    Drives
    1991 Eunos Roadster BRG RHD
    Location
    Alberta, Canada
    Join Date
    Jan 2014
    Posts
    24
    Thanks Given
    3
    Thanked 16 Times in 8 Posts
    Quote Originally Posted by Phatmiata View Post
    This is so weird, I had a 91 Miata and a 92 Miata and never had this problem, now I go to install my gauges this week and guess what?


    I went online to http://www.RealMazdaParts.com and ordered a new one as I just dont have time to mess with this sticky mess at the moment and really want to drive the car

    Price: was the cheapest online at $100.21
    It WASN'T ME!!!!!

    That IS weird though, perhaps it has to do with the phenomenon of buying a Miata or WRXs and suddenly all you SEE are Miatas or WRXs!
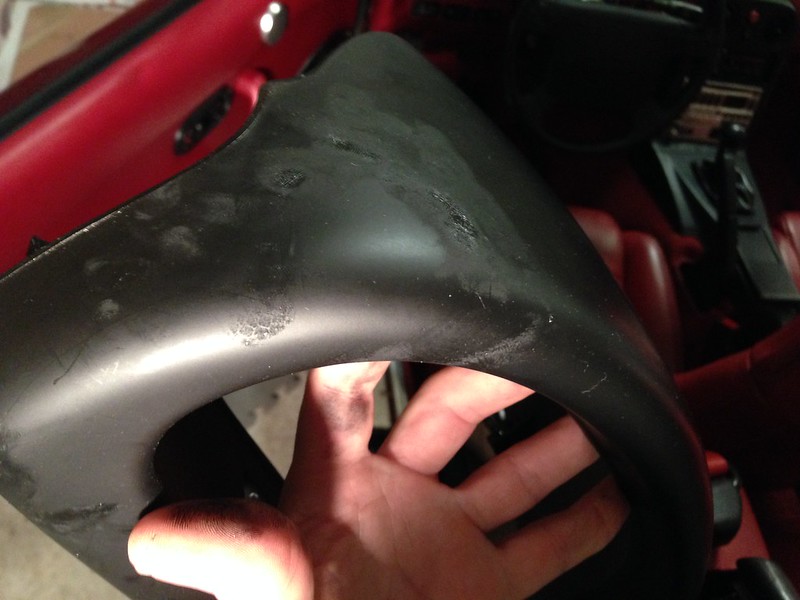
    I must say though, that yours is worse than MINE...mine was like that just underneath the cowling and around the gauge face, not so much on the top

  2. The Following User Says Thank You to Starbaby For This Useful Post:

    Phatmiata (03-25-2015)

  3. #17
    Idling - Listen to it purr...
    Drives
    1991 Eunos Roadster BRG RHD
    Location
    Alberta, Canada
    Join Date
    Jan 2014
    Posts
    24
    Thanks Given
    3
    Thanked 16 Times in 8 Posts
    Quote Originally Posted by Malibu Q View Post
    I used lacquer thinner to remove the original paint from my dash. Worked well.
    While you are looking at the heater, it was the firewall grommets that I had to replace on mine. Took ages to find that vibrating noise.
    Ok...will try lacquer thinner.

    good point on the grommets, I had those replaced along with the "cursed water fitting" plug on the back on the engine when all the engine hoses were replaced. I am slowly going through all the heater control doors, dash and electrical connectors replacing all the foam while I am in there as well.

  4. #18
    Supporting Member Malibu Q's Avatar
    Drives
    Grey NA Clubman
    Location
    Tasmania
    Join Date
    Aug 2013
    Posts
    778
    Thanks Given
    970
    Thanked 908 Times in 384 Posts
    Noticed Phat's post about the meter hood stickiness. I only used lacquer thinner on the main dash top to remove the sticky black paint off my red dash. I didn't use it on the meter hood. Suggest you try it on an inconspicuous bit first.

  5. The Following User Says Thank You to Malibu Q For This Useful Post:

    Starbaby (04-03-2015)

  6. #19
    Idling - Listen to it purr...
    Drives
    1991 Eunos Roadster BRG RHD
    Location
    Alberta, Canada
    Join Date
    Jan 2014
    Posts
    24
    Thanks Given
    3
    Thanked 16 Times in 8 Posts
    Thanks, I will do that but the paint on the dash has to come off as well, so either way lacquer thinner appears to be on my shopping list for the car.

  7. #20
    Admin / Pit Boss / Miataholic Phatmiata's Avatar
    Drives
    Kirin the '93LE Roadster #1073
    Location
    NEW Tampa > OLD Tampa
    Join Date
    Apr 1994
    Posts
    33,608
    Thanks Given
    13,680
    Thanked 9,521 Times in 4,642 Posts
    Quote Originally Posted by Starbaby View Post
    Thanks, I will do that but the paint on the dash has to come off as well, so either way lacquer thinner appears to be on my shopping list for the car.
    yep, my dash has been getting a bit of the tacky feeling as well, pretty sure I will have to removed the entire dash and take the black paint off and then repaint.

  8. #21
    Idling - Listen to it purr...
    Drives
    1991 Eunos Roadster BRG RHD
    Location
    Alberta, Canada
    Join Date
    Jan 2014
    Posts
    24
    Thanks Given
    3
    Thanked 16 Times in 8 Posts
    Malibu, You freaking ROCK!

    The sticky hood cluster took me 6 hours of my life and 1 1/2 bottles of brake fluid

    (Phat...halfway through the job I longingly thought of the link you forwarded to a good price on a new hood but by that time, I had spent WAY too much time on it myself)

    Malibu I read your post about the lacquer thinner and the entire top of the dash took only 2 hours.

    It DOES soften the plastic underneath, rather melts the pebbling off if you leave it too long so I got the unit propped as flat as I could, then laid some small, really absorbent cloth saturated with the thinner over sections of it, kept checking it and as soon as the paint bubbled, wiped it off and wiped with soap and water.

    However the REALLY great thing happened when I realized that despite the really good cleaning I had done on the interior, when I took out the switch plates and so on there were ground in dirt marks around them which nothing would take off...not REALLY noticeable but hey...I only want to do this ONCE.

    So, seeing that the thinner had somewhat softened the plastic, after washing the entire thing again I grabbed some Mr. Clean erasers, wet them down with thinner and carefully and quickly went over all of the plastic. I kept wiping the panels with soap and water as I cleaned each one.

    Did any of you with tan interiors realize that the color that is on there now after 20 some years of UV rays was radically (although evenly) changed by sun damage?

    The lacquer thinner took that layer OFF, the original color is now back and it is a really NICE color....like the interior part of the dash or the back sides that did not have sun on them. (um...DUH stands to reason I guess!) I didn't have time to do anything more yesterday but the tops of the doors also were a sort of S**T yellow rather than tan, you could just see the original color on one edge.

    I imagine this would work for any color plastic and might be something any of you could try on one of the bottom plastic panels in your vehicles in an unobtrusive place. I imagine red or blue would look a great deal more true and intense if the sun damage was removed like this.

    I didn't rub hard, the eraser was more to help me do it evenly but all the grunge came off around the switches as well as the top layer of plastic, there is still pebbling on those parts while the dash itself where the paint was really thick took a longer time and lost some of the pebbling.

    I AM going to wash all of the plastic down really well after doing the rest and put some sort of UV protecting on it as I don't want the panels to become brittle after having this done, I mean it changed the surface while it was removing the paint itself....who knows what doing that without protecting it again would do going forward.

    I wanted to cover the dash in leather myself but it would take three people with 4 sets of hands, about 30 bean bags and clamps and stretchers to keep everything in one place (or is it just ME?) so it could be done properly.

    I am biting the bullet and sending the cleaned parts off to be wrapped by someone who HAS all of the above and the skill set as well.

    But at the moment I am on top of the world seeing how much brighter and fresh the plastic is, what a bonus!

  9. #22
    Supporting Member Malibu Q's Avatar
    Drives
    Grey NA Clubman
    Location
    Tasmania
    Join Date
    Aug 2013
    Posts
    778
    Thanks Given
    970
    Thanked 908 Times in 384 Posts
    Glad it's working out for you Starbaby.
    Just be aware that some interior parts are painted in a speckled two tone finish to make them look rich and more like leather.
    Wiping over some parts with thinner will remove this texture. Ask me how I know this.
    73Bacon covers this in his excellent thread on red interiors HERE
    If youre looking for a top class job you may think of replicating what he did in tan.

  10. #23
    Idling - Listen to it purr...
    Drives
    1991 Eunos Roadster BRG RHD
    Location
    Alberta, Canada
    Join Date
    Jan 2014
    Posts
    24
    Thanks Given
    3
    Thanked 16 Times in 8 Posts
    Thanks for the link, I didn't know there was plastic adhesion promoter! Adding to the list of things I didn't know...sigh.
    The pebbling, or leather texture did not come off when I gently wiped the sides and bottom of the panel, just took off the grunge and discoloration but it did remove it from the dash, which is fine as it will have leather on it.
    Given what this article is saying, I will sand it now too just to make sure nothing translates through the leather.

Page 2 of 2 FirstFirst 12

Posting Permissions

  • You may not post new threads
  • You may not post replies
  • You may not post attachments
  • You may not edit your posts
  •