Page 2 of 37 FirstFirst 12345678912 ... LastLast
Results 16 to 30 of 546

Thread: ☆☆☆ '97M- Warbird ☆☆☆

  1. #16
    5,000 rpm - there be torque here! Greasemonkey2000's Avatar
    Drives
    2001 NB2 aka Misfire
    Location
    Temple, Tx is where Chad resides.
    Join Date
    Nov 2013
    Posts
    3,973
    Thanks Given
    4,901
    Thanked 2,425 Times in 1,233 Posts
    03-05-14:Decided to send my MP62 off to Jon Bond Performance to get ported which normally he won't port units he doesn't rebuild but I took some pictures on the rotors and since it is only suppose to have less than 5k miles and the rotors didn't even look to have that many miles, Jon agreed to port it,


    I also got some work done on my spare valve cover which I originally was going to polish but now I might do a machine finish since I like how it looks in its current state but would still have some work to do.

    Before: (but after a good cleaning)


    After: (used a combination of a sawazall, angle grinder with grinding wheel and wire wheel)


    I have actually smoothed a lot of the edges and raised areas down and obviously shaved the lettering off. I have even considered powder coating but after seeing the results with not much work I'm thinking a machine or polish finish is the better route.

  2. The Following 2 Users Say Thank You to Greasemonkey2000 For This Useful Post:

    Phatmiata (06-04-2015),tsingson (06-04-2015)

  3. #17
    5,000 rpm - there be torque here! Greasemonkey2000's Avatar
    Drives
    2001 NB2 aka Misfire
    Location
    Temple, Tx is where Chad resides.
    Join Date
    Nov 2013
    Posts
    3,973
    Thanks Given
    4,901
    Thanked 2,425 Times in 1,233 Posts
    03-06-14:Got a couple packages in one from Track Dog Racing with a bunch of gauges and associated sensors, hard to believe there is the cost of a set of Megan coil overs in the box. Thanks to William aka black roadster for all your help on the order and putting up with my on going questions!


  4. The Following 2 Users Say Thank You to Greasemonkey2000 For This Useful Post:

    Phatmiata (06-04-2015),tsingson (06-04-2015)

  5. #18
    5,000 rpm - there be torque here! Greasemonkey2000's Avatar
    Drives
    2001 NB2 aka Misfire
    Location
    Temple, Tx is where Chad resides.
    Join Date
    Nov 2013
    Posts
    3,973
    Thanks Given
    4,901
    Thanked 2,425 Times in 1,233 Posts
    03-05-14:Westach vac/boost gauge, can't wait till this is showing positive pressure from the s/c!


    Westach dual air temperature gauge for before and aft intercooler.


    Westach temperature gauge, will be used for water temperature.


    Westach oil pressure gauge


    This is actually a Falcon voltage gauge but it looks almost identical to the Westach gauges. All the Westach voltage gauges had a scale of 0-80volts or more so I went with this one.


    DDM Works stainless steel radio surround to hold gauges and radio.


  6. The Following 2 Users Say Thank You to Greasemonkey2000 For This Useful Post:

    Phatmiata (06-04-2015),tsingson (06-04-2015)

  7. #19
    5,000 rpm - there be torque here! Greasemonkey2000's Avatar
    Drives
    2001 NB2 aka Misfire
    Location
    Temple, Tx is where Chad resides.
    Join Date
    Nov 2013
    Posts
    3,973
    Thanks Given
    4,901
    Thanked 2,425 Times in 1,233 Posts
    03-10-14:Made some progress on my intake manifold today, thanks again to Jumbosrule for the inspiration for this project and information!

    Intake manifold stock after cleaning it up:


    Of course this isn't anywhere close to being done, still have probably a couple hours of grinding and smoothing and then will have to get the vacuum holes welded shut and tap the upper EGR port for the main vacuum source that will go to a vacuum block.

  8. The Following 2 Users Say Thank You to Greasemonkey2000 For This Useful Post:

    Phatmiata (06-04-2015),tsingson (06-04-2015)

  9. #20
    5,000 rpm - there be torque here! Greasemonkey2000's Avatar
    Drives
    2001 NB2 aka Misfire
    Location
    Temple, Tx is where Chad resides.
    Join Date
    Nov 2013
    Posts
    3,973
    Thanks Given
    4,901
    Thanked 2,425 Times in 1,233 Posts
    03-10-14:Also went back over the valve cover with a wire wheel in a uniform direction but still not done, not even sure if you can tell the difference.


    Took a couple pictures of my gauges at night and Revlimiter was right, red lighting is EXTREMELY difficult to capture but I assure you they are VERY red.


  10. The Following 3 Users Say Thank You to Greasemonkey2000 For This Useful Post:

    Malibu Q (03-09-2016),Phatmiata (06-04-2015),tsingson (06-04-2015)

  11. #21
    5,000 rpm - there be torque here! Greasemonkey2000's Avatar
    Drives
    2001 NB2 aka Misfire
    Location
    Temple, Tx is where Chad resides.
    Join Date
    Nov 2013
    Posts
    3,973
    Thanks Given
    4,901
    Thanked 2,425 Times in 1,233 Posts
    03-14-14:More parts hoarding...
    Racing Beat Tubular sway bar and blocks, AEM wideband gauge and Glow Shift oil filter sandwich plate

    AEM wideband with stock face

    AEM wideband with custom Warbird face by the genius Revlimiter


    Also, got in my Miata Roadster short throw shifter kit from the Winter Group Buy, thanks Bill!

    I hopefully will get this installed this weekend because I have heard nothing but good things about Bill's kit and I love a short precise throw!

  12. The Following 2 Users Say Thank You to Greasemonkey2000 For This Useful Post:

    Phatmiata (06-04-2015),tsingson (06-04-2015)

  13. #22
    5,000 rpm - there be torque here! Greasemonkey2000's Avatar
    Drives
    2001 NB2 aka Misfire
    Location
    Temple, Tx is where Chad resides.
    Join Date
    Nov 2013
    Posts
    3,973
    Thanks Given
    4,901
    Thanked 2,425 Times in 1,233 Posts
    03-16-14:Couldn't sleep so I got up and decided to see what my center/radio console is going to look like all put together...I like.


    Got my Miata Roadster short throw shifter/rebuild kit installed but haven't driven I really like the short, tight shifts but reverse is kind of a pain to locate but probably the derlin bushings just need broke in. ;)
    Before:


    Yes, its that dark and nasty. Im sure its the original fluid and boots.

    After:


    Overall impression of the kit is its complete and easy to install. :thumbs:

    Had these made a while back but just hadn't gotten around to put them in. I really like them and they are completely functional. Credit for the idea goes to MC70.

  14. The Following 2 Users Say Thank You to Greasemonkey2000 For This Useful Post:

    Phatmiata (06-04-2015),tsingson (06-04-2015)

  15. #23
    5,000 rpm - there be torque here! Greasemonkey2000's Avatar
    Drives
    2001 NB2 aka Misfire
    Location
    Temple, Tx is where Chad resides.
    Join Date
    Nov 2013
    Posts
    3,973
    Thanks Given
    4,901
    Thanked 2,425 Times in 1,233 Posts
    03-19-14:Received a set of Ryoku Rob Type 2 tow hooks yesterday, brand new and never opened from my Canadian friend Mike!


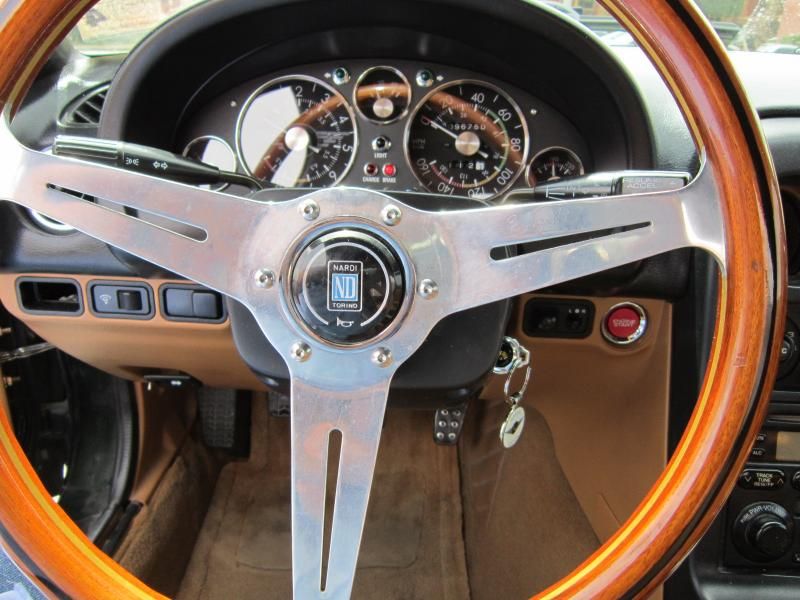
    I FINALLY got around to installing the S2000 push button start that I have had the parts for since Sept. of 2013! Thanks Adam aka Revlimiter for the great tech article that was meticulous as usual! Also, put in a Flyin Miata clutch neutral bypass so I can just put the key in and hit the button and im ready to roll!


    Looks like it came off the assembly line with it! ;)

  16. The Following User Says Thank You to Greasemonkey2000 For This Useful Post:

    tsingson (06-04-2015)

  17. #24
    5,000 rpm - there be torque here! Greasemonkey2000's Avatar
    Drives
    2001 NB2 aka Misfire
    Location
    Temple, Tx is where Chad resides.
    Join Date
    Nov 2013
    Posts
    3,973
    Thanks Given
    4,901
    Thanked 2,425 Times in 1,233 Posts
    03-27-14: Purchased another 90-93 dimmer switch(has white color filter instead of green) so I could change it to red to match the rest of the interior and will use this one for some interior ambient red lighting. Any who, I thought I would share the very simple process so anyone else who would like to change the color of the dimmer switch would know what they would need.
    Parts and materials:
    - '90 to '93 dimmer switch. *** VERY IMPORTANT- confirm by popping off the face of the dimmer switch and check that it has a white color filter and not a green.
    - bulb cover/condom in the color of your choosing or you could even get an LED bulb base from a LED distributor.( i.e. superbrightleds.com)
    - colored/transparent plastic, such as taillight lens repair kit made by 3M if you choose red and if another color buy a cheap strobe light w/ interchangeable colored light filters.

    First, simply remove the face of the dimmer switch and the bulb base from the dimmer switch housing. Then, put the bulb cover(I actually used two bulb covers, a smaller one that fit snug and a larger one to give a very deep color) on the stock bulb or replace the bulb base with an LED base if that is the route you choose to go.


    Next, check the back of the dimmer switch face and get an idea of the size of square you need to cut and cut larger than what you think you need and trim down. In reality you just need enough to back the "light bulb" on the dimmer switch face since that is all that will actually be illuminated. In my case since I chose red and bought the 3M taillight lens repair kit it has a adhesive side so it stayed in easily but if you don't have this luxury then either cut it large enough to be snug in the face of the dimmer switch or use super glue or some other adhesive substance. If you use an adhesive make sure to give it time to cure per the instructions before handling. Now just re-install the dimmer switch and enjoy.


    Sorry I didn't do a step by step photo process but this task is simple enough that I figured that it wasn't necessary.


    I stayed up late tonight finishing up my wiring harness for my first three gauges that include a oil pressure, water temp and dual air temp gauge that will be above my new radio. I wired the lights for the gauges with a separate 12v supply that will be connected to the factory dimmer switch so that the gauges will dim with the rest of the factory back lighting. This task was tedious for me because I hate wiring but if I do it then im going to do it to the best of my ability so each wire got labeled approx. every foot and then the signal wires were all taped every couple inches and then a plastic wiring loom put over it and then taped it up with the GOOD 3M electrical tape. WAIT!! I for got to put the stupid ground wire in the loom. So I had to take all the tape off the loom to put the ground in it. Now at this point I haven't taped the loom back up because I know with stereo systems you are suppose to run the positive and negative separately to keep "noise out" so im wondering if the same wouldn't apply here... :dunno: Any electrical gurus care to share their expertise please? The reason the ground is going to the engine compartment is because according to the instructions all the gauges are suppose to share a ground with the corresponding sensor and since electrical is not my strong point and did as the instructions said.


    Okay, better hit the hay since I plan on finishing up tomorrow and installing the gauges and radio tomorrow but probably won't hook any of the senders up, well maybe the water temp since its simple enough. The dual air temp gauge isn't really all that useful for now and im not going to do the oil pressure because I still have a TDR oil filter relocation and cooler kit to install, so that will be another day.

  18. The Following 3 Users Say Thank You to Greasemonkey2000 For This Useful Post:

    Malibu Q (03-09-2016),Phatmiata (06-04-2015),tsingson (06-04-2015)

  19. #25
    5,000 rpm - there be torque here! Greasemonkey2000's Avatar
    Drives
    2001 NB2 aka Misfire
    Location
    Temple, Tx is where Chad resides.
    Join Date
    Nov 2013
    Posts
    3,973
    Thanks Given
    4,901
    Thanked 2,425 Times in 1,233 Posts
    03-30-14:Started installing my Warbird HVAC, radio and gauges last night but didn't get finished up till this afternoon. It really sucks not having a garage, thank goodness for grandparents!

    Took a fair amount of pictures and not really doing a step by step but I figured I would share a couple things for replacing the HVAC control panel since the cables were kind of a pain to get to. So first remove the center console which has a screw on each side in the front and then a screw below the cup holder/ash tray and then two inside the console storage. Of course you have to remove the shifter knob and remove the center console but will have to unplug two connectors, one for the center console light and the other for the power windows if you have them and now console will come out. Next pop out the eyeball vents from the tombstone. There are a couple ways to do this and they are a pain and covered in many write ups so I wont get into that. Now there will be a screw behind each vent at approx. a 45 degree angle at the top of the tombstone and one at the bottom left hand side and now the tombstone will pull away freely except for the hazard/light switch so unplug it and remove the tombstone completely. Now it will look something like this:


    Then remove the 4 screws holding the factory radio in and unplug the two harnesses and antenna and there is a grounding wire that is connected to the radio with a flat head screw that just wanted to strip out so I cut that wire since I was putting a different radio in, now the radio is out. Next, go to the driver side foot well and look at the topside of the transmission tunnel and you should see one cable and simply take it off the peg and pop the cable from the metal tab to free it completely. Driver side:


    Now got to the passenger side and there are two cables to be unhooked, one on the side of the transmission tunnel and the other behind the glove compartment, so take the two screws from the back bottom side of the glove compartment off while holding it so it don't fall in your face and remove the glove compartment. Passenger side transmission tunnel side:

    Remove the cable from the peg and take the cable loose from the plastic tab/clip.

    Now take the cable loose from the passenger side directly behind the glove compartment. Passenger side behind glove compartment:

    There is also a metal tab/clip holding the cable so take the cable loose from this.

    Now remove the 4 screw holding the HVAC panel in and pull it out enough to get your hand in to undo the two harnesses, one on the far left side which the tab to press is on top and the harness on the far right the tab is on the right of the harness connection. Once these are unplugged you can remove the HVAC panel and you have this big hole, like so:


    Of course, to reinstall just do this in reverse!

  20. The Following 2 Users Say Thank You to Greasemonkey2000 For This Useful Post:

    Phatmiata (06-04-2015),tsingson (06-04-2015)

  21. #26
    5,000 rpm - there be torque here! Greasemonkey2000's Avatar
    Drives
    2001 NB2 aka Misfire
    Location
    Temple, Tx is where Chad resides.
    Join Date
    Nov 2013
    Posts
    3,973
    Thanks Given
    4,901
    Thanked 2,425 Times in 1,233 Posts
    03-30-14, cont'd:Next I wired up the radio harness to the Miata specific Metra radio harness which is color coded and even labeled, which really helps. Not sure why I didn't do this ahead of time but I didn't. :bang: It was straight forward enough but I wasn't sure what to do for the power antenna lead since there was none on the head unit harness and since it had been so long since I had put in a radio, I called my friend who is a I.T. guy and pretty good with electrical junk. He said that usually the power antenna is a ignition/switch positive so I tested that theory and it proved true. Not going to get into every little detail for the complete gauge/radio/gauge lights harness since I would be here forever and I suck at electrical and don't care to misguide anyone, so here are pictures.


    Reinstalled HVAC panel:


    After confirming the lights for the gauges worked and I had the wiring on the gauges correct I put the DDM Works din with the radio and gauges back in.


    I ran the harness for the gauges thru the firewall thru the factory grommet which was just big enough for the 3/8'' loom wrapped in electrical tape. Installed the spare tombstone I had bought so I could put some switch guards on and have my Revlimiter switches installed and ready to go.


    Also, went ahead and drilled a hole in the center console storage area for the cigarette lighter which never gets used but may need it on a trip to charge cell or something.


    I had purchased Rockford Fosgate 6.5" speakers for the doors and 3.5" speakers for the headrest so I installed those. I had to make a hole for the new headrest speaker since they were 2/3 way and stuck out further.


    I know not the prettiest but you can't see them.

  22. The Following 2 Users Say Thank You to Greasemonkey2000 For This Useful Post:

    Phatmiata (06-04-2015),tsingson (06-04-2015)

  23. #27
    5,000 rpm - there be torque here! Greasemonkey2000's Avatar
    Drives
    2001 NB2 aka Misfire
    Location
    Temple, Tx is where Chad resides.
    Join Date
    Nov 2013
    Posts
    3,973
    Thanks Given
    4,901
    Thanked 2,425 Times in 1,233 Posts
    03-30-14, cont'd:Rockford Fosgate 6.5'' speaker compared to factory which is actually Pioneer:

    Word of caution the factory door speakers are 8ohm and the headrest are 2 ohm and most aftermarket are 4 ohm so I don't know how long the speakers will last since they are running thru the factory amp? :dunno:

    All done and I am REALLY happy with the results. The only complaint is the HVAC lighting isn't even because I used red LED's so the center isn't as bright but oh well.


    Didn't hook up any of the senders for the gauges, just ran the harness into the engine bay and tucked it out of the way, that is for another day.

  24. The Following 2 Users Say Thank You to Greasemonkey2000 For This Useful Post:

    Phatmiata (06-04-2015),tsingson (06-04-2015)

  25. #28
    5,000 rpm - there be torque here! Greasemonkey2000's Avatar
    Drives
    2001 NB2 aka Misfire
    Location
    Temple, Tx is where Chad resides.
    Join Date
    Nov 2013
    Posts
    3,973
    Thanks Given
    4,901
    Thanked 2,425 Times in 1,233 Posts
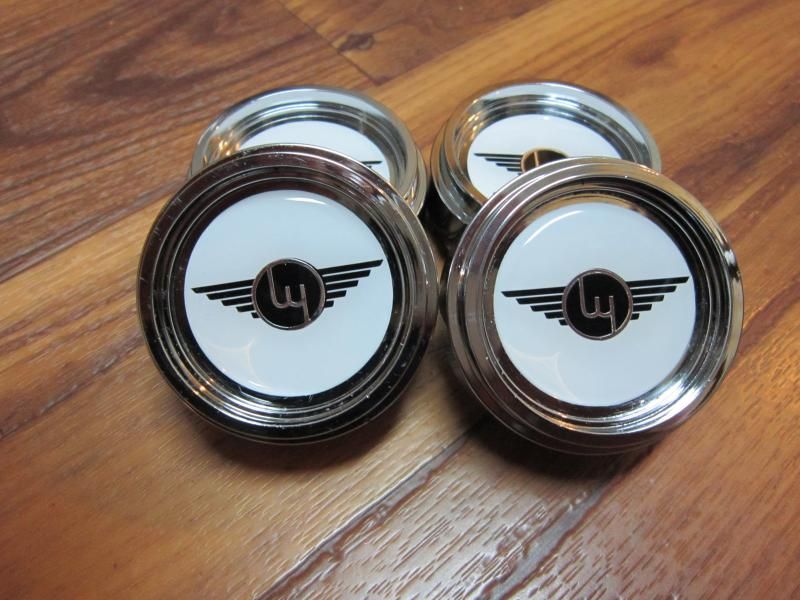
    04-01-14:Received these center cap decals yesterday from Adam aka Revlimiter for weather testing, so they aren't a production item...yet.


    They look fantastic! The above pic looks like there is a blemish but I assure it is not, its the plastic bag they are in but I just got off work from a 12 hour shift so I got to get to bed. Will put them on when I get the new center caps since the ones I currently have on the wheels already have "Roadster" decals and I want a good clean/virgin surface to put these on.

  26. The Following 2 Users Say Thank You to Greasemonkey2000 For This Useful Post:

    Phatmiata (06-04-2015),tsingson (06-04-2015)

  27. #29
    5,000 rpm - there be torque here! Greasemonkey2000's Avatar
    Drives
    2001 NB2 aka Misfire
    Location
    Temple, Tx is where Chad resides.
    Join Date
    Nov 2013
    Posts
    3,973
    Thanks Given
    4,901
    Thanked 2,425 Times in 1,233 Posts
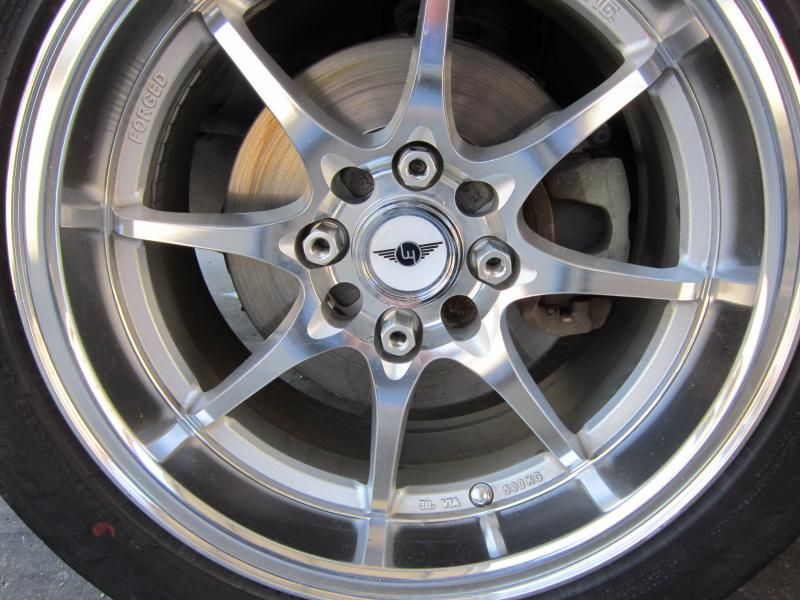
    04-09-14:Okay got my wheel caps, thanks to konigjim , in and after spending A LOT of time getting the black background peeled off and removing all the adhesive, applied the decals to the caps. Had to do this step because my idiotic self :bang: gave Adam the wrong size of 45mm and it should have been 49mm and I didn't want the white background decals up against a black backing so had to remove. These ARE NOT a production item but am being used as a alpha tester for durability.


    Installed on front driverside wheel:


    Close-up:


    Adam aka Revlimiter also wanted me to place one else where and I tried the front nose but I think it was too small and couldn't get it center and then tried the finish panel but no success there. So then I thought hum.... I could place them on the reverse light and be able to center them fairly easily and there is enough room around it for light to escape and you get this:


    Close-up:


    The ones on the taillights will probably not be permanent but Adam wanted as much exposure as possible so I obliged.

  28. The Following 3 Users Say Thank You to Greasemonkey2000 For This Useful Post:

    Malibu Q (03-09-2016),Phatmiata (06-04-2015),tsingson (06-04-2015)

  29. #30
    5,000 rpm - there be torque here! Greasemonkey2000's Avatar
    Drives
    2001 NB2 aka Misfire
    Location
    Temple, Tx is where Chad resides.
    Join Date
    Nov 2013
    Posts
    3,973
    Thanks Given
    4,901
    Thanked 2,425 Times in 1,233 Posts
    04-11-14:Received my GarageStar Type 1 license plate relocation bracket from....Garage Star today. ;) Ordered Wednesday and received today so really fast to ship, thanks! The cheap eBay one I have works but was a pain to put on and kind of rigged and the hardware was mild steel, so upgrade!!!


  30. The Following 2 Users Say Thank You to Greasemonkey2000 For This Useful Post:

    Phatmiata (06-04-2015),tsingson (06-04-2015)

Page 2 of 37 FirstFirst 12345678912 ... LastLast

Posting Permissions

  • You may not post new threads
  • You may not post replies
  • You may not post attachments
  • You may not edit your posts
  •