Page 1 of 2 12 LastLast
Results 1 to 15 of 16

Thread: BluFalcon's- 99 NB1 Emerald Mica

Hybrid View

Previous Post Previous Post   Next Post Next Post
  1. #1
    Idling - Listen to it purr... BluFalcon's Avatar
    Drives
    99 Emerald Mica
    Location
    Wichita, KS
    Join Date
    Aug 2016
    Posts
    23
    Thanks Given
    20
    Thanked 58 Times in 20 Posts

    BluFalcon's- 99 NB1 Emerald Mica

    Decided to start a build thread for my car. Never really got to do this before, but I think it'll be cool to document the progress of the car as I work on it. Most of the first post is cadged directly from my Introduction Post, but I should have more updates as I do more stuff to the car.

    So...here's my story.

    In The Beginning...., or Late 2015

    After selling my 92 Galant VR-4 and having owned a never ending parade of DSM's,and other Mitsubishi based cars since 1997, I was ready for something different.

    I loved my MMC/DSM cars, and especially the 4G63 engine, but was getting tired of doing the same old thing with them. Which basically consisted of modifying them to the point that they weren't fun to drive anymore.

    I wanted something simpler, that was, reliable, affordable to modify, had plenty of aftermarket and owner support and most importantly, it had to be fun to drive.


    A friend who of mine who owned a heavily modded DSM at one time, had picked up a 99 Miata and was using it as a Fun/Project Car set up for for High Performance Driving Events at Motorsports Ranch. He seemed to be having a good time with the car, and suggested I give a Miata a try.


    So despite all my other friends saying "They're All Going To Laugh At You!", I started the hunt on the local forums and Craigslist for a car.


    "Miata Trek 1: The Search For A Car"

    My friend suggested I concentrate more on the NB cars rather than the NA models because of the improvements Mazda made to the engine and chassis with the 2nd Gen cars. I wasn't a real fan of Pop Up headlights at the time, so I didn't need too much convincing. I also liked how the NB2 looked like a scaled down version of a FD RX-7, and the power bump from the engine as well. Now I just had to find one in my price range.

    After searching for about a week, I eventually found a 1999 Emerald Mica 5 Speed with about 173K on the clock, from a older guy on Craigslist. He said he had a few Miatas, and that this one was supposedly his Daily Driver.

    Made an appointment and had a buddy drive me to Downtown Dallas to go check this thing out.


    Initial Impression

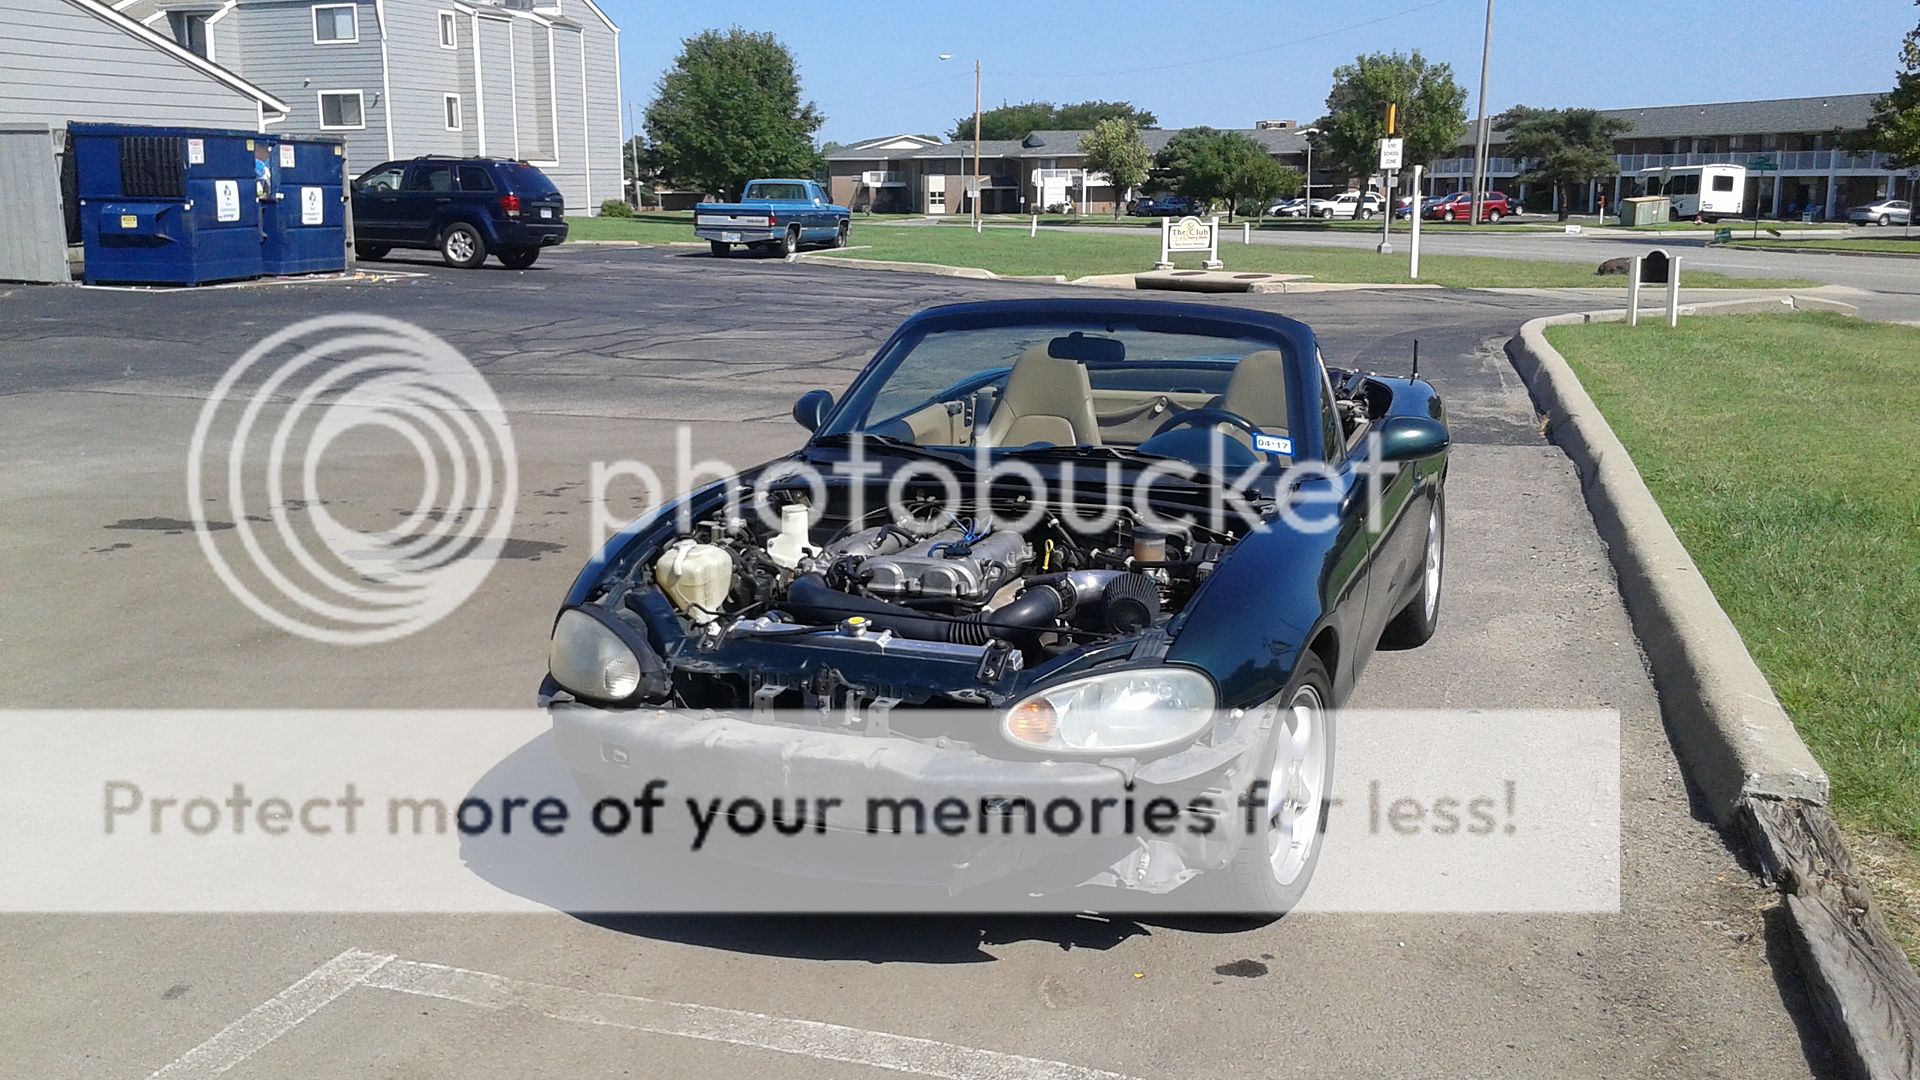
    Aside from some minor door dings and a small dent in the rear D/S quarter panel, it looked fairly clean and well kept. It was Green which wasn't a deal killer to me, but I wasn't a real fan of the Tan Interior at the time. I would in fact grow to appreciate that it did in fact have this interior, but that was a bit later. Also it looked like it originally had a Tan top rather than the Black one installed. Eh, whatever.

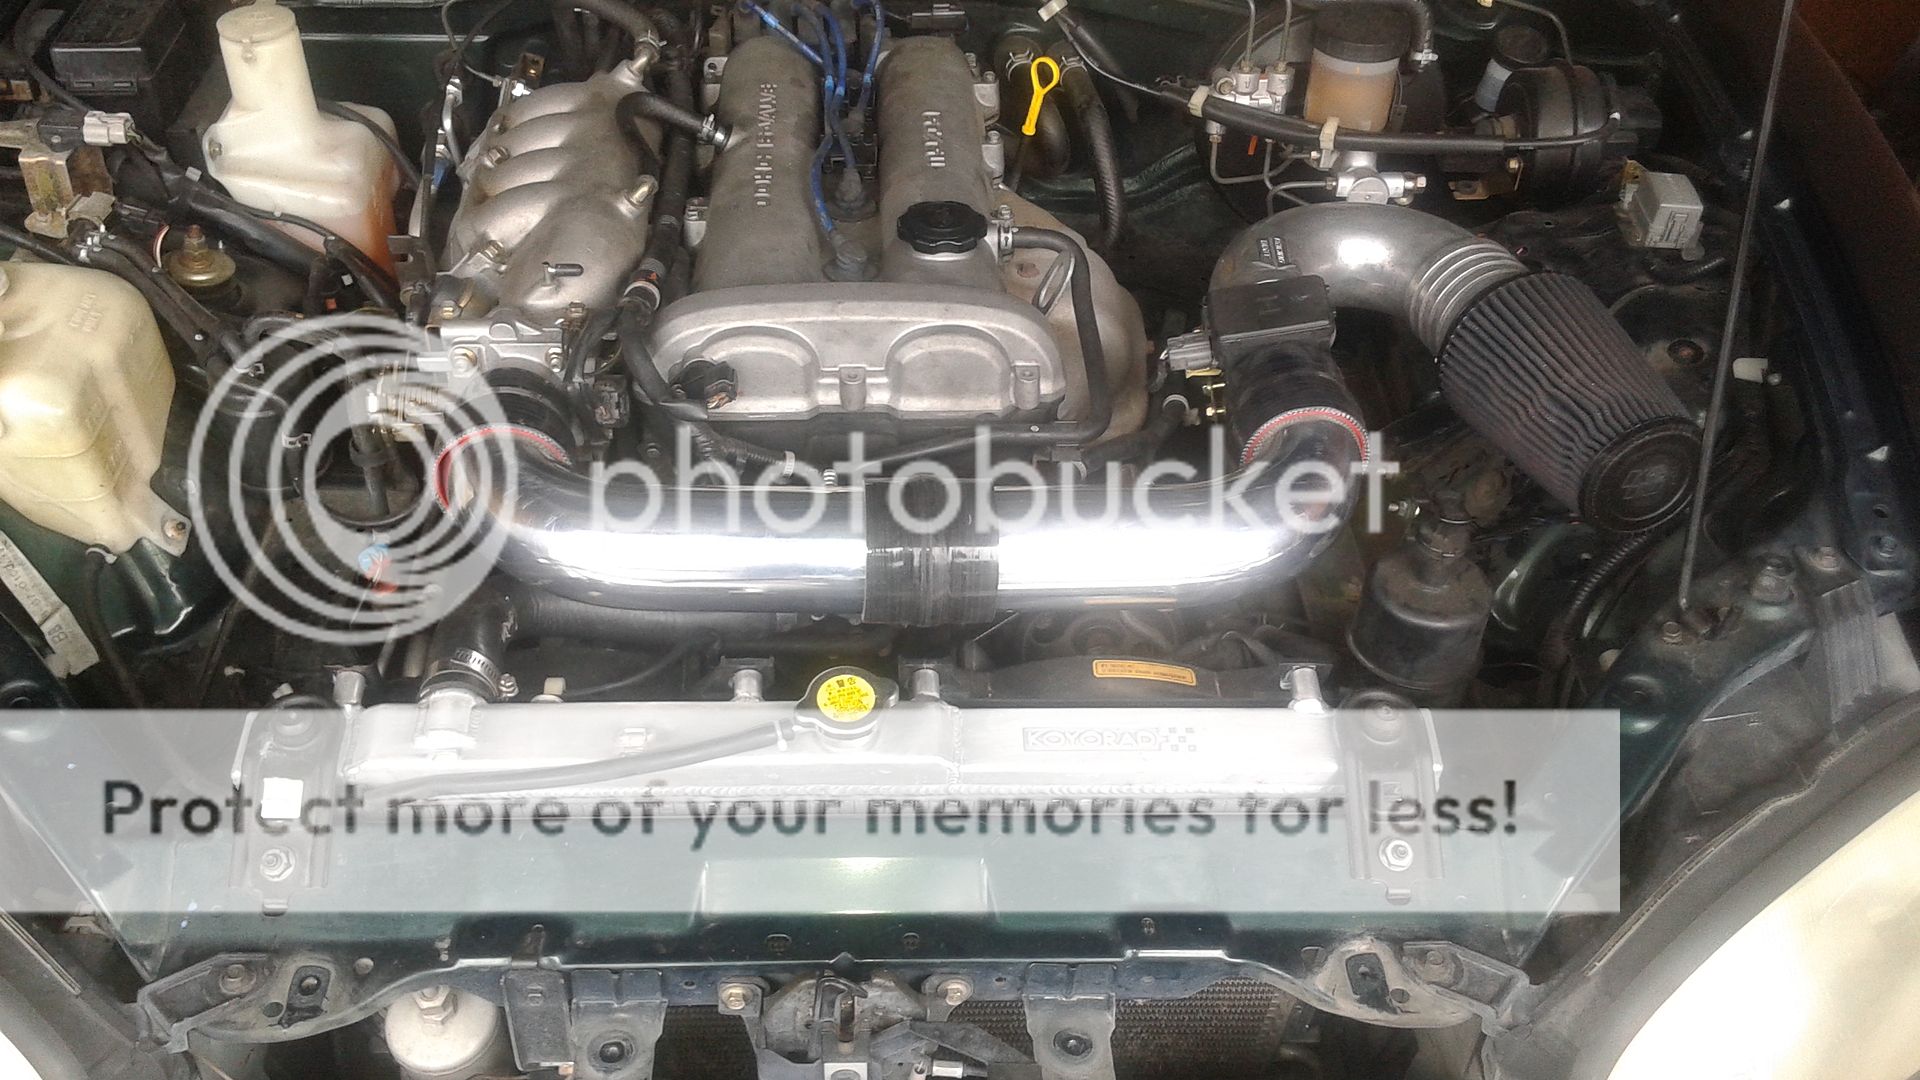
    Engine bay looked very clean, no rust on the rockers, and the interior looked good as well besides a fairly worn driver's seat and steering wheel. This wasn't a big deal, as I planned on aftermarket seats in the future, but it was nice to know someone tried to take care of it.

    I took it for a test drive on the streets downtown and noticed that it drove very well, was responsive to throttle inputs and seemed to shift solidly. Never having driven one before, I didn't have a good baseline to go by, but it felt good.

    He was asking $3500 for it and I offered 3000, which he took after thinking about it for a few seconds. I paid the man and he signed the title over and handed me the keys. Neat!

    I was now officially a Miata Owner.


    What's All This Then?


    Drove the car home on the highway, and got introduced to the "65 MPH Shimmy", which elicited a cry of "Come On! I Just Bought This Stupid Thing!" I dropped the speed down a bit, made it home and eventually had the wheels/tires rebalanced a week later to get rid of the shimmy at speed.

    Snapped a quick pic to show my buddy with the NB


    I did some more research on the 99 model year cars and was pleased to discover that according to the tag on the passenger showing "NC22", along with some other items included with the car, I'm SUPPOSED to have a Torsen rear end.

    I haven't confirmed it visually yet, but one of these days when I get a chance, I will.

    I still think the Black Interior looks better, but I'll deal with a Tan Interior if I get a Torsen out of the deal.

    So, What Now?

    Shortly after I bough the car, I relocated to the Wichita area from Arlington, TX. I bought the car before I moved, because I wanted a clean rust free car, and I had a much better selection available in the DFW Metroplex. Kansas salts their roads, and I've seen some really haggard looking cars up here. I don't plan on driving this in bad weather, and I have a garage for the car to keep it out of the elements and work on it.


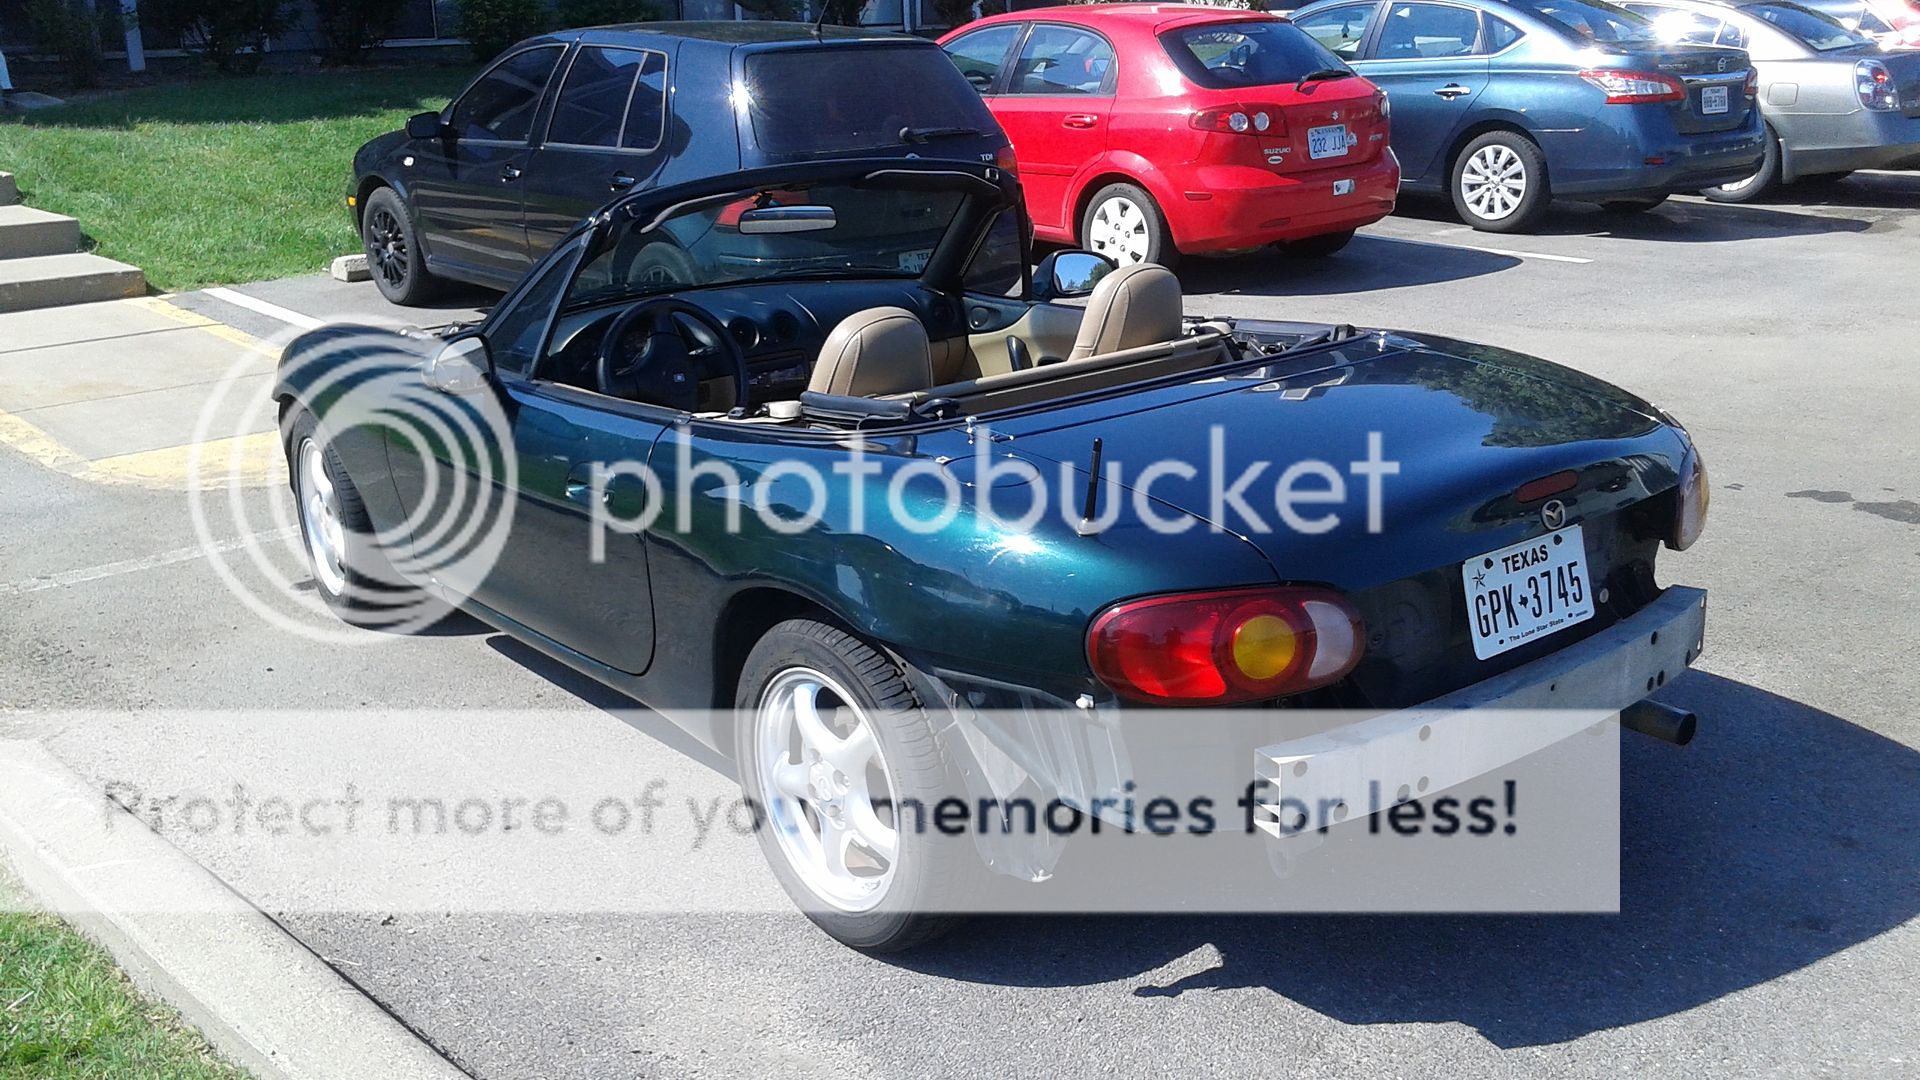
    Texas! (What's With All The Crows?)
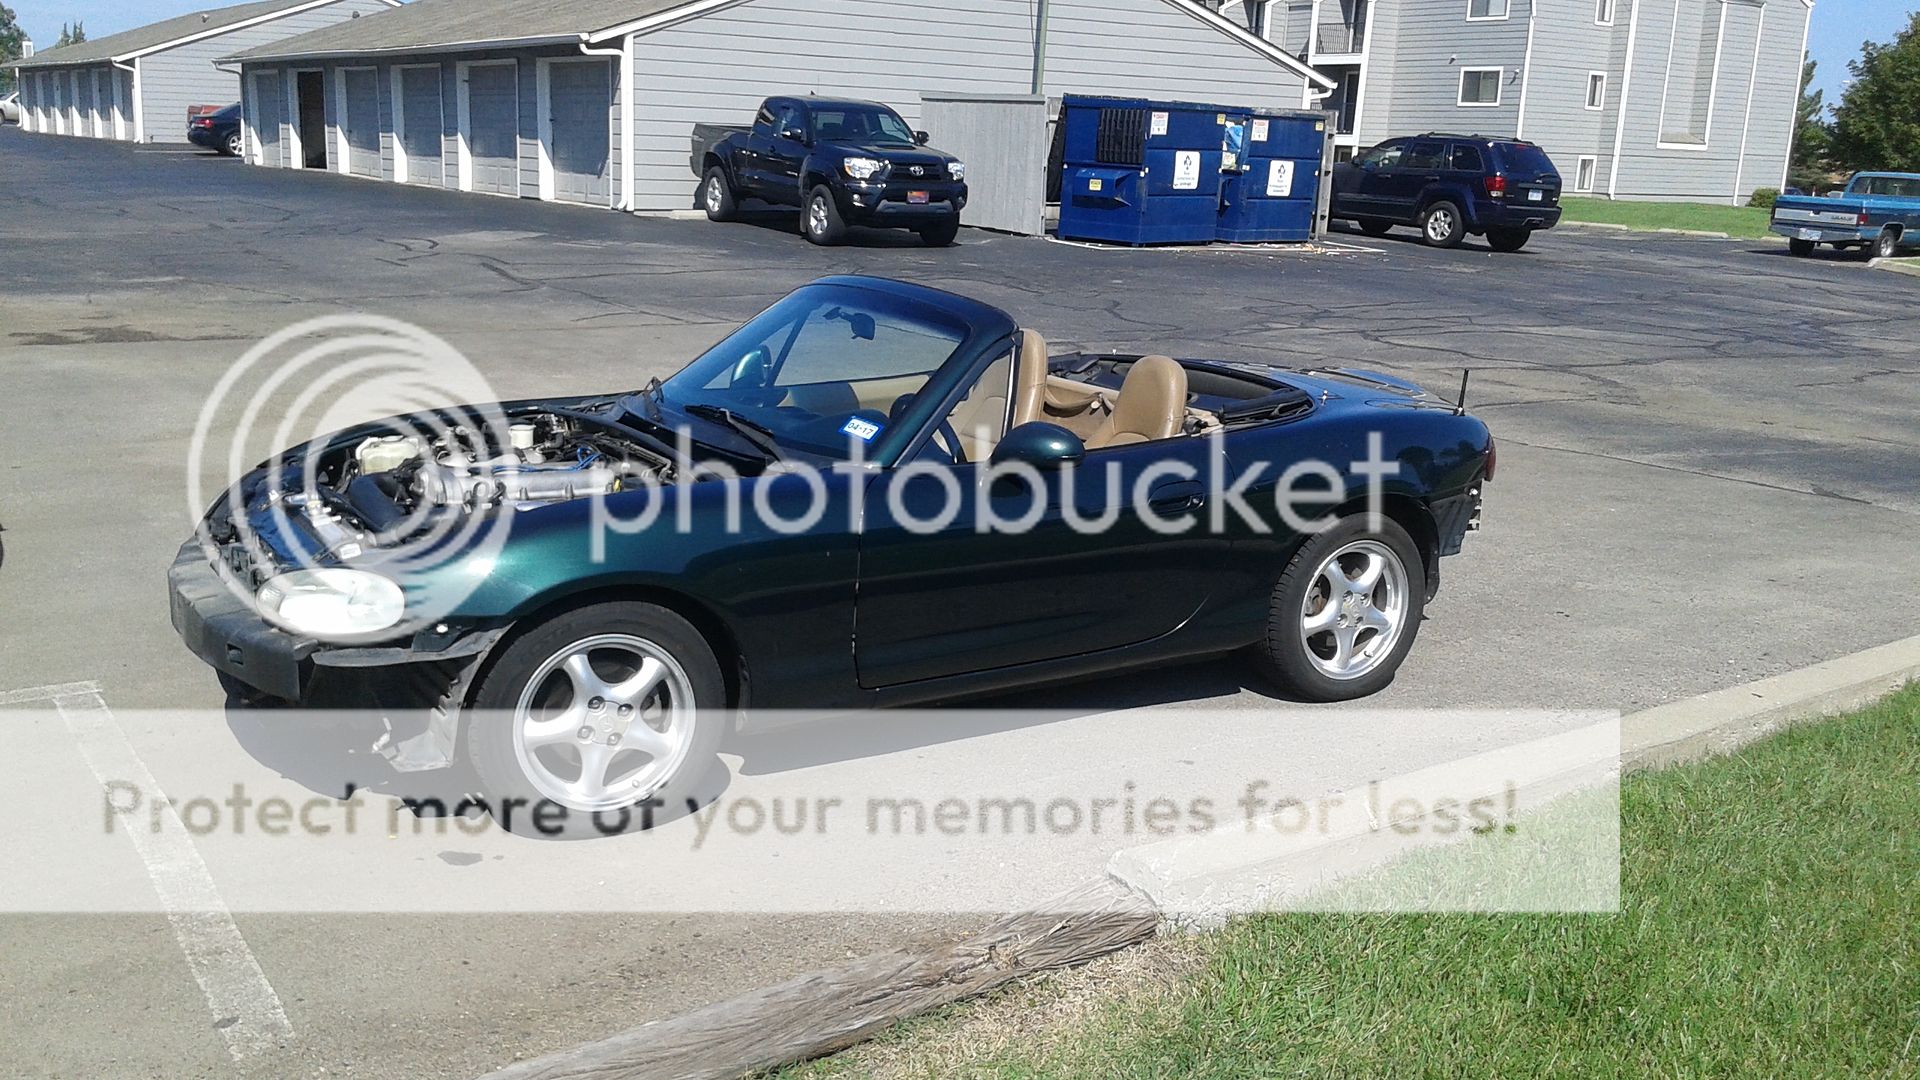

    Not Texas :-(

    I also performed some much needed maintenance, and fixed a few things, that If I had known about them at the time, I would have tried to knock a few more bucks off the price. I'll detail all that in later posts on here, with more information and the gory details.

    So, that's where I'm starting from.

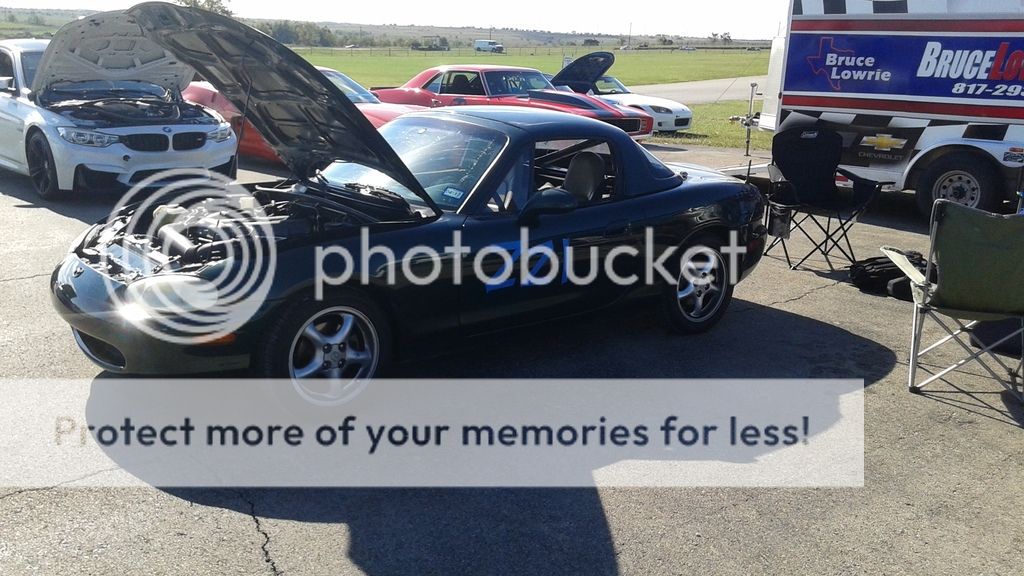
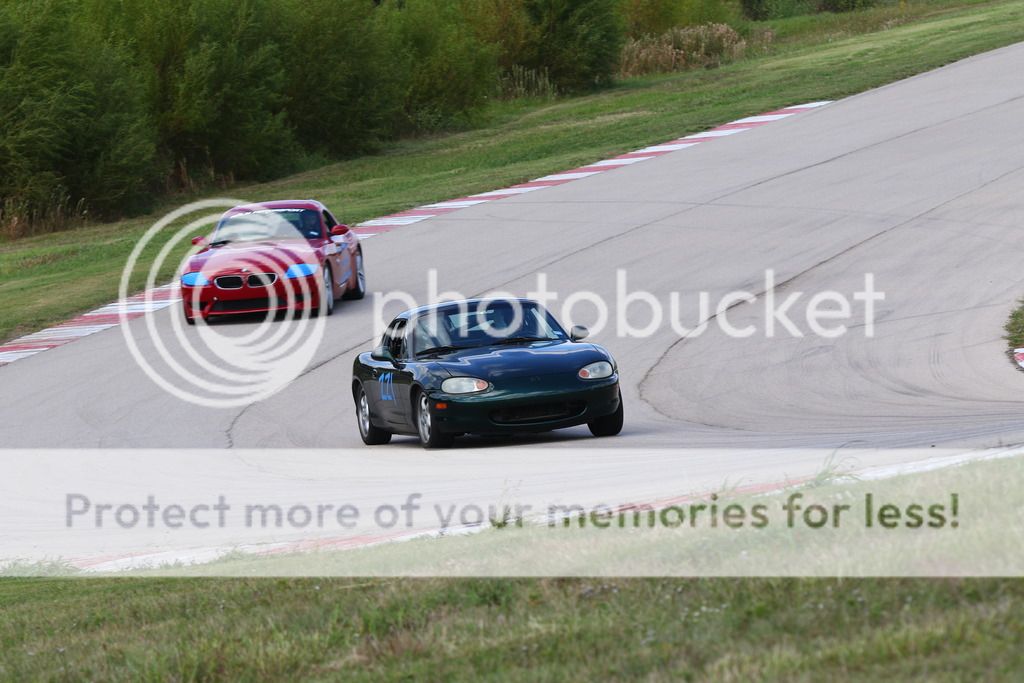
    The plan is to build a nice clean car, that I can drive on the street and take to the Autocross course and maybe hit up Motorsport Ranch with my buddies every once in awhile. I have no idea what I'm doing, but I'm enjoying figuring things out and learning about the new platform.

    Thanks For The Space!
    Attached Images Attached Images
    Last edited by BluFalcon; 09-16-2016 at 02:47 PM. Reason: Whimsy
    99 Mazda Miata-The Fun One
    05 VW Golf TDI- Daily Driver Oil Burner
    06 Mitsubishi Raider DuroCross V8- Hauls Things, Drinks Gas

  2. The Following 6 Users Say Thank You to BluFalcon For This Useful Post:

    Agent☣Orange (09-16-2016),Greasemonkey2000 (09-16-2016),HarryB (09-16-2016),MiataQuest (09-17-2016),NCGreasemonkey (09-17-2016),tsingson (09-17-2016)

  3. #2
    Idling - Listen to it purr... BluFalcon's Avatar
    Drives
    99 Emerald Mica
    Location
    Wichita, KS
    Join Date
    Aug 2016
    Posts
    23
    Thanks Given
    20
    Thanked 58 Times in 20 Posts
    So one of the first things on the list was to change the oil on the car. I had put off doing an oil change until after I had gotten it up to the Wichita area, since dealing with it while I was moving and also still working didn't leave me with a lot of time.

    Lets Get Started

    I grabbed a drain pan to start the oil change process, got the car up on ramps and crawled under it. That's when I noticed something odd about the drain plug that was installed.

    It had no hex head for a wrench, or Allen Key, just a weird shaped lip on a very large metal washer that looked like a pair of pliers could grab onto it to loosen it.


    "Aww Crap."

    The threads in the oil pan for the drain bolt had stripped out, and the PO (or whoever did his oil changes) opted to use a "Temporary Repair Plug" to "fix" the problem. Evidently this is a common issue with the Miata oil pan.

    Unacceptable.

    So, of course since I work on Jet Engines for a living, I had to go and over think the whole thing.

    The plug wasn't leaking, and had been on the car for who knows how long. Why screw with it? If I had to, I could just use the Vacuum Oil Removal Pump I have for my VW TDI to get the oil out and not EVER have to deal with draining the oil out.

    Nah. Let's do it the hard way, because I can't leave anything alone.

    Option 1: Replace the oil pan with a new or used unit. I was all for this idea until I found out that in order to install a new oil pan, the engine needed to be removed from the car or the front subframe needed to be dropped.

    Nope. Not gonna do that.


    Option 2: Involved a new oversized drain plug with special threaded flutes to cut new threads into the pan. This option was offered by the local Mazda dealership when I went to ask how much they would charge to swap a new pan on. Even though it offered a bit more peace of mind than a thin rubber gasketed disc attached with a piece of threaded rod and a toggle bolt on one end, it too was just a temporary fix.

    Pass.

    Option 3: Would be to repair the threads on the oil pan with a insert repair kit, or tap it for an oversized drain plug. Doing some research on various forums led me to discover that the majority of folks used a TimeSert Drain Plug Repair Kit. It was kind of expensive, but it seemed like the best way to go in my situation. Placed an order, and after a small mixup with my shipping address, received the kit in about a week and a half or so.

    I chose to use the 1415A kit on my car, and found that it wasn't that hard to even under the car with common hand tools.


    Not Nervous About This At All

    So, armed with my new repair kit, the required tools and plenty of axle grease to catch any metal shavings, I went ahead and removed my "temporary" oil drain plug to start the process.
    I used the instructions from the site along with plenty of grease and lubricant for the threads while using the tap, counter bore and drill. The nice thing about the tools was that they didn't require any special tap handles or holders for the items. A novice mechanic could easily complete this repair with common tools.


    I made sure to clean the drain hole and flushed out as much trash with about two quarts of cheap oil before again cleaning the repaired threads and the repair insert with plenty of brake cleaner. I applied a liberal amount of RED LocTite to the insert and threaded it in per the instructions and locked it in place with the supplied tool.


    It Almost Looks Like I Know What I'm Doing

    I waited for three days to allow the LocTite to completely set (Overkill, I know), before I installed a new Drain Plug into the pan. Changed the filter and filled the engine with fresh Synthetic Blend oil. Started her up to check for leaks, and everything appears to be working fine.

    I'm keeping an eye on it to make sure it doesn't back out. Overall I'm pretty happy with the results, but just to be on the safe side. I think I'll use the Vacuum Oil Removal Pump to get the oil out from now on. I know the insert is locked in place, I just don't want to take the chance on it pulling out.
    99 Mazda Miata-The Fun One
    05 VW Golf TDI- Daily Driver Oil Burner
    06 Mitsubishi Raider DuroCross V8- Hauls Things, Drinks Gas

  4. The Following 7 Users Say Thank You to BluFalcon For This Useful Post:

    Agent☣Orange (09-16-2016),Greasemonkey2000 (09-16-2016),HarryB (09-16-2016),Jarrett (09-16-2016),MiataQuest (09-17-2016),NCGreasemonkey (09-17-2016),tsingson (09-17-2016)

  5. #3
    Idling - Listen to it purr... BluFalcon's Avatar
    Drives
    99 Emerald Mica
    Location
    Wichita, KS
    Join Date
    Aug 2016
    Posts
    23
    Thanks Given
    20
    Thanked 58 Times in 20 Posts
    The majority of these posts are going to be of the "Catch Up" variety. I've done a bit here and there in the 10 months I've owned the car. I'll try to do everything in chronological order, but I'm old and I'll probably slip up, because that's what I do.


    I found a used hardtop off Craigslist a few months after I arrived in Wichita. Literally three miles away from my apartment. I wasn't planning on getting one this early, but my Income Tax check had come in and I was like, "What the hell?"

    It was a early OEM Mazda hardtop from the looks of it, with no defroster for the rear window. Wasn't in bad shape, aside from some slight chipping and wear on the bottom edge of the top and the faded red paint. The price was right, so I made an offer and he accepted. Got the top loaded up in my Raider and headed back to my apartment.

    Didn't Need To Save That Money Anyway

    Previous owner had Frankenstein Bolts on the car, so threw it on to see how it looked.


    OK, The Red Has Got To Go

    A guy at work said he knew someone who could paint it and repair the damage for a decent price, so I dropped it off. One of the Frankenstein Bolts Was loose, and I wanted to do something about the gold anodized trim plates. Things didn't go as planned at first.


    Seized Stud, Broken Captured Nut

    But eventually, I got it done.


    Used some paint that's used to "tint" chrome trim or wheels.

    With about three coats, it gives a "Piano Black" look to everything. One day I'll get it powdercoated, but for now this'll do.

    After a few weeks, I got a call. The hardtop was ready.


    Well, That's A Change!


    Shiny Top, Dirty Car

    Did a quick wash on the way home.


    Very pleased with the job. Plan on having him refresh my bumpers and hood next.
    Last edited by BluFalcon; 09-17-2016 at 01:57 AM. Reason: Word Usage
    99 Mazda Miata-The Fun One
    05 VW Golf TDI- Daily Driver Oil Burner
    06 Mitsubishi Raider DuroCross V8- Hauls Things, Drinks Gas

  6. The Following 5 Users Say Thank You to BluFalcon For This Useful Post:

    Demon I Am (09-18-2016),Greasemonkey2000 (09-17-2016),HarryB (09-18-2016),MiataQuest (09-20-2016),tsingson (09-17-2016)

  7. #4
    Idling - Listen to it purr... BluFalcon's Avatar
    Drives
    99 Emerald Mica
    Location
    Wichita, KS
    Join Date
    Aug 2016
    Posts
    23
    Thanks Given
    20
    Thanked 58 Times in 20 Posts

    Loud Noises!

    I'm a Craigslist junkie, so obviously I find deals for the Miata on there every once in awhile. The Wichita area doesn't have quite the selection that the D/FW area does obviously, and I admit I was a bit spoiled by having a large selection of parts to choose from when I lived in Texas.

    So anyway, someone had a 99-00 Racing Beat "Cold Air" Intake setup on sale for $100. It included a brand new Hardware Kit, the Intake Housing, a recently Cleaned and Oiled Filter, along with a "custom" Aluminum Crossover Tube.

    Seemed like a good deal, so let's e-mail the seller, check the location..and crap. He's outside Kansas City, about three hours away.

    Looks like a road trip.

    Got in the TDI and headed out to meet him a few days later. Cool guy, had a really clean NB and he popped the hood and we talked for a bit about his car. Took a quick look at the parts, loaded up and headed back.

    I unboxed everything after I got home and got a better look at what I bought. The Crossover Tube looked like it could be used with my car with a few mods, and the filter and hardware kit were in great shape. The cast aluminum Intake Housing however, had some surface corrosion.


    No Big Deal. I can Fix This.

    I hit the outer surface of the Intake Housing with a wire wheel on a electric drill motor. I used a piece of wood in my vise to hold the housing in place while I cleaned off as much crud as I could with the drill and wire wheel.


    Don't Laugh, It Worked

    After the wire wheel treatment, I hit the hard to reach areas with some 400 Grit Sandpaper soaked in WD-40. I then went over the whole surface with some 800 Grit Sandpaper and WD-40 as well to try and clean it up as much as possible.

    Hit it with some brake cleaner and used some Mothers Aluminum Polish, applied with a old T-Shirt, and started working the polish onto the metal. A Craftsman Buffing wheel mounted in the same electric drill was used to try and buff it out. It wasn't perfect, but I think it looks a lot better than it did when I got it.


    That'll Do For Now

    I installed the intake according to the instructions and I'm pretty happy with it. I honestly can't tell if it added any actual power, but I love the way this thing sounds at WOT.

    In my old DSM/Mitsubishi days, I was more interested in parts that made power rather than pretty things for the engine bay. So the fact that I like this Intake is kind of amusing to me. I would eventually like to get the RB Carbon Fiber Intake Cover for this and I have plans to modify the "custom" Aluminum Crossover Tube so that I can use it with the intake.

    Once that happens, I'm not sure if I want to powder coat or ceramic coat the Intake Housing and Crossover Tube.
    99 Mazda Miata-The Fun One
    05 VW Golf TDI- Daily Driver Oil Burner
    06 Mitsubishi Raider DuroCross V8- Hauls Things, Drinks Gas

  8. The Following 2 Users Say Thank You to BluFalcon For This Useful Post:

    Greasemonkey2000 (09-17-2016),tsingson (09-17-2016)

  9. #5
    Idling - Listen to it purr... BluFalcon's Avatar
    Drives
    99 Emerald Mica
    Location
    Wichita, KS
    Join Date
    Aug 2016
    Posts
    23
    Thanks Given
    20
    Thanked 58 Times in 20 Posts

    Timing Belt Time

    A timing belt and water pump change is usually one of the first things I used to do when I bought a new to me DSM or Mitsubishi. With the interference design of the 4G63, it was cheap insurance. I've done more than a few, so it wasn't hard, just a bit messy.

    Since I discovered the Miata was a non interference engine, I put it off for a couple of months and didn't really think about it. After driving the Miata to work a couple of times after I went to 2nd shift though, I figured I should do it before the car left me stranded on some dark Kansas county road in the middle of the night.

    Ordered a timing belt kit from a vendor, along with the Flyin' Miata Tool Set. I sourced a water pump, the front main and cam seals locally.

    I've never done this on a Miata before, but I figured if I could muddle through the same job on a DOHC 6G72 V6 in a 3000GT, I SHOULD be able to figure this out.

    Got the car up on ramps, drained the coolant and started taking things apart. The front covers were in terrible shape, and it definitely was leaking from the front main, and probably the cam seals as well.


    Slot A....Tab B

    Things were going well, until I got to the crank sprocket.

    It was seized on the nose of the crank pretty tight, which is probably why the seal was leaking. No one wanted to deal with getting the sprocket off during previous T-Belt jobs. I used some Kroil and a small butane torch to try and heat the sprocket up to try and loosen it. When this didn't work, I grabbed my prybar and started prying it forward, using the bolt heads on the front case as lever points. I got it to move forward a bit, and I was feeling a bit smug and cocky, until I heard:

    *CRACK*

    'Please don't let that be the front case', I muttered.


    Good Job! What Do You Do For An Encore?

    It wasn't, thankfully. I did however managed to crack the rear flange of the sprocket. It was already screwed, so with much more caution and visions of cracked front cases dancing in my head, I proceeded to get the sprocket off. Then placed an order for that and some other parts.

    After that, the rest of the install went well. Cleaned the mess from the leaks as best I could. New seals went in easily with the FM install tools. Water pump was a bit tricky, with lots of urges to want to choke whichever engineer thought that configuration was a good idea.

    New crank sprocket and front timing covers arrived. I did have some difficulty lining the cam gears up, even with the Ninja Tool. The marks on the gears and the cover, weren't really lining up. I wound up counting the teeth on the belt between the two gears.

    Tensioner was easy to install and set. Much easier than the one in the 4G63.

    Got it all buttoned up, muttered "Shepard's Prayer", and turned the key. Started right up with no issues.

    Yay, for peace of mind.
    99 Mazda Miata-The Fun One
    05 VW Golf TDI- Daily Driver Oil Burner
    06 Mitsubishi Raider DuroCross V8- Hauls Things, Drinks Gas

  10. The Following 4 Users Say Thank You to BluFalcon For This Useful Post:

    Greasemonkey2000 (09-17-2016),MiataQuest (09-17-2016),NCGreasemonkey (09-17-2016),tsingson (09-17-2016)

  11. #6
    6,000 rpm - mere mortals would shift NCGreasemonkey's Avatar
    Drives
    '95 NA NA8 w/small tweeks
    Location
    Winston-Salem, N.C.
    Join Date
    Oct 2015
    Posts
    4,423
    Thanks Given
    3,898
    Thanked 1,455 Times in 859 Posts
    Nice start.

    On a side note: If the thread repair kit you mentioned is the one with the drill bit, tap / alignment tool, chamfer cutter and installation tool that must have the threads oiled you need not worry! We have the 12 and 14 mm sets at work and I have installed dozens without any backing out issues. The installation tool actually stretches the insert in the opening.
    ... Rick

    Quote Originally Posted by Hammerhead View Post
    ...and don't be like an NCGreasemonkey.
    For the thread on Noir click below
    http://mazdaroadster.net/showthread....e-light-Slowly

  12. The Following User Says Thank You to NCGreasemonkey For This Useful Post:

    BluFalcon (09-17-2016)

  13. #7
    Idling - Listen to it purr... BluFalcon's Avatar
    Drives
    99 Emerald Mica
    Location
    Wichita, KS
    Join Date
    Aug 2016
    Posts
    23
    Thanks Given
    20
    Thanked 58 Times in 20 Posts
    Thanks!

    This the same kit you mentioned, with the same tools included.

    I know on a logical level that everything should be fine with the repair, but my irrational, "that shouldn't have happened in the first place" level is pinging pretty hard.

    I probably shouldn't worry too much. Even if it backs out, I still have 4 other inserts that can go in.
    99 Mazda Miata-The Fun One
    05 VW Golf TDI- Daily Driver Oil Burner
    06 Mitsubishi Raider DuroCross V8- Hauls Things, Drinks Gas

  14. The Following User Says Thank You to BluFalcon For This Useful Post:

    NCGreasemonkey (09-17-2016)

  15. #8
    5,000 rpm - there be torque here! Greasemonkey2000's Avatar
    Drives
    2001 NB2 aka Misfire
    Location
    Temple, Tx is where Chad resides.
    Join Date
    Nov 2013
    Posts
    3,973
    Thanks Given
    4,901
    Thanked 2,425 Times in 1,233 Posts
    Great work sir! I have always wanted to a Galant VR4! What are the plans for the miata?
    '01 NB2 aka MisF1re: http://mazdaroadster.net/showthread....218#post207218
    '97 M aka Warbird, gone but not forgotten: http://mazdaroadster.net/showthread....B&goto=newpost
    Instagram: @greasemonkey2000

  16. The Following User Says Thank You to Greasemonkey2000 For This Useful Post:

    BluFalcon (09-18-2016)

  17. #9
    Idling - Listen to it purr... BluFalcon's Avatar
    Drives
    99 Emerald Mica
    Location
    Wichita, KS
    Join Date
    Aug 2016
    Posts
    23
    Thanks Given
    20
    Thanked 58 Times in 20 Posts
    Plan is to build up a nice looking street car that sees the Autocross track or road course occasionally.

    What I should have done is left it completely stock, then gotten some autocross time under my belt, before I started modifying it. The car itself, the support from the manufacturers and the owners is starting to grow on me, so maybe I'll find a nice NA as a second car to use as a entry point into autocross.
    99 Mazda Miata-The Fun One
    05 VW Golf TDI- Daily Driver Oil Burner
    06 Mitsubishi Raider DuroCross V8- Hauls Things, Drinks Gas

  18. The Following User Says Thank You to BluFalcon For This Useful Post:

    HarryB (09-18-2016)

  19. #10
    6,000 rpm - mere mortals would shift NCGreasemonkey's Avatar
    Drives
    '95 NA NA8 w/small tweeks
    Location
    Winston-Salem, N.C.
    Join Date
    Oct 2015
    Posts
    4,423
    Thanks Given
    3,898
    Thanked 1,455 Times in 859 Posts
    Quote Originally Posted by BluFalcon View Post
    Plan is to build up a nice looking street car that sees the Autocross track or road course occasionally.

    What I should have done is left it completely stock, then gotten some autocross time under my belt, before I started modifying it. The car itself, the support from the manufacturers and the owners is starting to grow on me, so maybe I'll find a nice NA as a second car to use as a entry point into autocross.
    See that is my plan. Noir got built for race. But over built for class. Hopefully this fall I buy her a sibling that can wear fancy clothes and be stock other-wise.
    ... Rick

    Quote Originally Posted by Hammerhead View Post
    ...and don't be like an NCGreasemonkey.
    For the thread on Noir click below
    http://mazdaroadster.net/showthread....e-light-Slowly

  20. The Following User Says Thank You to NCGreasemonkey For This Useful Post:

    BluFalcon (09-20-2016)

  21. #11
    Idling - Listen to it purr... BluFalcon's Avatar
    Drives
    99 Emerald Mica
    Location
    Wichita, KS
    Join Date
    Aug 2016
    Posts
    23
    Thanks Given
    20
    Thanked 58 Times in 20 Posts

    Radiator Springs

    Drip.....Drip.....

    Found a small puddle of coolant behind the passenger side headlight one night. I traced the leak from the coolant reservoir hose to the seal between the radiator core and top end tank.

    I always pop the hood and check the oil at every gas fill up, and happened to spot it.

    And only about a month from when I had all this apart to do the timing belt and water pump. Awesome

    As always, when presented with a simple maintenance issue, I again decided to be an overachiever, and not just replace the radiator, but to upgrade at the same time. Because, that's what I do.

    So, I bought a Koyo 37mm radiator from one of the vendors on here, along with a GarageStar Thermostat Housing Sandwich plate. So I had a place I could install a aftermarket Temperature Gauge Sending unit for a later gauge install. Why make a mess twice if you don't have to?


    The Road To Hell

    I've installed a ton of radiators into various cars over the years and have gotten pretty good at it. Hell, one time on a first date, I changed my date's radiator out (So To Speak) in the parking lot of a Malibu Speedzone, before we went to dinner. Unfortunately, this didn't really impress her and I didn't get a second date after this.
    Pisser.

    Anyway....
    It's simple: Drain Coolant, Loosen and Remove Hoses, Remove Mounting Hardware, Unplug Electric Fans/Connections and "Pull The Damned Thing Out". Installation is the reverse of removal.

    Got the old radiator out and transferred all the fans and attachments over to the new unit. I even manged not to make a huge mess draining the radiator and removing the hoses, which is not a normal thing with me. I was pretty proud of myself.

    I also went ahead and installed the GarageStar Sandwich Plate, along with new gaskets to ensure no leaks.


    Going Well So Far


    The new radiator is both thicker and wider than the OEM unit, so there are clearance issues. Something, I should have realized beforehand. After a few searches on the Internet, I discovered the solution to this issue was to "gently" bend the Condenser Core forward until the radiator DIDN'T contact the pokey bits of the Condenser Mount.

    Okay, I can be gentle.


    Gently

    After about an hour of gently wiggling, bending, cursing and several sworn oaths, I decided that I was tired of screwing with it and grabbed the biggest prybar I had and bent the Condenser as far forward as I could. Sometimes, GENTLE doesn't get the job done. At least in a timely manner.


    Not So Gently

    With the core out of the way, the rest of the install went smoothly. Bolted everything down, reconnected both radiator hoses, plugged the fans in and filled the radiator with a mixture of coolant and distilled water. Started the car up and burped the system to remove any trapped air in the system, and checked for leaks around the sandwich plate and the threaded plug in the plate as well.

    I moved on the upper radiator hose and checked it out while congratulating my self about being proactive and installing the plate beforehand to make sure I didn't make a mess in the future when it came time to install my gauges.

    It was around that time, feeling ever so smug, that I noticed that Koyo had thoughtfully, already provided a 1/8NPT port in the top of the radiator, for an aftermarket temperature sensor.


    Thanks Koyo!

    So I wound up pulling the Sandwich Plate off, made a huge mess with leaking coolant this time, bought a new gasket, more coolant and a new hose to replace the one I trimmed. All because my OCD wouldn't let me leave the Sandwich Plate on the car, because it no longer served a purpose.

    After All That...

    I'm happy to report that everything is working fine. No leaks in the cooling system and all appears to be well. The new radiator is a pretty nice looking piece that not only enhances the cooling capacity of the car, but looks pretty good doing it. My only real hiccup (that wasn't of my own doing) was the Condenser Core clearance issue. A few seconds with a pry bar took care of that, and other than that it did just drop right in. You know, as advertised aside from the bit with the prybar and cursing.


    All Is Well..Finally

    I also now have a really nice GarageStar Thermostat Sandwich plate, with about 20 minutes of run time, minus the gaskets. Anyone wanna buy it?

    *SIGH*
    99 Mazda Miata-The Fun One
    05 VW Golf TDI- Daily Driver Oil Burner
    06 Mitsubishi Raider DuroCross V8- Hauls Things, Drinks Gas

  22. The Following 3 Users Say Thank You to BluFalcon For This Useful Post:

    Greasemonkey2000 (09-21-2016),HarryB (09-20-2016),NCGreasemonkey (09-20-2016)

  23. #12
    Idling - Listen to it purr... BluFalcon's Avatar
    Drives
    99 Emerald Mica
    Location
    Wichita, KS
    Join Date
    Aug 2016
    Posts
    23
    Thanks Given
    20
    Thanked 58 Times in 20 Posts

    Intake Addendum

    When I got the Racing Beat Intake, the previous owner included a "custom" intake crossover tube with it. He said he had a buddy of his make it for him, just never got around to installing it before he sold

    The pipe wasn't really anything special. Just 2 pieces of polished 3 in diameter piping, with 90 degree bends at each end. The two pieces were welded together in the center, with beaded edges welded onto the ends of the piping that went into the Throttle Body and MAF Inlet. There was also a aluminum nipple welded into the O.D. of the piping for the breather line from the valve cover.

    There were a couple of nice quality 2.75 to 3.0 in silicone couplers included, but no hose clamps.

    The piping was a bit too long to fit properly, so I cut it in the middle. I also cleaned out some welding spatter I found where the nipple was welded in. Ordered a 3 in hump connector to join the two pieces, and ground the edges down to clean up the cuts and shorten the length of the assembly.

    Did a test fit afterwards:


    A few hose clamps, and it's done.

    I seriously doubt this will have any real performance gain, but I think it looks a lot better than the stock plastic crossover tube. Plus I was getting tired of tripping over this thing in the garage. If I decide to keep it, I might get it and the RB Intake, ceramic coated.
    99 Mazda Miata-The Fun One
    05 VW Golf TDI- Daily Driver Oil Burner
    06 Mitsubishi Raider DuroCross V8- Hauls Things, Drinks Gas

  24. The Following 3 Users Say Thank You to BluFalcon For This Useful Post:

    Greasemonkey2000 (10-17-2016),Martin (10-17-2016),MiataQuest (10-18-2016)

  25. #13
    Idling - Listen to it purr... BluFalcon's Avatar
    Drives
    99 Emerald Mica
    Location
    Wichita, KS
    Join Date
    Aug 2016
    Posts
    23
    Thanks Given
    20
    Thanked 58 Times in 20 Posts
    The builds for Noir and Warbird were the first ones I really latched onto and read all the way through when I got on here. Loved seeing the cars from the beginning evolve as the thread continued. Definitely gave me some ideas on what I'd like to do with my car as well.
    99 Mazda Miata-The Fun One
    05 VW Golf TDI- Daily Driver Oil Burner
    06 Mitsubishi Raider DuroCross V8- Hauls Things, Drinks Gas

  26. The Following 3 Users Say Thank You to BluFalcon For This Useful Post:

    Greasemonkey2000 (09-21-2016),HarryB (09-20-2016),NCGreasemonkey (09-20-2016)

  27. #14
    Idling - Listen to it purr... BluFalcon's Avatar
    Drives
    99 Emerald Mica
    Location
    Wichita, KS
    Join Date
    Aug 2016
    Posts
    23
    Thanks Given
    20
    Thanked 58 Times in 20 Posts

    Face Off

    Just A Little Work...

    One thing that bothered me about the car when I got it was the condition of the front and rear bumpers.

    The front was pitted and looked to have been repainted a few times, along with a small puncture mark on the driver's side.

    The rear bumper wasn't that great either, with evidence of a few resprays and some cracked paint, showing down to the primer.

    So, while the car was down for the rollbar install, I went ahead and pulled the bumpers, and hood off to give to the guy who had painted my hardtop for me.

    Needless to say, the car looked a little funny:


    Dropped everything off and waited a few weeks for him to get done. He said that the bumpers had definitely been repainted a few times, but he managed to strip them down completely. Charged me a little more than he quoted, but was happy with the job for the most part.

    For some reason, he decided that the metal support plate in the front bumper, needed some Mica loving, so I ended up drilling the pop rivets out and spraying the whole thing with semi gloss black.


    Since the emblems had to come off, and I wasn't a fan of them being anodized gold, I shot them with some of the Shadow Cast paint for chrome, and painted them semi gloss black as well.

    Put everything back together and it was looking a lot better.


    Now I just need to do something about that dent in the driver's side rear quarter panel.
    99 Mazda Miata-The Fun One
    05 VW Golf TDI- Daily Driver Oil Burner
    06 Mitsubishi Raider DuroCross V8- Hauls Things, Drinks Gas

  28. The Following 2 Users Say Thank You to BluFalcon For This Useful Post:

    Demon I Am (11-15-2016),tsingson (11-14-2016)

  29. #15
    Idling - Listen to it purr... BluFalcon's Avatar
    Drives
    99 Emerald Mica
    Location
    Wichita, KS
    Join Date
    Aug 2016
    Posts
    23
    Thanks Given
    20
    Thanked 58 Times in 20 Posts

    Track Weekend Bro

    Seemed Like A Good Idea...

    Took the Miata out to my first ever driving even on the weekend of the 15th and 16th of October.

    Driver's Edge was holding an event at Motorsport Ranch in Cresson, TX and I took my all season tired, stock 170K suspension having butt out there to see what the car could do.

    My plan was to drive the car down, beat it on the track and then drive home. No sweat, right?

    I didn't go completely unprepared....I put new rotors and Green Stuff pads on all around. So I had that going for me.

    See? That's me being prepared.

    I drove from Wichita KS, and met my buddy at his job in Plano, TX. He threw a quickie alignment on the car for me, and then we headed out to Cresson, to check into the hotel.

    Got to the track and staked out a spot, and got checked in and got the car ready.


    Slapped some numbers on it, emptied the trunk completely, yanked the floormats, adjusted my seats, and checked my fluids.

    How Was It?

    I had a blast! Definitely more intense than I was expecting. I got passed (a lot), but I enjoyed pushing the car and the instruction I got from my instructor and the classroom sessions.


    I wanted to take the car out there mostly stock to see what it felt like before I started modding it with suspension parts, and different wheels and tires.

    I beat the dog snot out of the car, and it handled everything like a champ. Had a few close calls, but I didn't stuff it in the dirt.

    Made the 6 hour drive back to Wichita on Sunday, without a real hitch.

    Now, I really want to get some suspension and new wheels and tires for this thing.

    Oh and improve the "loose nut" behind the wheel as well.
    99 Mazda Miata-The Fun One
    05 VW Golf TDI- Daily Driver Oil Burner
    06 Mitsubishi Raider DuroCross V8- Hauls Things, Drinks Gas

  30. The Following 3 Users Say Thank You to BluFalcon For This Useful Post:

    Demon I Am (11-15-2016),NCGreasemonkey (11-16-2016),tsingson (11-14-2016)

Page 1 of 2 12 LastLast

Posting Permissions

  • You may not post new threads
  • You may not post replies
  • You may not post attachments
  • You may not edit your posts
  •