Loving it! Good time to install frame rails
Sent from my iPhone using Tapatalk


Loving it! Good time to install frame rails
Sent from my iPhone using Tapatalk


That cleaning part is what makes me wanna pull my dash too; however too afraid of broken clips and rattles afterwards to do so...yet. Awesome progress, cannot wait to see more!
kung fu jesus (11-27-2017)

We have pulled close to 200 dashes now and the only ones that have issues breaking clips end up being the NA6 ones...being NB I'd be willing to bet you would be more then fine on this!!!Originally Posted by HarryB

HarryB (11-27-2017)


I have to agree. My NA6 dash was easier, but a lot more fragile. No broken clips here on the NB dash.
All the screws have found their place.
The airbags slowed me down quite a bit, but I had the interior stripped in about three hours working alone.
Paul B (11-27-2017)

Some great work on this thing so far. Interested to see it all come together.
kung fu jesus (11-27-2017)

ESPECIALLY if you use the correct tool for the job
During lunch today, I touched up some areas of the pan with leftover alpinweiss paint from my e30.

Agent☣Orange (11-28-2017),fwdtamiya (12-03-2017),Greasemonkey2000 (02-04-2018),JamieH (11-27-2017),Paul B (11-28-2017),Phatmiata (11-28-2017),tsingson (11-27-2017)
Any time I pull a dash, I do all the work on a table. I take a lot of pictures for reference because there are a couple of short screws, and the HVAC tubes are intertwined pretty tight.
I keep all the fasteners in a dish, and I lay parts on the floor in a similar way they came out. Its nice to have good lighting, and a chair.
I didnt paint the crashbar like I did on the NA, but if you remove the dash harness, label connections with tape and have some fresh zip ties to reattach the harness.
When reassembling the bar/harness to the dash, a few different length screw drivers are really helpful, especially if they are magnetic. Lay the dash on a clean, soft towel to prevent scuffs and damage. When you start attaching the dash to the bar, take your time and make sure its all lined up. Repair any broken bosses with epoxy before any of this, if possible.
Start in the center and work outward, equally towards each side. As you thread in the screws, feel for resistance, you may be threading in at the wrong angle. Doing this could break off the boss. Stop, look at how the screw head should land, and re-attempt. It should screw in with a little resistance but not much.
When you get the screw about 90% of the way in, stop and move to the next one. Snug them all down when they are all in place. Do not Hulk-smash tighten them, or bosses will break, no joy.
The HVAC tubes are thin and blow-molded, like a milk jug, so they give a little. Watch to see that the detents on their connections line up.

Greasemonkey2000 (02-04-2018),HarryB (11-27-2017),JamieH (11-27-2017),tsingson (11-27-2017)

...you make me happy that I just taped it off and spray painted my dash black.Obviously not as good looking, but that amount of work at this juncture seems daunting.
I thought about painting, but it would piss me off if the paint didntt hold up and I wound up pulling the dash to fix it.
Do it right, do it once. Also have a number of Miata-specific breakers in the region. Scratchnsniff (Alex) has been a huge help and his parts are excellent.
My friends and wife didnt bat an eye when I gutted this car less than two weeks after buying it.
Right now, Im waiting on a new heater core. Its an easy job with the dash out and preventative maintenance. I have a lot of other small projects to do while the car is in this state, so while this all looks daunting, its not my first rodeo. Organization is key.
This being a new (to me) car, this gives me huge insight to where the car is structurally, mechanically, and its history. Its like reading the rings on a cut tree.
Another one of those while Im in there jobs is the seal on the fuel pump. The pump itself tested fine, and it was replaced in the past 2-3 years by my estimate with OE parts. The seal wasnt, not uncommon.
Before:
After:
I hate working on an open tank, so I work quickly with no distraction. I know the procedures here, so it went really smooth.
I also swapped the VIN plates on the dash. A minor detail, but important to me.
Last edited by kung fu jesus; 11-27-2017 at 08:30 PM.
Agent☣Orange (11-28-2017),fwdtamiya (12-03-2017),Greasemonkey2000 (02-04-2018),HarryB (11-28-2017),MiataQuest (11-27-2017),Phatmiata (11-28-2017),tsingson (11-27-2017)
Since there are a ton of really good tips and tricks related to most auto work above, another good tip is to start a screw by placing it at the hole, adding gentle pressure while turning counter-clockwise. Within a rotation, you will feel the screw threads drop into the thread path, then you can tighten away. I do this with pretty much every screw or bolt that I've ever handled, especially spark plugs.
Agent☣Orange (11-28-2017),JamieH (11-28-2017),kung fu jesus (11-28-2017),Martin (11-28-2017),Paul B (11-28-2017)
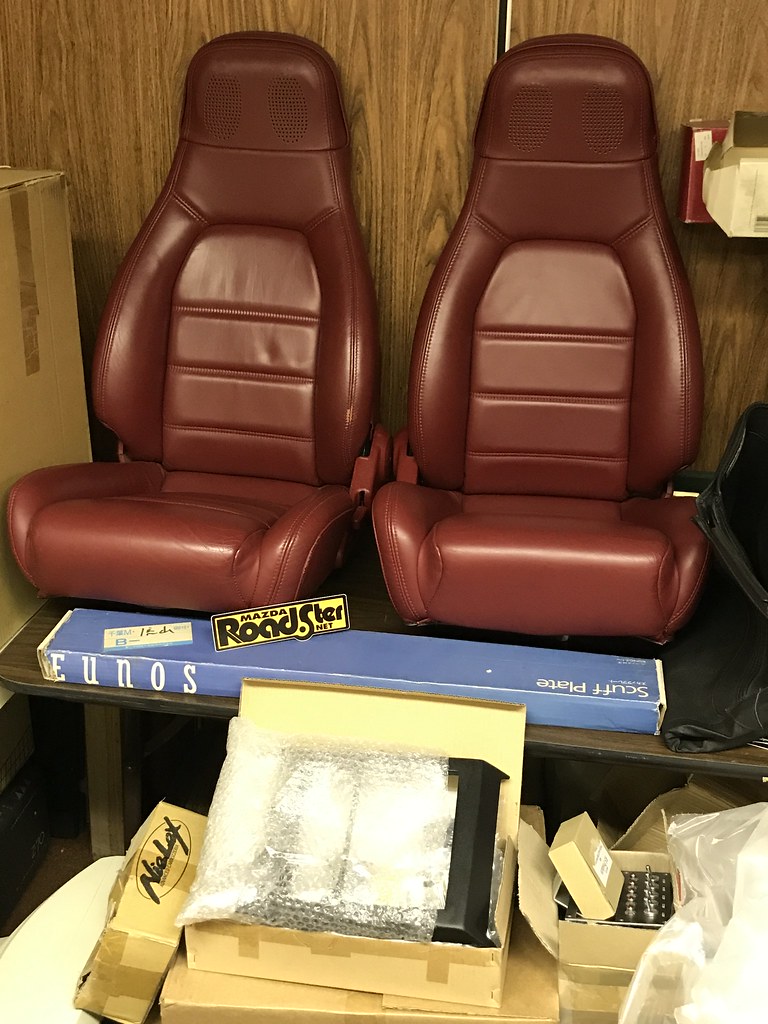
Get yer lotion and close the blinds. Heres something that may make your pants a little tight...
(my NA sees you batin)

Agent☣Orange (11-28-2017),CollinMB (11-28-2017),Demon I Am (11-28-2017),fwdtamiya (12-03-2017),Greasemonkey2000 (02-04-2018),HarryB (11-29-2017),JamieH (11-28-2017),Martin (11-28-2017),MiataQuest (11-28-2017),Paul B (11-28-2017),Phatmiata (11-28-2017),TNRooster3 (02-12-2018)

Sexy!
Those red seats that Phat is selling would sure look nice in that interior!
Linky: http://mazdaroadster.net/showthread....558#post212558
If they were black I sure would have bought them.
Last edited by MiataQuest; 11-28-2017 at 08:32 PM.
Return of the Manticore build: http://mazdaroadster.net/showthread....-4-engine-swap
Agent☣Orange (11-28-2017)

I predict the finished results will create sticky keyboards.
kung fu jesus (11-28-2017),Paul B (11-28-2017)
Exactly what I had in mind!!! so much sexiness!!!
kung fu jesus (11-28-2017)
 Posting Permissions

 Reply With Quote