Page 33 of 64 FirstFirst ... 2326272829303132333435363738394043 ... LastLast
Results 481 to 495 of 948

Thread: I did a thing.

  1. #481
    Ninja Messiah kung fu jesus's Avatar
    Drives
    1999 White
    Location
    Atlanta, GA
    Join Date
    Dec 2011
    Posts
    15,852
    Thanks Given
    2,791
    Thanked 7,202 Times in 3,433 Posts
    Harry, I ordered the parts off Rockauto. I’ve talked with a few guys in the business, they have the same opinions about most aftermarket parts for A/C systems...which is lukewarm. Fortunately the compressor is still good as are the electronics.

    The FSM does a good job with diagnosing and troubleshooting the HVAC. It was instrumental repairing my wife’s A/C on her 99 and buttoning up the NA.

    There is a surprising amount of good info on better BMW owner forums as those systems are a little finicky and expensive to repair, so there are a lot of DIY jobs with terrific empirical data, particularly with the parallel flow condensers and Nylog sealant.

  2. The Following User Says Thank You to kung fu jesus For This Useful Post:

    HarryB (04-30-2019)

  3. #482
    Ninja Messiah kung fu jesus's Avatar
    Drives
    1999 White
    Location
    Atlanta, GA
    Join Date
    Dec 2011
    Posts
    15,852
    Thanks Given
    2,791
    Thanked 7,202 Times in 3,433 Posts
    The parts arrived early!

    The pressure switch is the wrong one, so it’s going back. No big deal my current one is confirmed operational.


    Never one to let grass grow under my feet, I dug in immediately.

    Easiest was the Schrader valve cores on the high and low side.


    Next, I pre-assembled the condenser and the drier.


    I carefully moved the condenser tubing to fit the drier so the parts wouldn’t touch and rub.


    Then I removed my intake and replaced the seals at the compressor. One of these seals was pretty flat, maybe a potential source of the leak.


    I used Nylog on all the seals and threads.

    I also loosened the high and low fittings at the bulkhead. These have to be disconnected to remove the evaporator under the dash. I’ll tackle these later, likely tomorrow, because I have to remove the bumper to get to the old condenser and connections.

    It’s important to keep the new and old components sealed so dust and contaminants cannot enter.

    I feel pretty good about this so far, the harder stuff is yet to come, but an hour this afternoon got me this far.

  4. The Following 3 Users Say Thank You to kung fu jesus For This Useful Post:

    Greasemonkey2000 (05-03-2019),HarryB (05-01-2019),tsingson (05-01-2019)

  5. #483
    Ninja Messiah kung fu jesus's Avatar
    Drives
    1999 White
    Location
    Atlanta, GA
    Join Date
    Dec 2011
    Posts
    15,852
    Thanks Given
    2,791
    Thanked 7,202 Times in 3,433 Posts

    I did a thing.

    Pressed on, call it a second wind. ;)

    I removed the evaporator box:


    Started to remove the evaporator valve...found the leak.


    This makes sense as I remember smelling the refrigerant last autumn inside the cabin. Looks like this one corroded and made a hole. There is AC oil all over it. Already sourcing one locally.

    Started cleaning the insulated box of organic material and grime.


  6. The Following 4 Users Say Thank You to kung fu jesus For This Useful Post:

    fwdtamiya (05-09-2019),Greasemonkey2000 (05-03-2019),HarryB (05-01-2019),tsingson (05-01-2019)

  7. #484
    Ninja Messiah kung fu jesus's Avatar
    Drives
    1999 White
    Location
    Atlanta, GA
    Join Date
    Dec 2011
    Posts
    15,852
    Thanks Given
    2,791
    Thanked 7,202 Times in 3,433 Posts

    I did a thing.

    Having today off, I got rolling around mid morning. I thought I could remove the condenser without removing the radiator and only the bumper, but no...it’s far easier to remove both to get at it.


    The condenser tucks under the radiator core support and it’s feet land just in front of the radiator. My larger CSF radiator and thicker front sway bar wouldn’t allow me to get at the condenser and fittings easily without removing the radiator. So, I emptied the radiator in a clean container, set it aside, removed the radiator hoses, unclipped the electrical connectors from the fans, and lifted the radiator assembly out, super easy.

    From there, I had easy access to the condenser and the hose connections. I used a 17mm, 19mm, and two adjustable wrenches to loosen the connection fittings before loosening condenser mounts. Always use two wrenches at each connection to support the fittings and prevent the aluminum from twisting and collapsing.


    I removed the old unit and drier. Here it is next to the new one.


    The tube coming out of the old drier on the right needs to be transferred over. New o rings all around, more Nylog to keep the seals happy and threads sealed.


    Installing the new condenser needed some fitment. One of the mounting brackets was a little larger than it needed, so I marked it and cut a 19mm x 9mm notch with an angle grinder. I was carful to keep all open fittings covered to keep dust and debris out while doing this.


    The factory mounting brackets are arranged and shaped to allow a lot of slop/adjustment. They didn’t reattach in the same orientation as they came out. That’s not a worry, you just want to be sure the condenser angles away from the radiator and it, nor the drier, contact anything where they can rub and create a hole. Patience and a bit of mild modification with pliers worked fine. I test fit the radiator for clearance before buttoning up the condenser.


    I started reattaching the connections finger tight. I also rechecked the clearance for everything.


    Be sure to reuse the little bracket that attaches to the radiator at the bottom center. This supports two AC lines and keeps them clear of roar debris. After the condenser was tidied up, I tightened the connections. Empathy and touch are necessary. No need to hulk-smash them tight, but judicious torque gets it done. ;)

    I dropped the radiator assembly back in, reattached the hoses, poured the coolant in, reinstalled the bumper and undertray, then burped the system.


    I taped the ends of the open lines at the bulkhead, I am picking up a used evaporator assembly from my favorite local Miata breaker tomorrow after work.


    All this took 3-3.5 hours. I’m about 5-6 hours into it total, so it makes sense why AC system repairs are so expensive...it’s the labor time. It really is not difficult at_all. Figure ~$150 for these parts, 7-8 hours at $50-65/hour, plus recharge costs, I can see where this job could be $600-1000 at a repair shop.

    I will replace the evaporator valve on my new-used unit tomorrow and reinstall the evaporator box. I decided to use a shop to evacuate the system and recharge it. I want this working right for a long time, so it will be worth it to me to have a pro do that.

  8. The Following 5 Users Say Thank You to kung fu jesus For This Useful Post:

    fwdtamiya (05-09-2019),Greasemonkey2000 (05-03-2019),HarryB (05-02-2019),MaRcOp01o (05-02-2019),tsingson (05-02-2019)

  9. #485
    2,000 rpm - light wheelspin, no bog here! turboedpickup's Avatar
    Drives
    1999 Miata
    Join Date
    Nov 2015
    Posts
    240
    Thanks Given
    1
    Thanked 239 Times in 111 Posts
    Damn. Nicely done. As far as the leak in the evaporator... did it have a leak previously, and the black tar was the solution made by the previous owner - or is that how all evaporators come?

  10. The Following User Says Thank You to turboedpickup For This Useful Post:

    kung fu jesus (05-02-2019)

  11. #486
    Ninja Messiah kung fu jesus's Avatar
    Drives
    1999 White
    Location
    Atlanta, GA
    Join Date
    Dec 2011
    Posts
    15,852
    Thanks Given
    2,791
    Thanked 7,202 Times in 3,433 Posts
    All evaporators I’ve seen in Miatas have that black insulation/mastic over the capillary. There shouldn’t be oil in there. It was the same consistency as that I drained from the system. The AC components deal with high pressures over long cycles, so when the hardware fades, shit goes pear-shaped quickly.

  12. The Following User Says Thank You to kung fu jesus For This Useful Post:

    tsingson (05-02-2019)

  13. #487
    Ninja Messiah kung fu jesus's Avatar
    Drives
    1999 White
    Location
    Atlanta, GA
    Join Date
    Dec 2011
    Posts
    15,852
    Thanks Given
    2,791
    Thanked 7,202 Times in 3,433 Posts

    I did a thing.

    Update; the NB refrigerant pressure switch is listed as NLA on dealer sites, and aftermarket as well. I may have to look up the specs to see if I can find one that matches and can be adapted with pig tails and compression fittings.

  14. The Following User Says Thank You to kung fu jesus For This Useful Post:

    tsingson (05-02-2019)

  15. #488
    Ninja Messiah kung fu jesus's Avatar
    Drives
    1999 White
    Location
    Atlanta, GA
    Join Date
    Dec 2011
    Posts
    15,852
    Thanks Given
    2,791
    Thanked 7,202 Times in 3,433 Posts

    I did a thing.

    Picked up the new-used condenser today. It’s very clean. It holds pressure because I watched as it was evacuated to remove it.


    Judging by the lack of leaves and debris inside, the donor car lived in a garage.

    On the car next to it, I found and bought this (yaaaaaaassssss!)


    Aluminum GS radiator panel.

  16. The Following 7 Users Say Thank You to kung fu jesus For This Useful Post:

    Demon I Am (05-03-2019),fwdtamiya (05-09-2019),HarryB (05-03-2019),JonB (05-10-2019),MaRcOp01o (05-03-2019),MiataQuest (05-03-2019),tsingson (05-03-2019)

  17. #489
    5,000 rpm - there be torque here! Greasemonkey2000's Avatar
    Drives
    2001 NB2 aka Misfire
    Location
    Temple, Tx is where Chad resides.
    Join Date
    Nov 2013
    Posts
    3,973
    Thanks Given
    4,901
    Thanked 2,425 Times in 1,233 Posts
    Nice work as usual Steven!
    '01 NB2 aka MisF1re: http://mazdaroadster.net/showthread....218#post207218
    '97 M aka Warbird, gone but not forgotten: http://mazdaroadster.net/showthread....B&goto=newpost
    Instagram: @greasemonkey2000

  18. The Following User Says Thank You to Greasemonkey2000 For This Useful Post:

    kung fu jesus (05-03-2019)

  19. #490
    Ninja Messiah kung fu jesus's Avatar
    Drives
    1999 White
    Location
    Atlanta, GA
    Join Date
    Dec 2011
    Posts
    15,852
    Thanks Given
    2,791
    Thanked 7,202 Times in 3,433 Posts
    Today I swapped out the evaporator valve, cleaned the evaporator core, and buttoned up the system.


    This evaporator valve DOESN’T leak. ;) New valve goes on regardless. Be careful not to kink the thin copper tubing, collapsing it.


    I sealed the box with silicone RTV and reinstalled the assembly. Reinstallation was a little tough. Here is what to do:

    Put the triangular tube clamp on the box opening.

    Position the box in its space under the dash. Gently push the AC hoses coming out of the box through the fire wall.

    Loosely connect the fittings onto the AC lines. New seals of course.

    Go back under the dash and push the box on the top and bottom studs that secure the assembly to the fire wall. Install the two 10mm nuts. This will take patience as the top stud is hard to see and reach. I used a combo of wobble extensions and a u-joint adapter.

    Slide the triangular clamp over to cover the gap between the box and the HVAC stack in the center of the dash.

    Install the square, 2-piece clamp onto the right side of the box and blower assy.

    Re-attach the HVAC cable into the armature for fresh/recirc air above the blower assy.

    Under the hood, tighten the AC hose fittings.

    Install glovebox.

    Hit the showers.


  20. The Following 4 Users Say Thank You to kung fu jesus For This Useful Post:

    HarryB (05-05-2019),JonB (05-14-2019),MiataQuest (05-04-2019),tsingson (05-04-2019)

  21. #491
    6,000 rpm - mere mortals would shift HarryB's Avatar
    Drives
    '04 Strato Blue NB2
    Location
    Greece
    Join Date
    Jun 2015
    Posts
    5,941
    Thanks Given
    6,677
    Thanked 2,273 Times in 1,330 Posts
    Excellent write up as always Steven. And that top stud is an absolute nightmare. I have removed the evap box before without removing the evaporator itself to clean the drain; dont wanna do that ever again!

  22. #492
    Ninja Messiah kung fu jesus's Avatar
    Drives
    1999 White
    Location
    Atlanta, GA
    Join Date
    Dec 2011
    Posts
    15,852
    Thanks Given
    2,791
    Thanked 7,202 Times in 3,433 Posts
    Thanks, Harry.

    I was recalling how easy this was on my NA then it hit me; no passenger airbags in that car.

  23. #493
    Super Moderator RotorNutFD3S's Avatar
    Drives
    '99 Brilliant Black Turbo
    Location
    Newnan, GA
    Join Date
    Dec 2011
    Posts
    1,885
    Thanks Given
    2,464
    Thanked 1,473 Times in 698 Posts
    Nice work on the overhaul!!

    Quote Originally Posted by kung fu jesus View Post
    On the car next to it, I found and bought this (yaaaaaaassssss!)


    Aluminum GS radiator panel.
    Nice score! That used to be Andre's (atlnb).
    I've got a lot less horsepower - luckily they are Japanese horses - usually in better shape and more motivated.

  24. The Following User Says Thank You to RotorNutFD3S For This Useful Post:

    kung fu jesus (05-06-2019)

  25. #494
    Ninja Messiah kung fu jesus's Avatar
    Drives
    1999 White
    Location
    Atlanta, GA
    Join Date
    Dec 2011
    Posts
    15,852
    Thanks Given
    2,791
    Thanked 7,202 Times in 3,433 Posts
    Quote Originally Posted by RotorNutFD3S View Post
    Nice work on the overhaul!!


    Nice score! That used to be Andre's (atlnb).
    I thought I recognized the car.

    It’s at David Luney’s house.

  26. #495
    Ninja Messiah kung fu jesus's Avatar
    Drives
    1999 White
    Location
    Atlanta, GA
    Join Date
    Dec 2011
    Posts
    15,852
    Thanks Given
    2,791
    Thanked 7,202 Times in 3,433 Posts
    Made an appointment at a buddy’s shop for the test and AC recharge this morning.

    Success!!

    Sweet, sweeeeet, glorious AC!

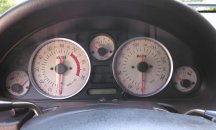
    The humidity was at 74% when I took these readings, fresh air setting, blower set at “1”:


    The compressor cycles regularly as it should:


    Everything is solid.


    Summer may commence as scheduled.

  27. The Following 3 Users Say Thank You to kung fu jesus For This Useful Post:

    fwdtamiya (05-09-2019),JonB (05-10-2019),tsingson (05-09-2019)

Page 33 of 64 FirstFirst ... 2326272829303132333435363738394043 ... LastLast

Tags for this Thread

Posting Permissions

  • You may not post new threads
  • You may not post replies
  • You may not post attachments
  • You may not edit your posts
  •