-
3,000 rpm - starting to feel the power


I'm doing some catch up with the build thread. There's been lots of little jobs but nothing really worthy of its own update.
While doing the clutch change we swapped over the passenger side gearbox mount. The bracket that bolts to the gearbox is different on the V6 and I so happened to have ordered a 1.5/1.8 mount *eye roll*
Luckily that bracket is on a spindle that passes through the bush mount and is held on by a large nut. The bush itself looked the same so we swapped the bracket over and it all bolted into place.
The reason for the change was because I get a knock when changing gears and sometimes under harsh acceleration. I had purchased all 4 mounts but we only had time to do the one (which made sense because of the clutch change).
Although we did look at the front mount, but the one supplied was incrorrect. Turns out the studs are wider on the V6 model.
The driver side mount was the next one to look at. With the engine supported with a trolley jack and a piece of wood it was time to loosen the nuts.

There's 4 nuts on the top, one is for an earth strap which sits ontop of another nut.
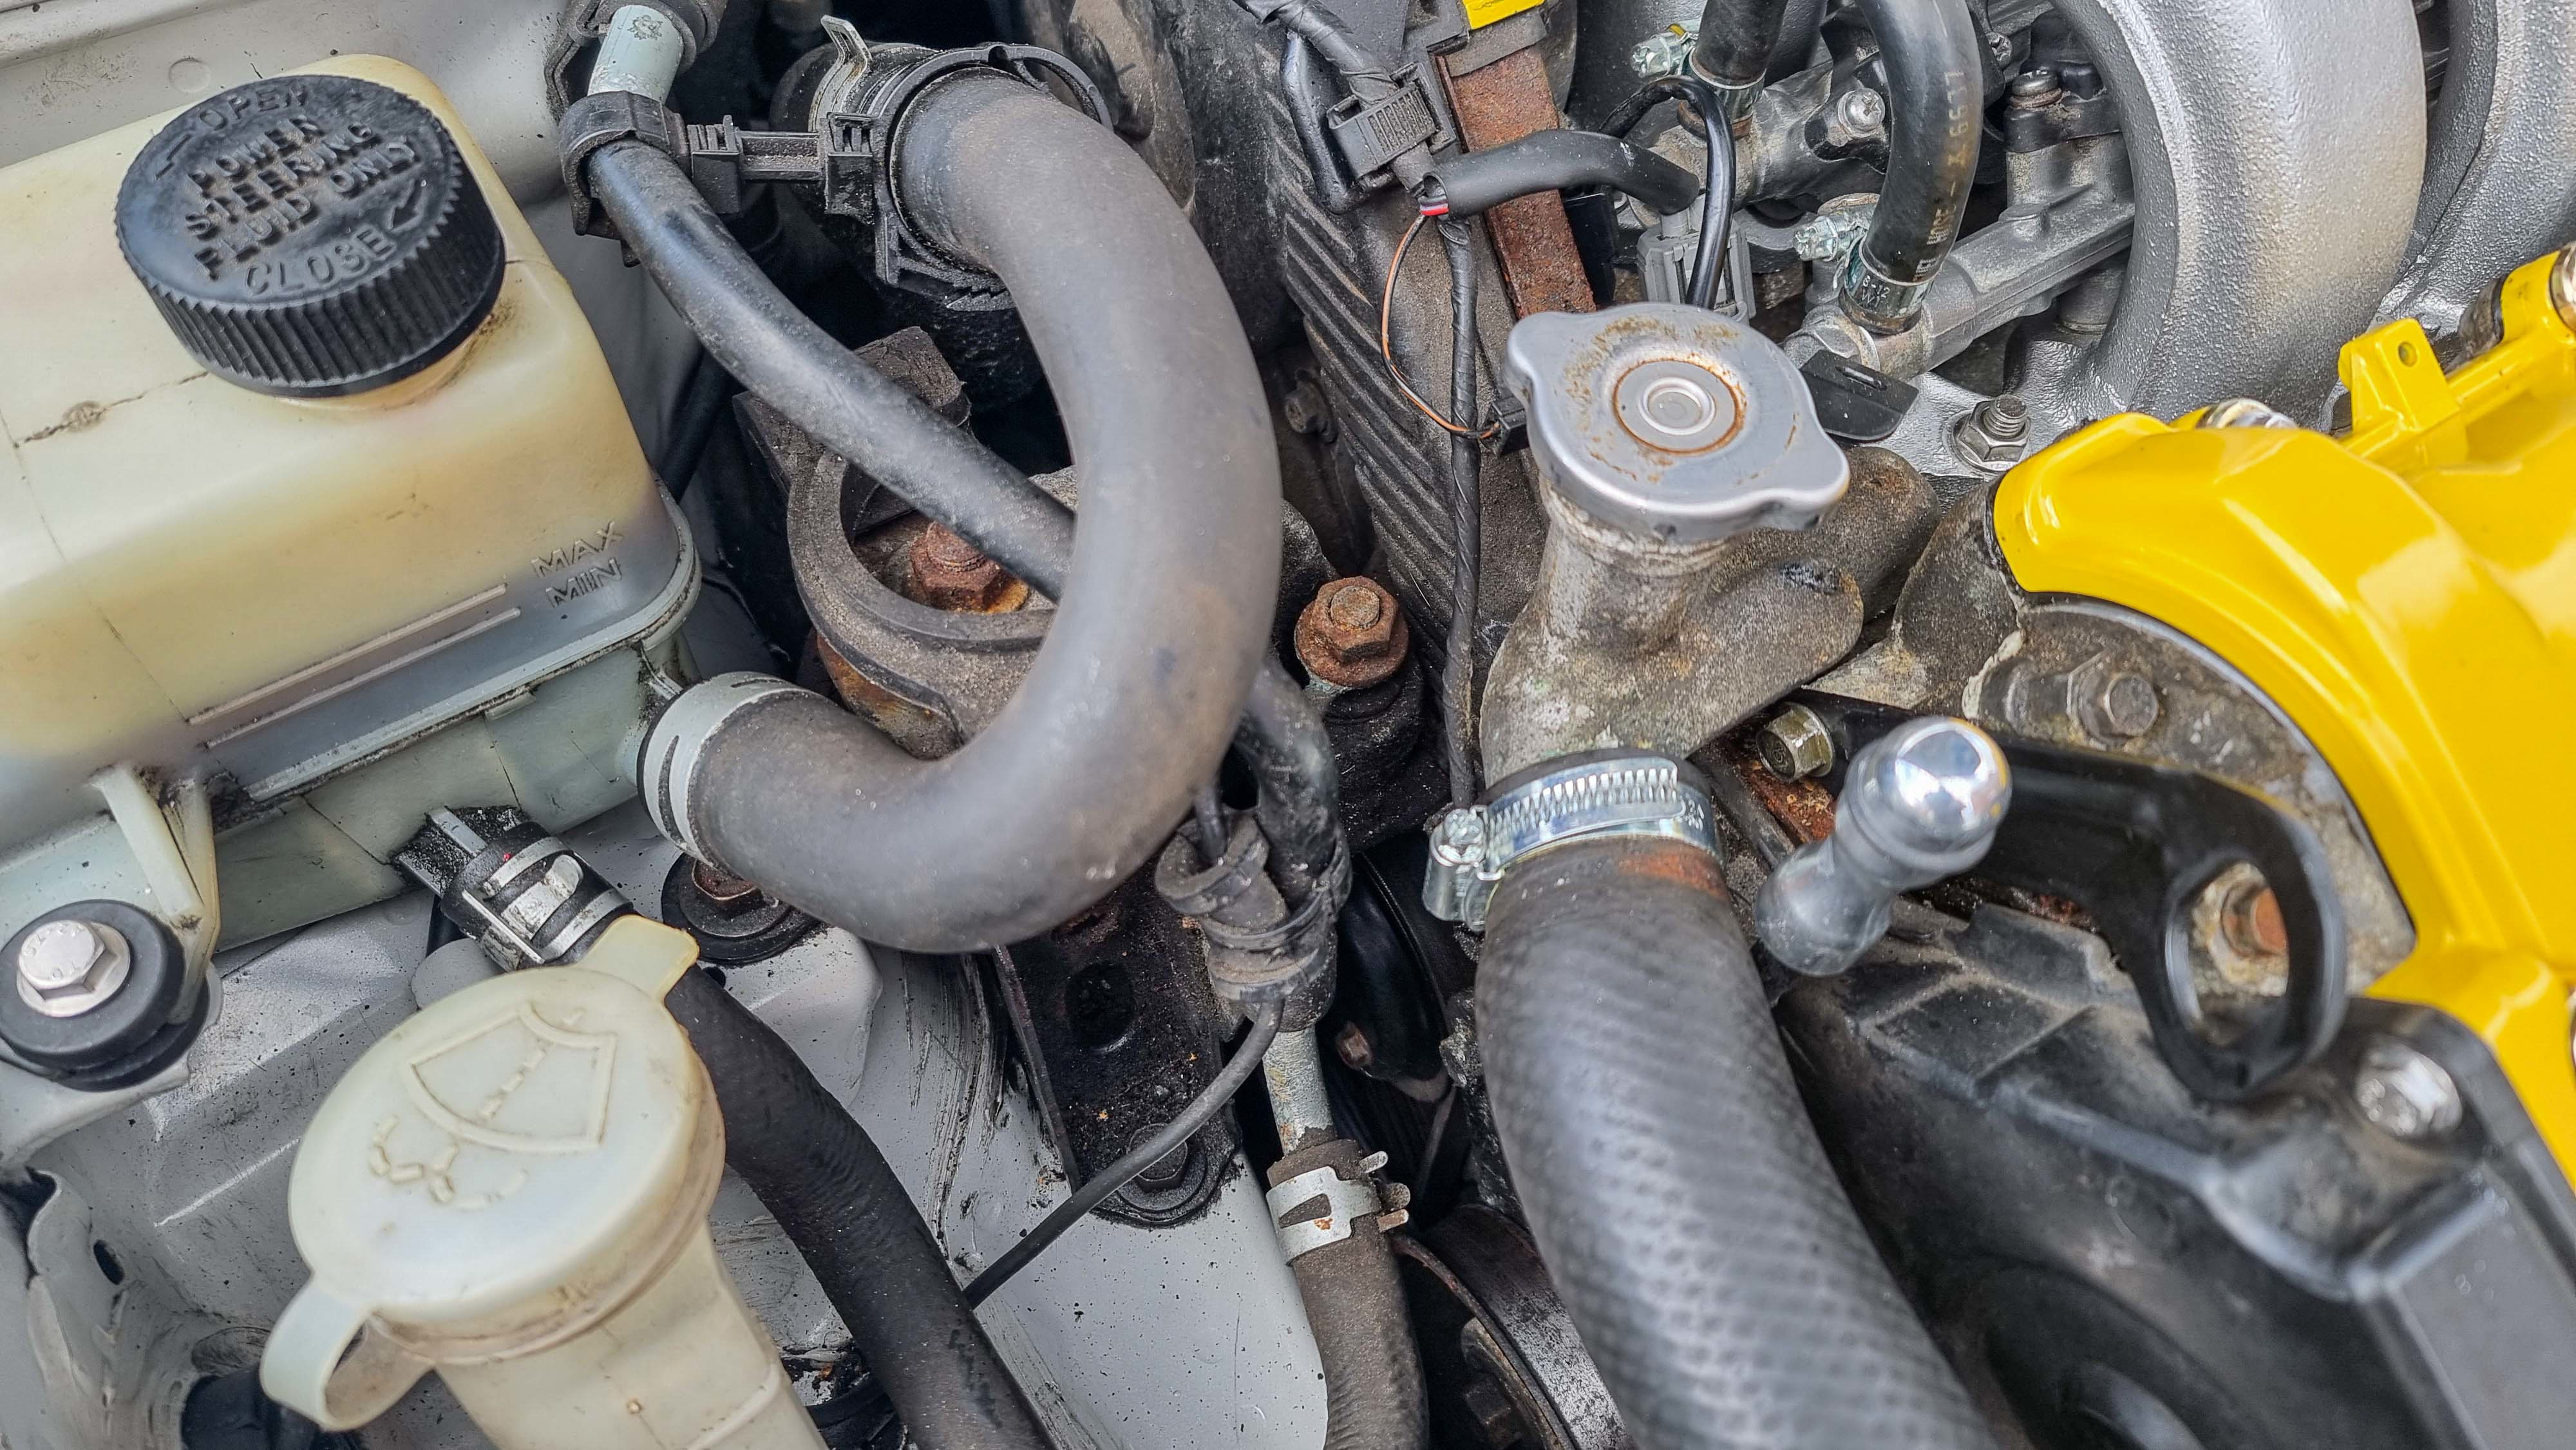
There's 2 bolts that hold the mount to the chassis. There's also a 10mm nut that holds a bracket onto the main mount.
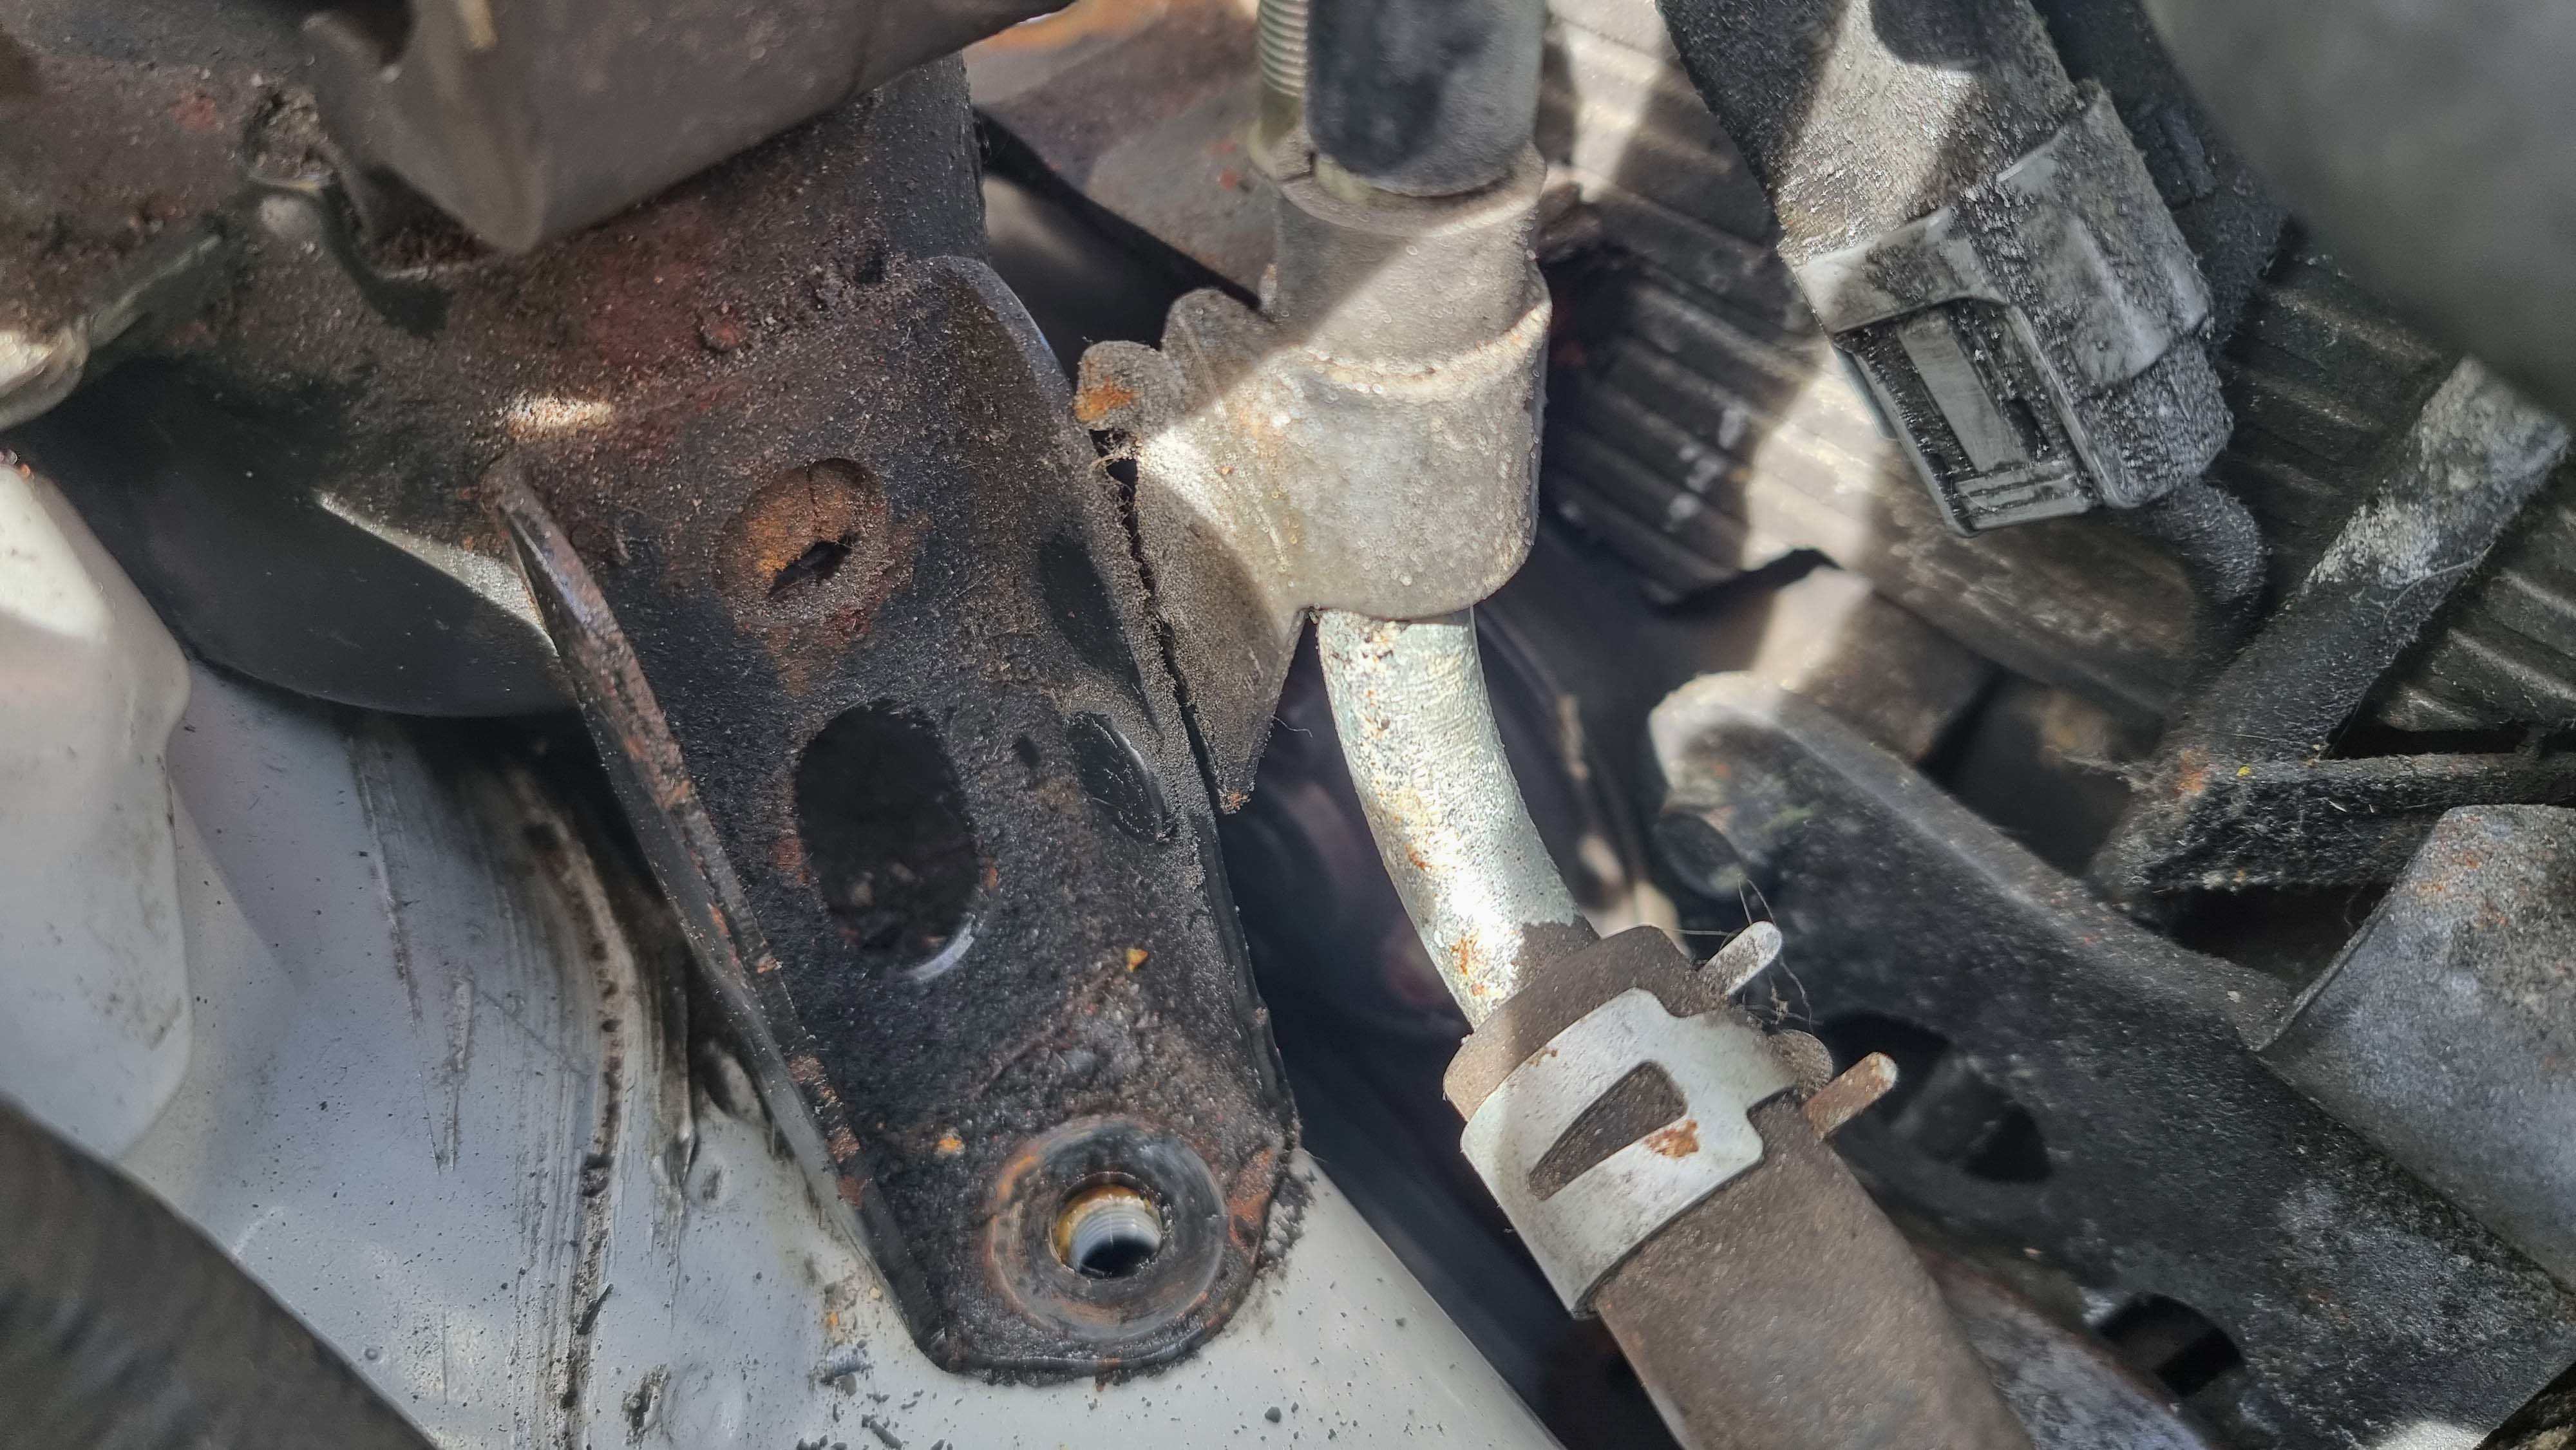
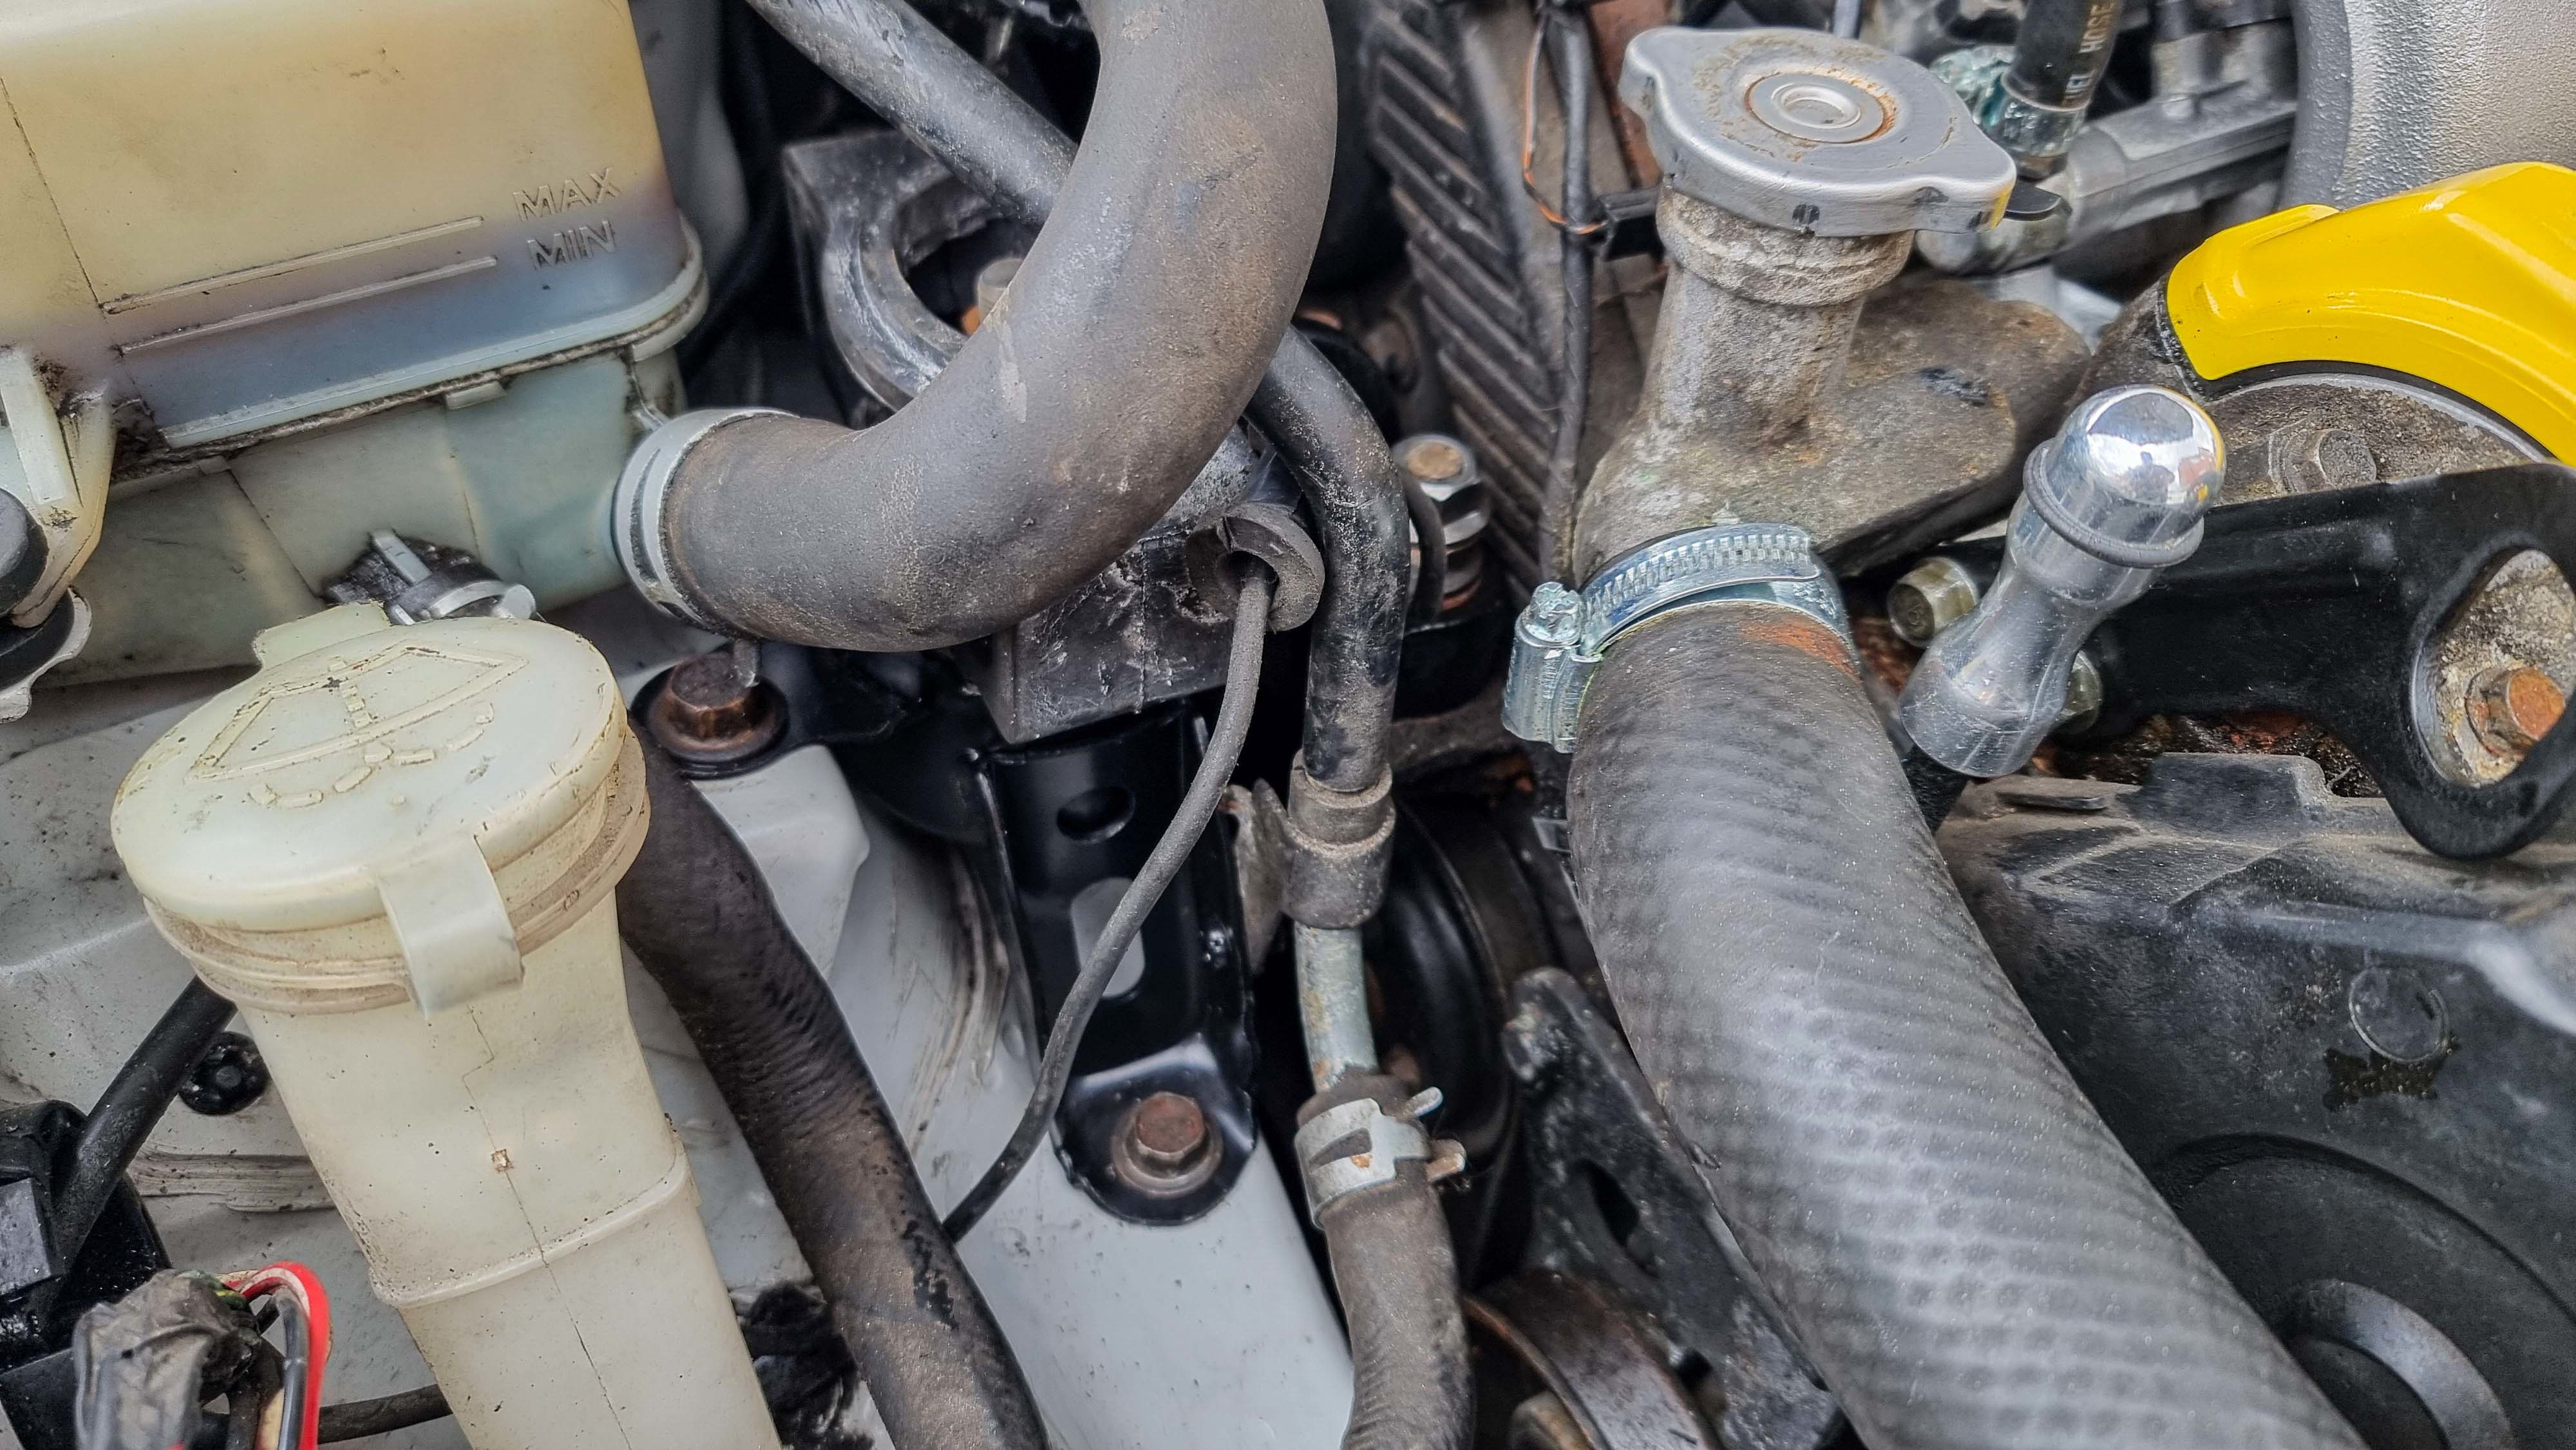
The powder steering reservoir needs unbolting and lifting up and off from the bracket. From here the mount can be removed while navigating under the hose.
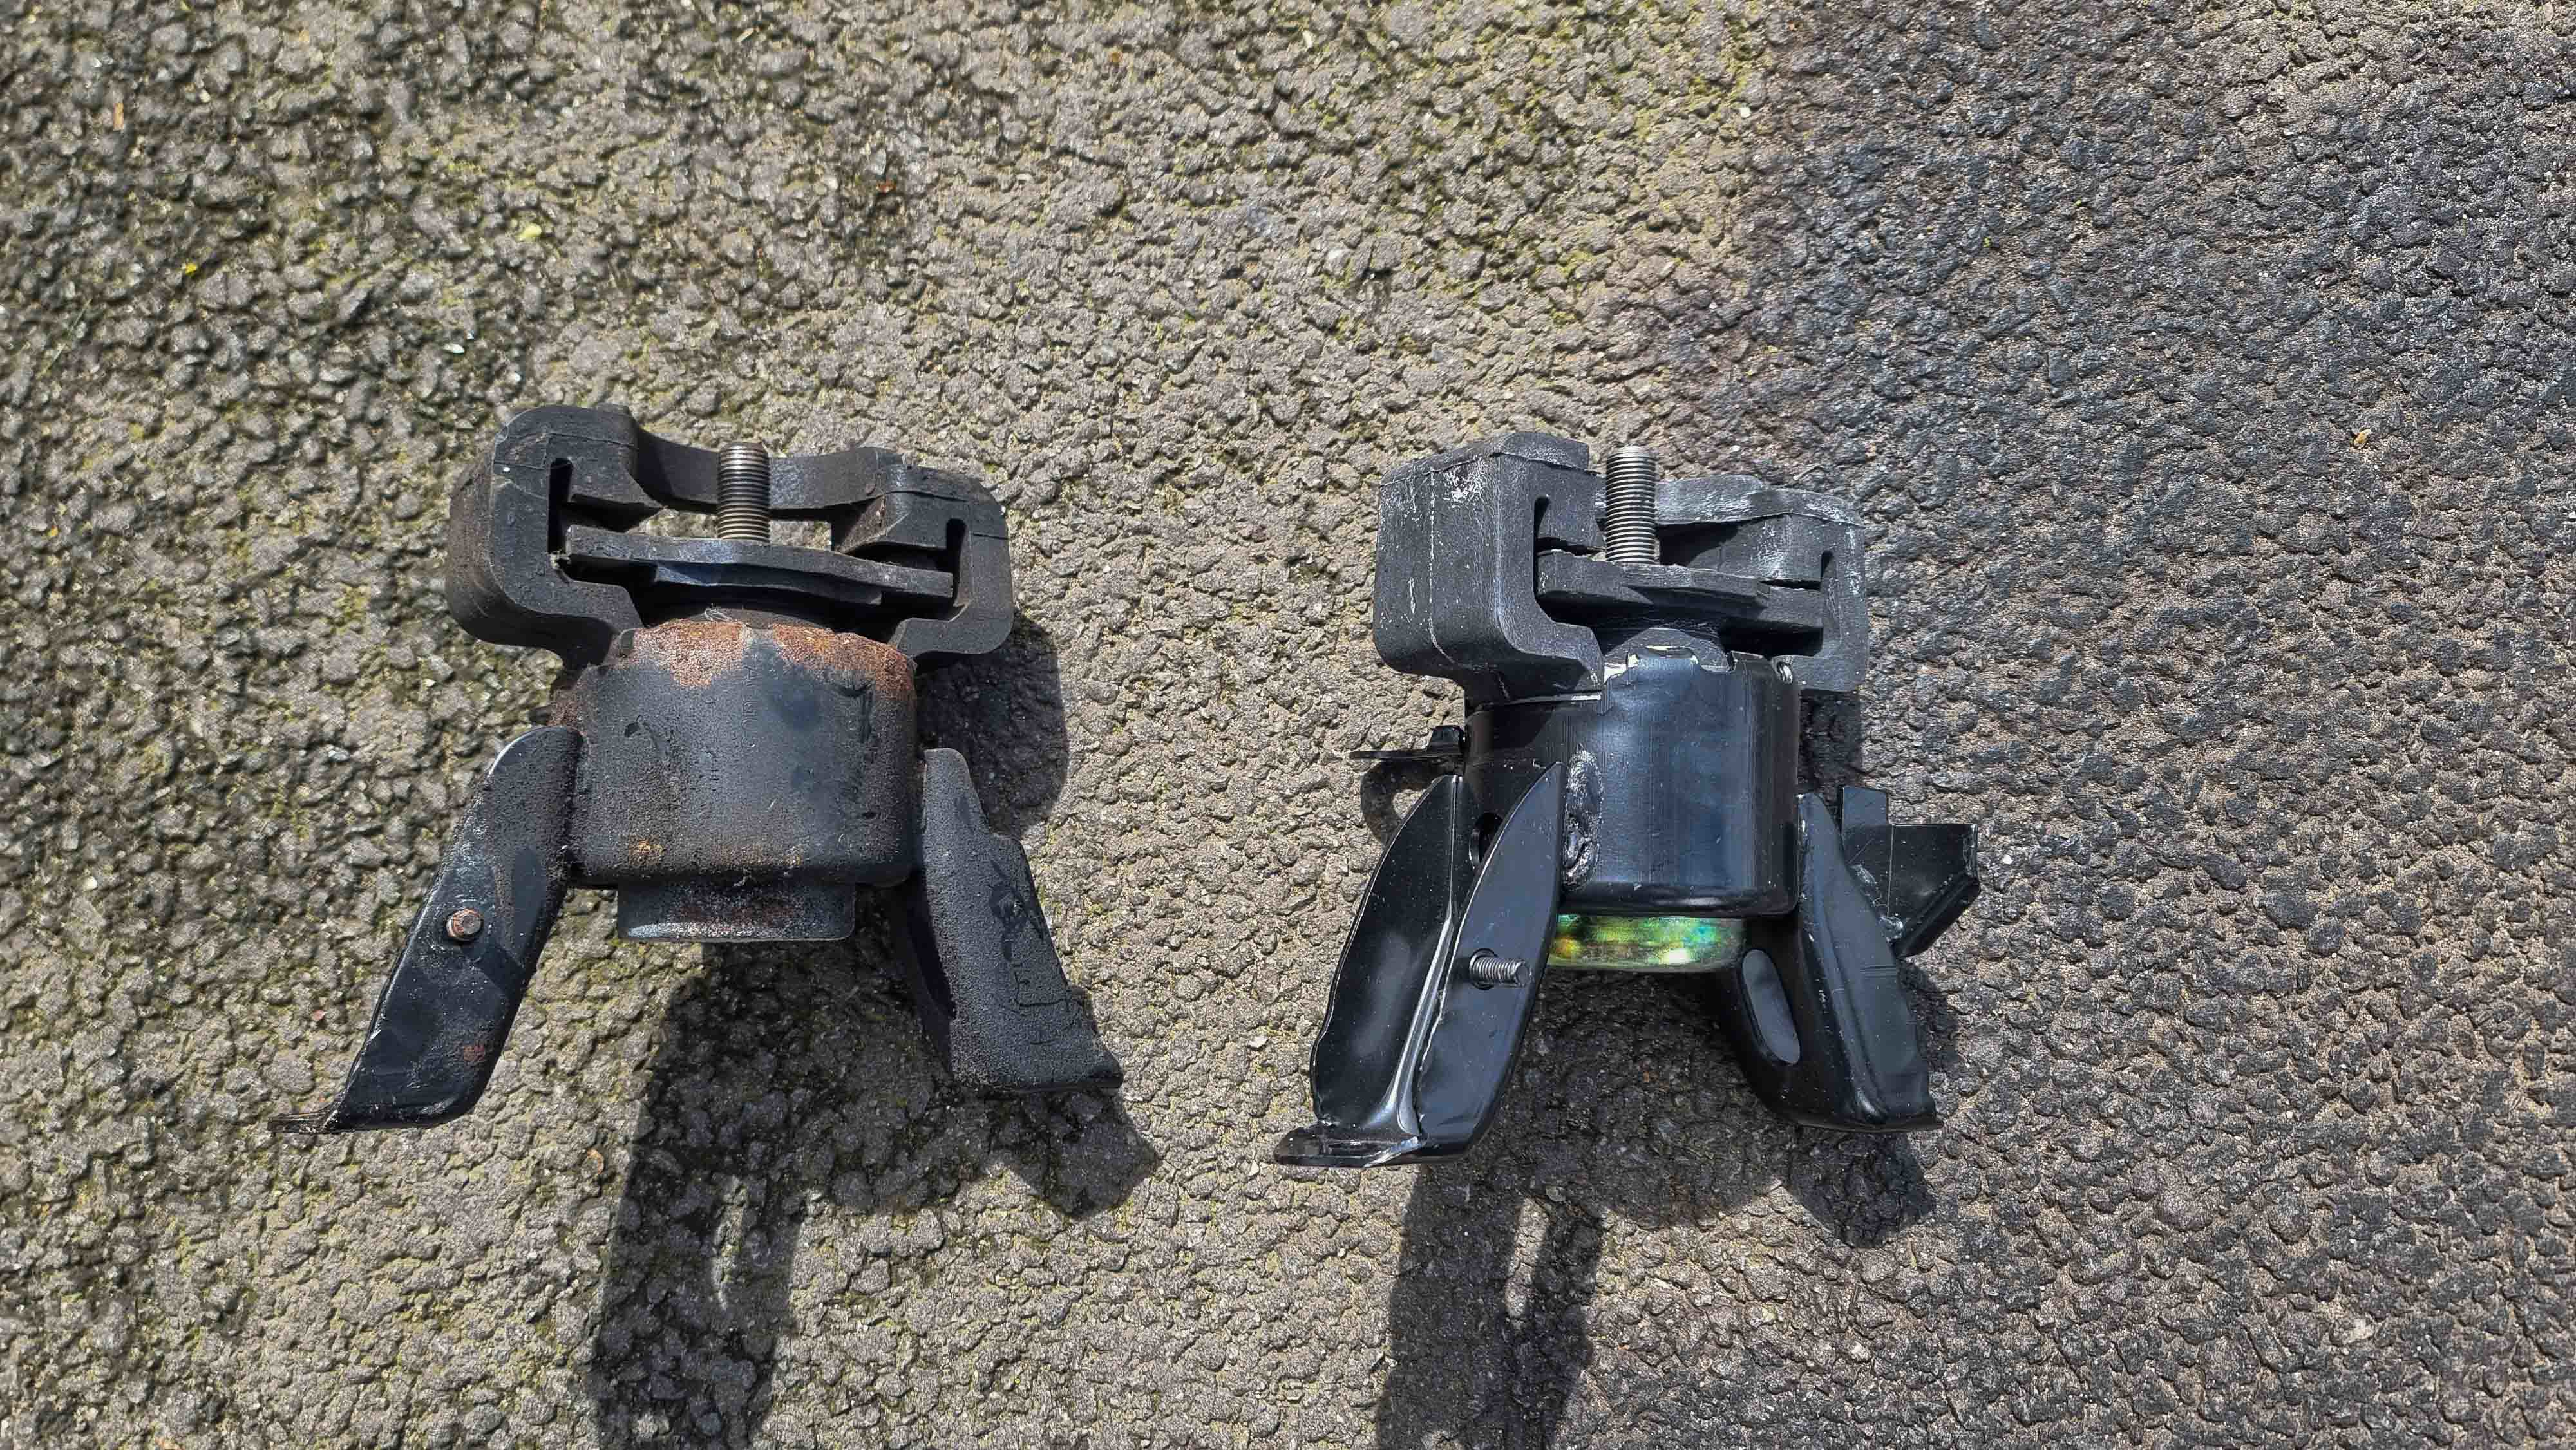
The mounts look pretty identical with a couple of minor differences. The top stud is longer on the new one and there's an additional bracket? on the right hand side which faces the bulk head.

At first thought I didn't think it would line up. But I threaded in the bolts by a couple of turns and they equally tighened up. The top bracket dropped straight on

Unfortunately I still have the knocking noise. I've got front lower ball joints and stabaliser links to change. But I've got a strong feeling it's going to be the rear engine mount. To do that the subframe needs removing because access to the bolts is blocked by the bulkhead.
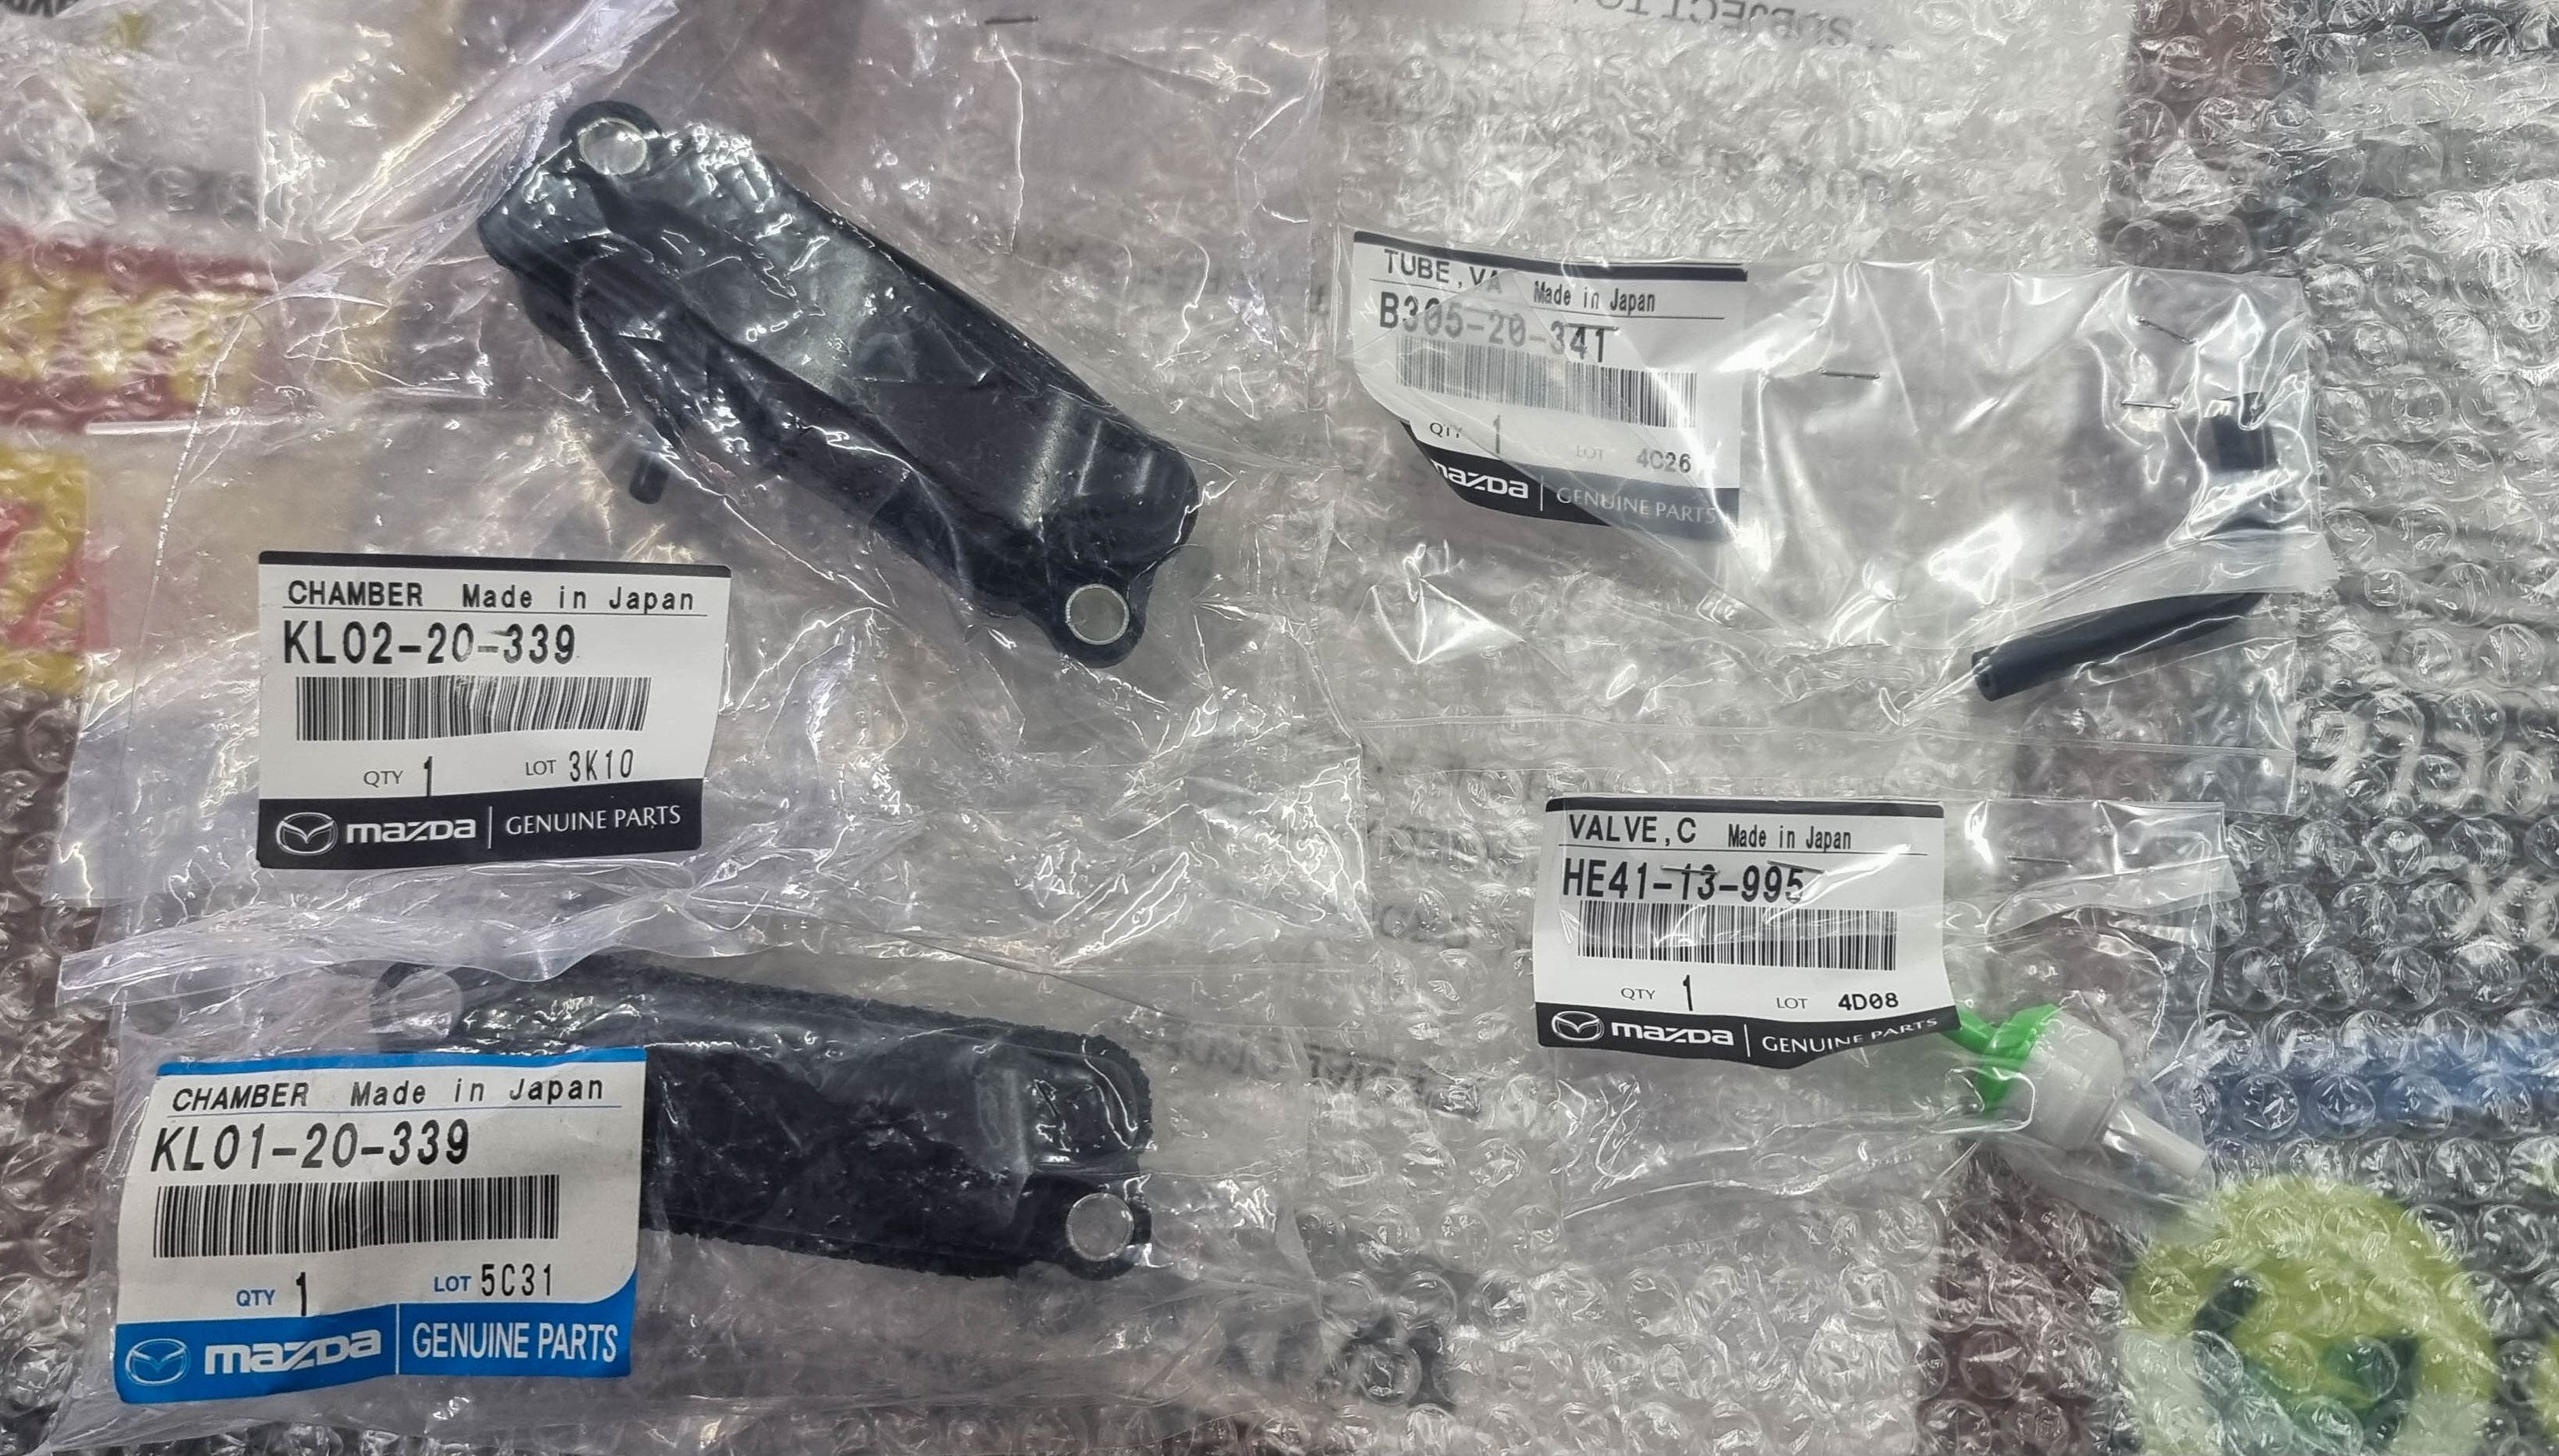
The next job was something that was being revisited from the engine bay refresh update. You may remember me breaking the check valve and barb on a vacuum chamber which are bolted to the underside of the inlet manifold.
I made an(other) order with Amayama for some replacement parts to fix the issue. I decided to buy both chambers, check valve and the elbow hose.
After the refresh I knew something wasn't right, the car was lacking a severe amount of power (well...what ever is left lol) So I knew it was related to the check valve I got from my work.
It didn't take long to remove the inlet manifold (I'm getting pretty good at doing this now!) to see what was causing me problems.
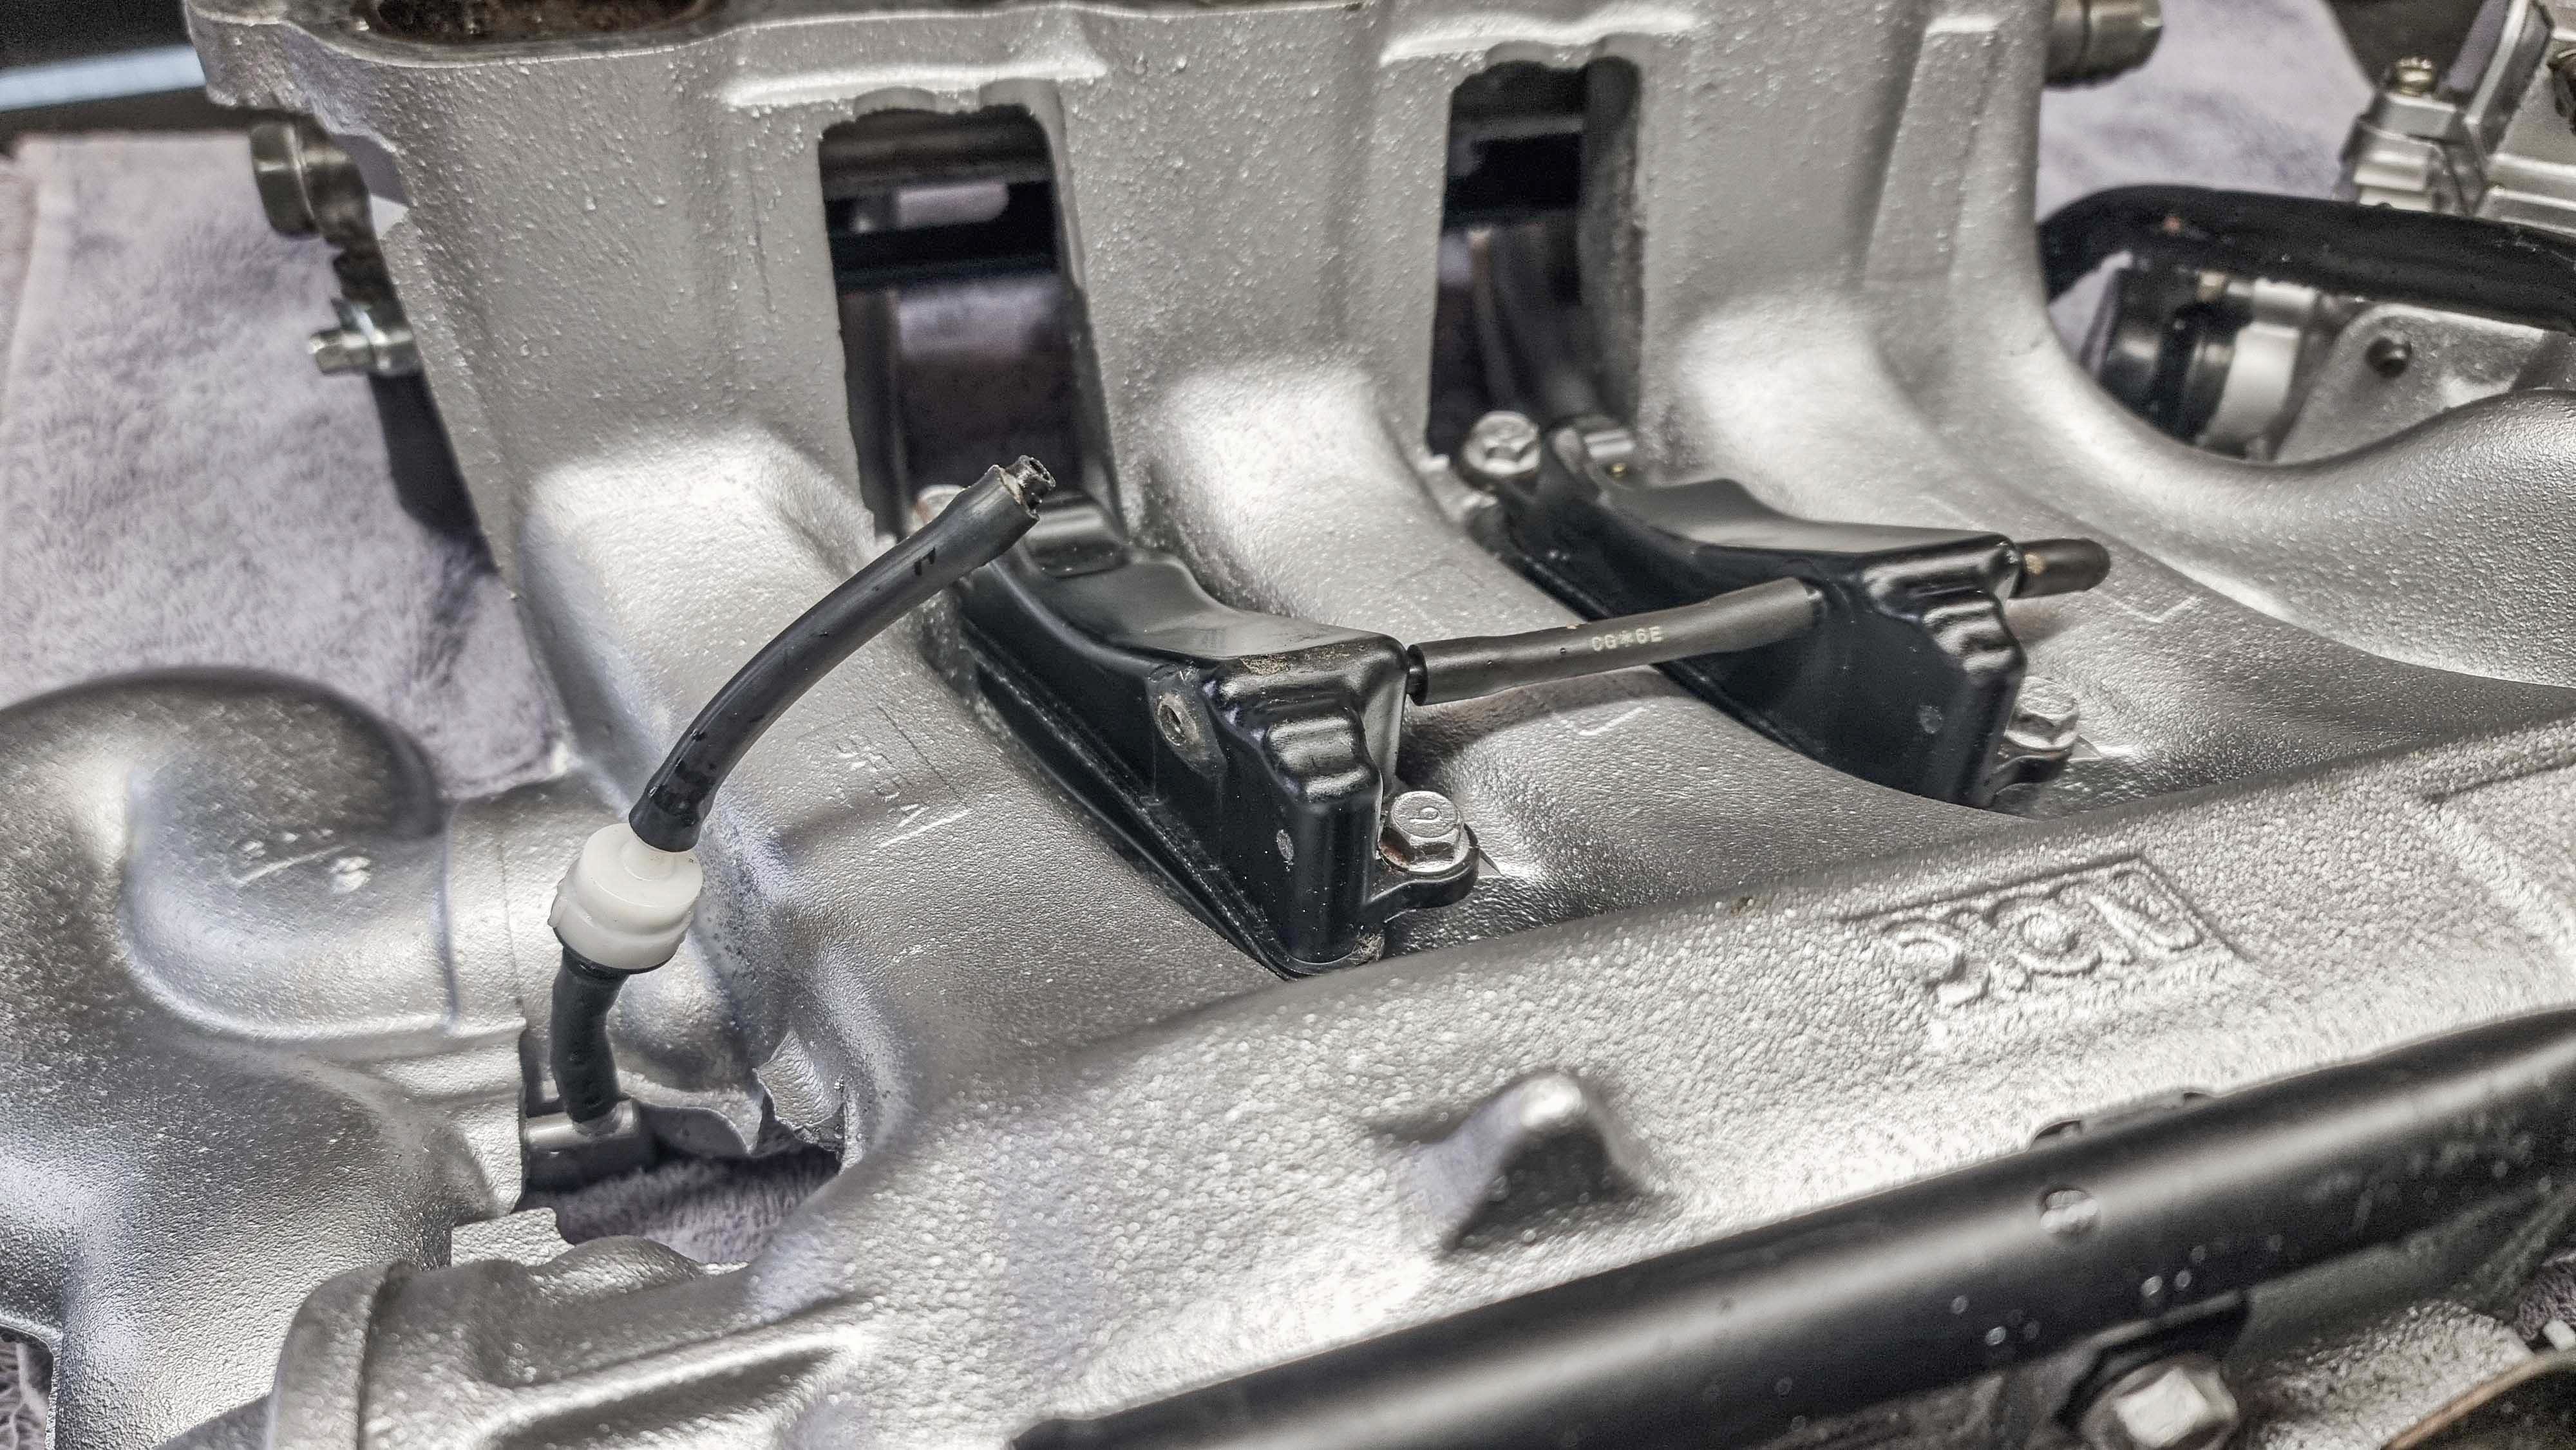
The barb had pulled itself out from the chamber (I already knew the glue had failed from last time), that would explain alot!
It didn't take long to fit the new parts, it's a good job I purchased the other chamber because that barb had snapped off to.
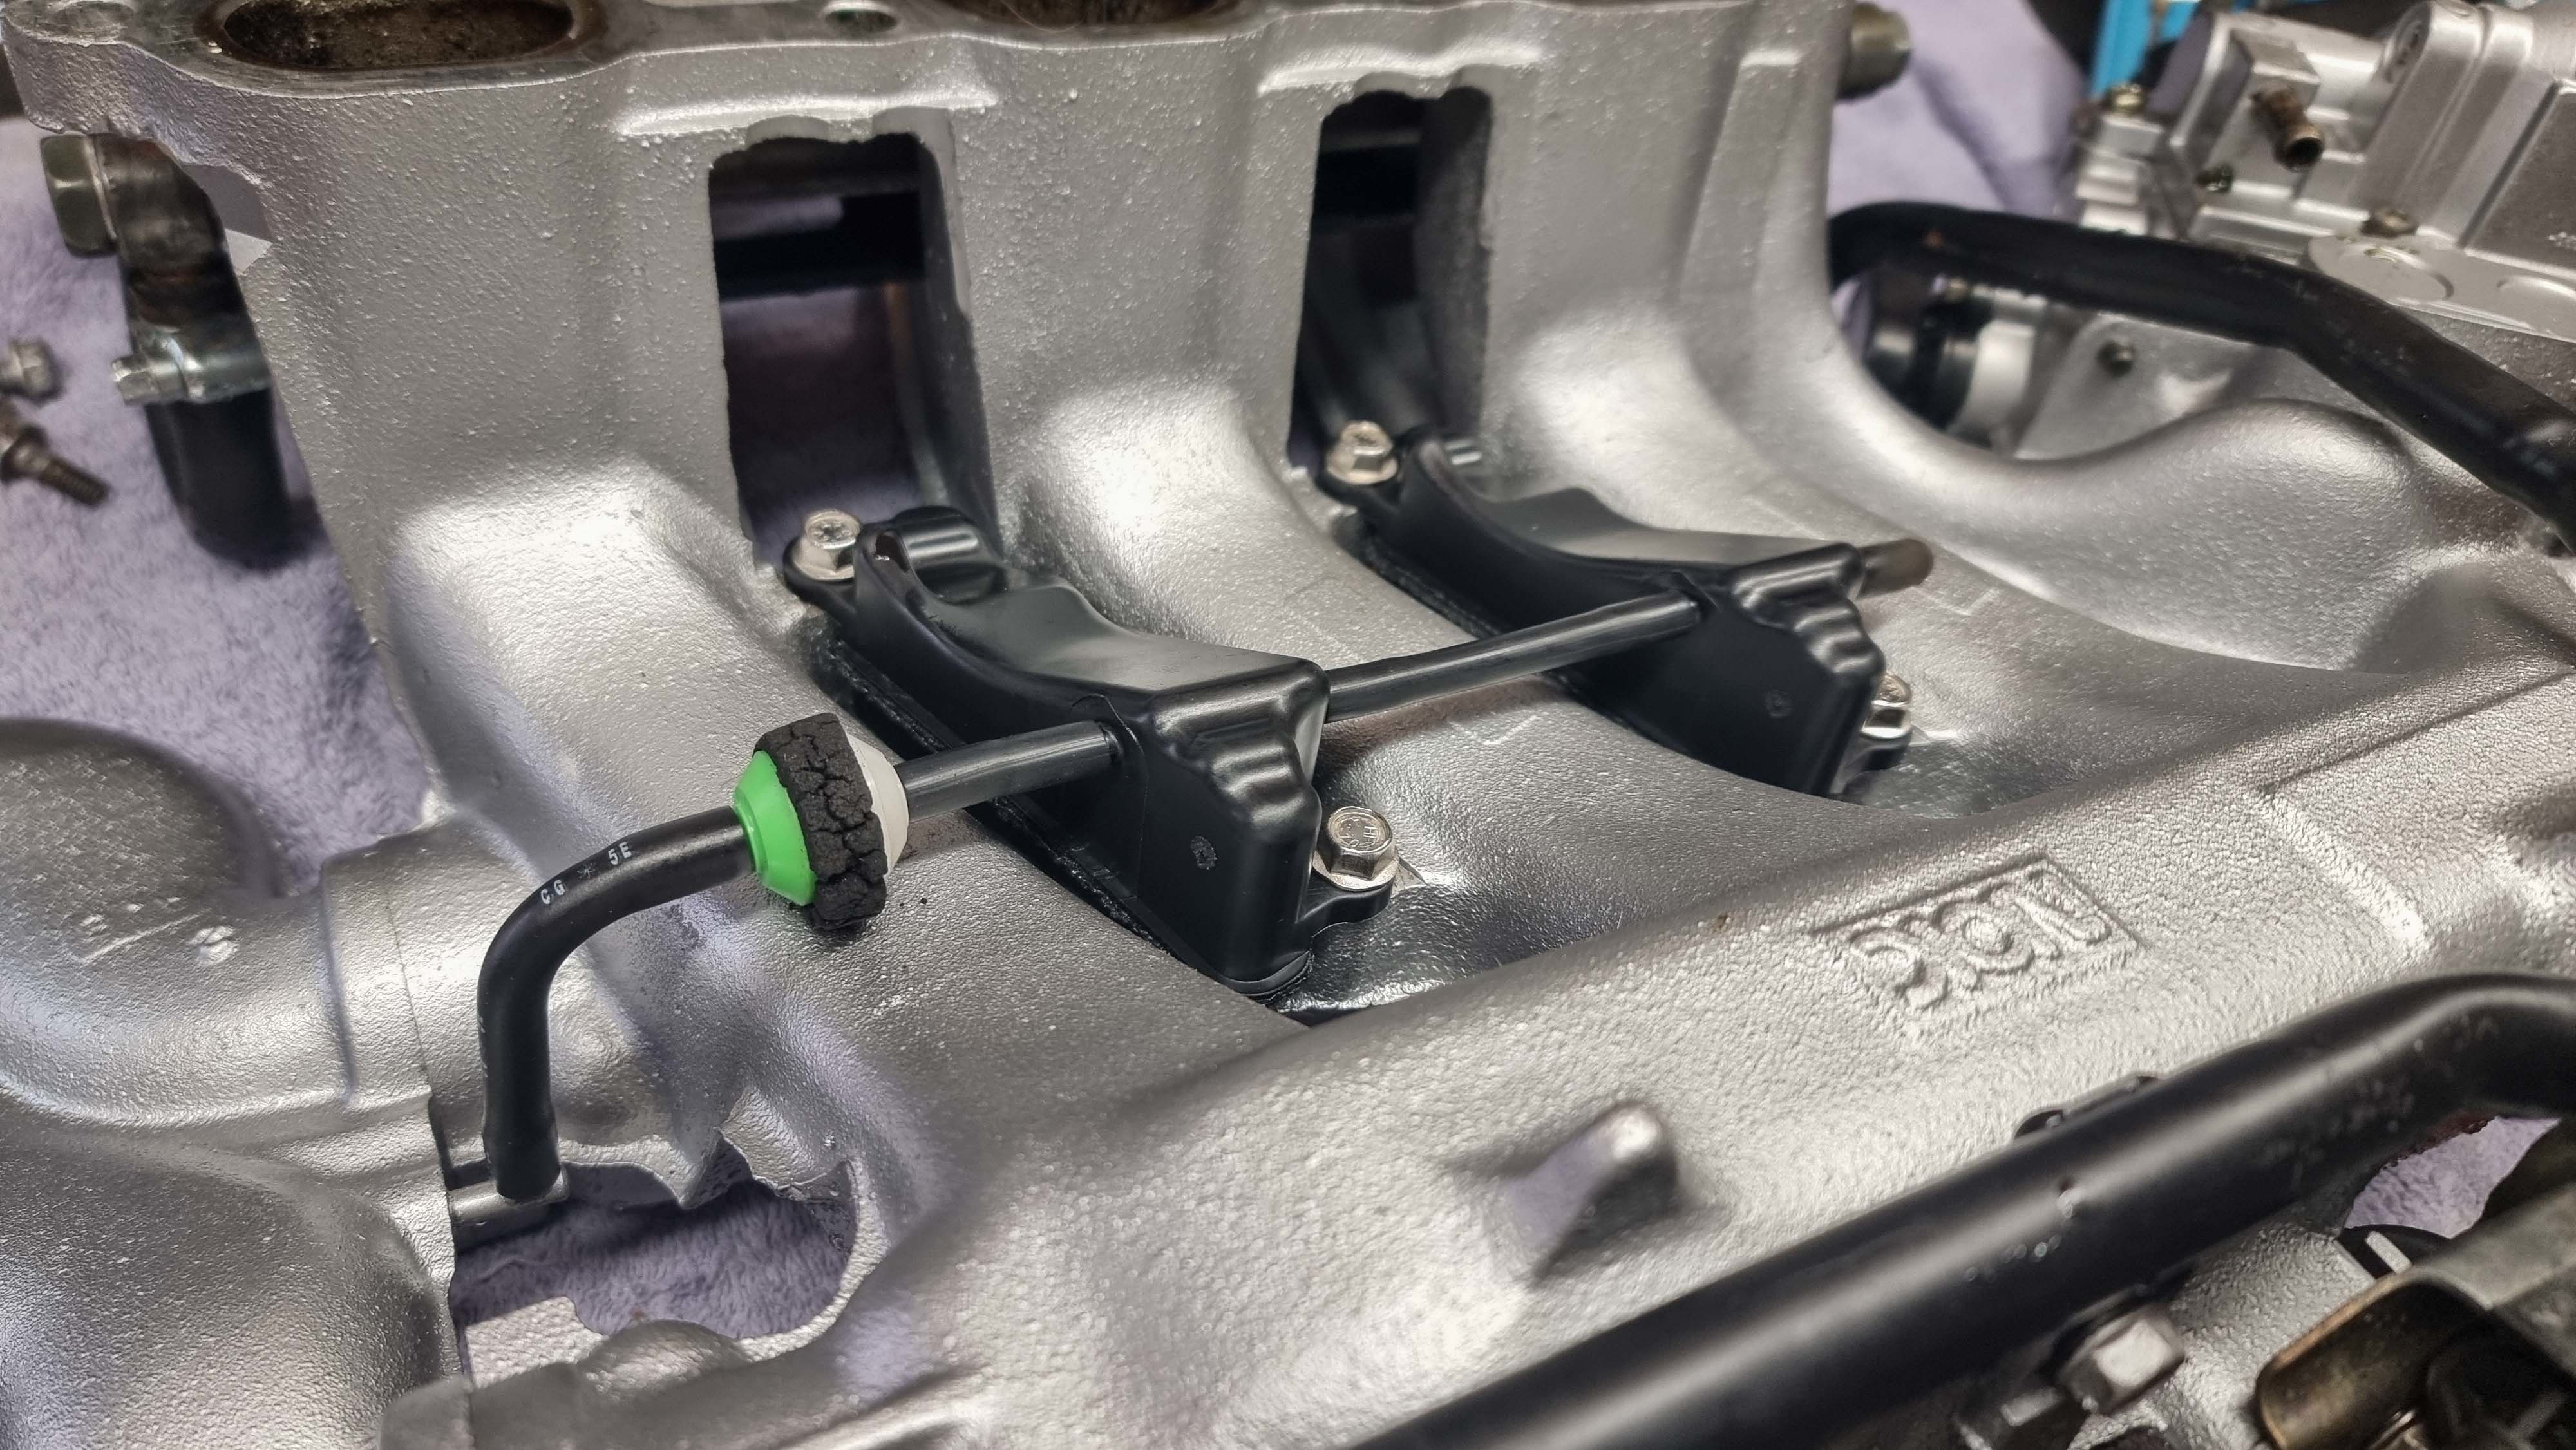
I'm kicking myself for not ordering a new foam buffer ring thing that goes around the check valve, it's just to stop the check valve from rubbing against the inlet manifold. Hopefully this one lasts a little while longer.
With it all back together it was time for a test drive. My face lit up when the VRIS engaged and the car was back to running normal again.
Youtube video can be found here:
https://www.youtube.com/watch?v=sLt9-6Hpxps
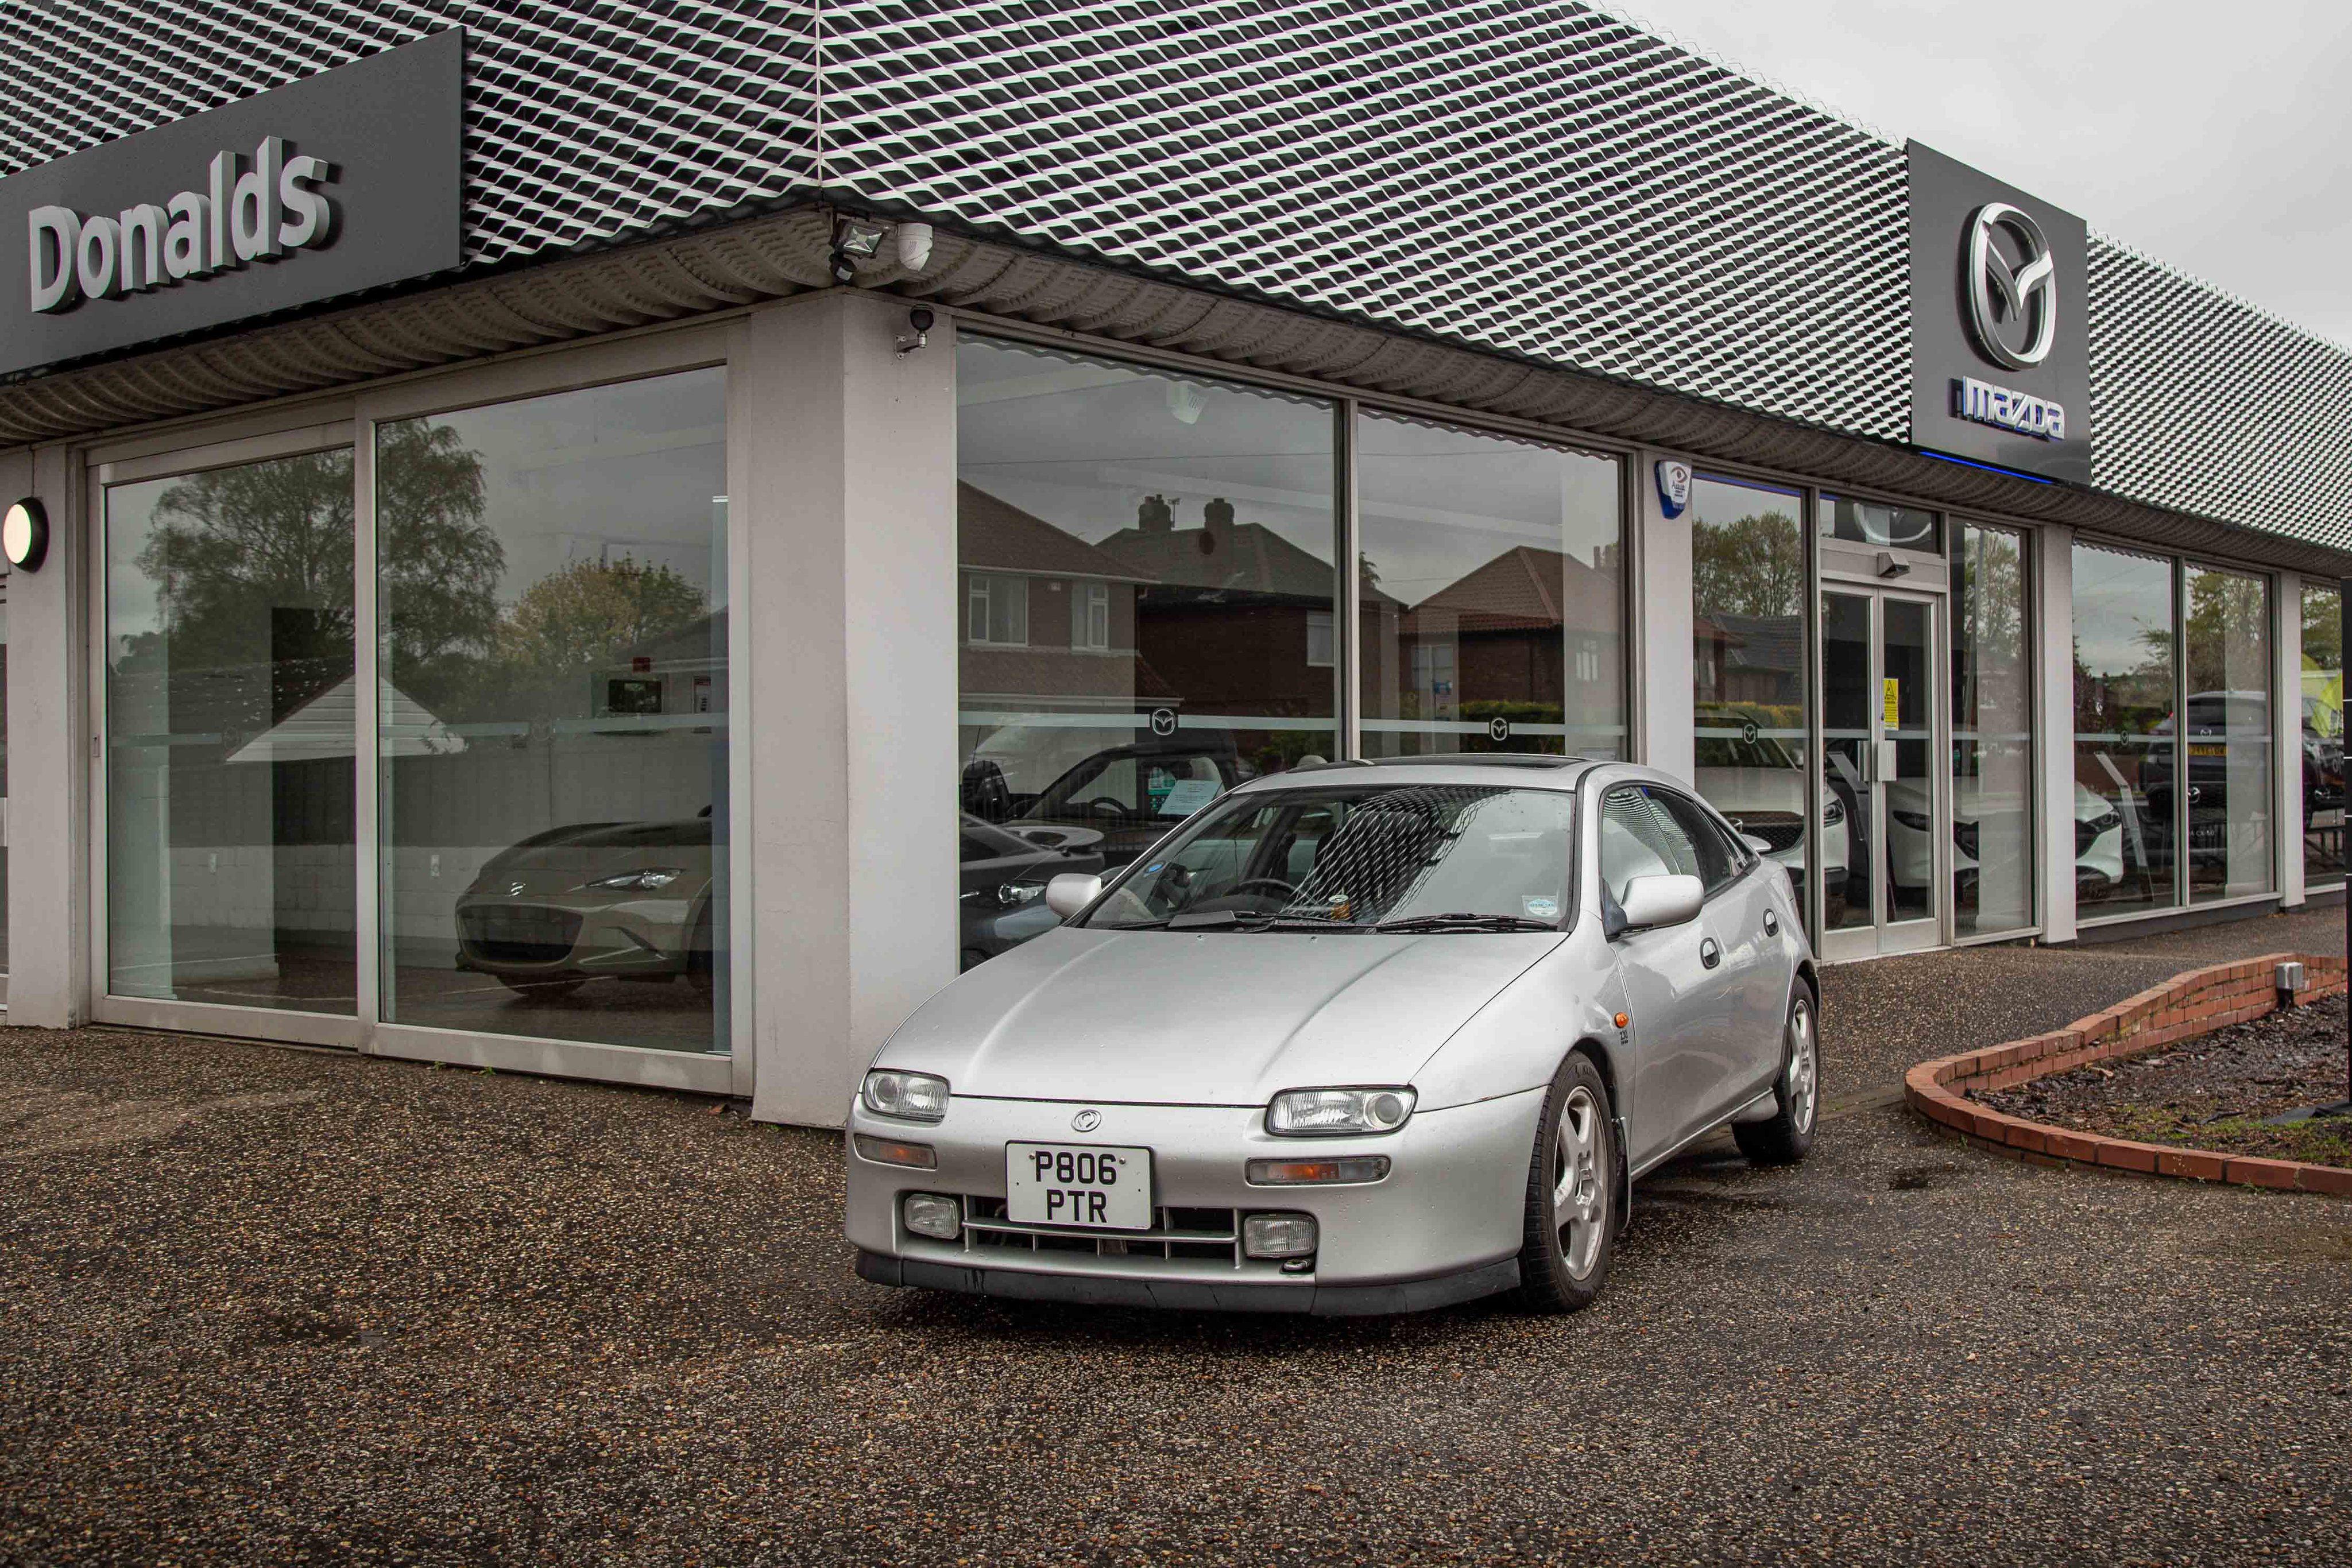
A couple of Sunday's ago I was invited to the local Mazda dealership for a small event they had organised for the 35th Anniversary of the MX5 (or Miata to some readers), it was also the 30th Anniversary of the 323F  . The MX5 club were there having a number of cars on display. I did arrive late due to being at my Cars & Coffee event that I organise.
The rain hadn't stopped all morning so alot of people had already left. The event finished at 12:30pm and I waited till everyone had left so I could get some photos outside the dealership.
Fun Fact: The owners manual that I got sent by another member, that car was originally sold at this dealership back in the mid '90s. The staff even recognised the signatures in the service history.
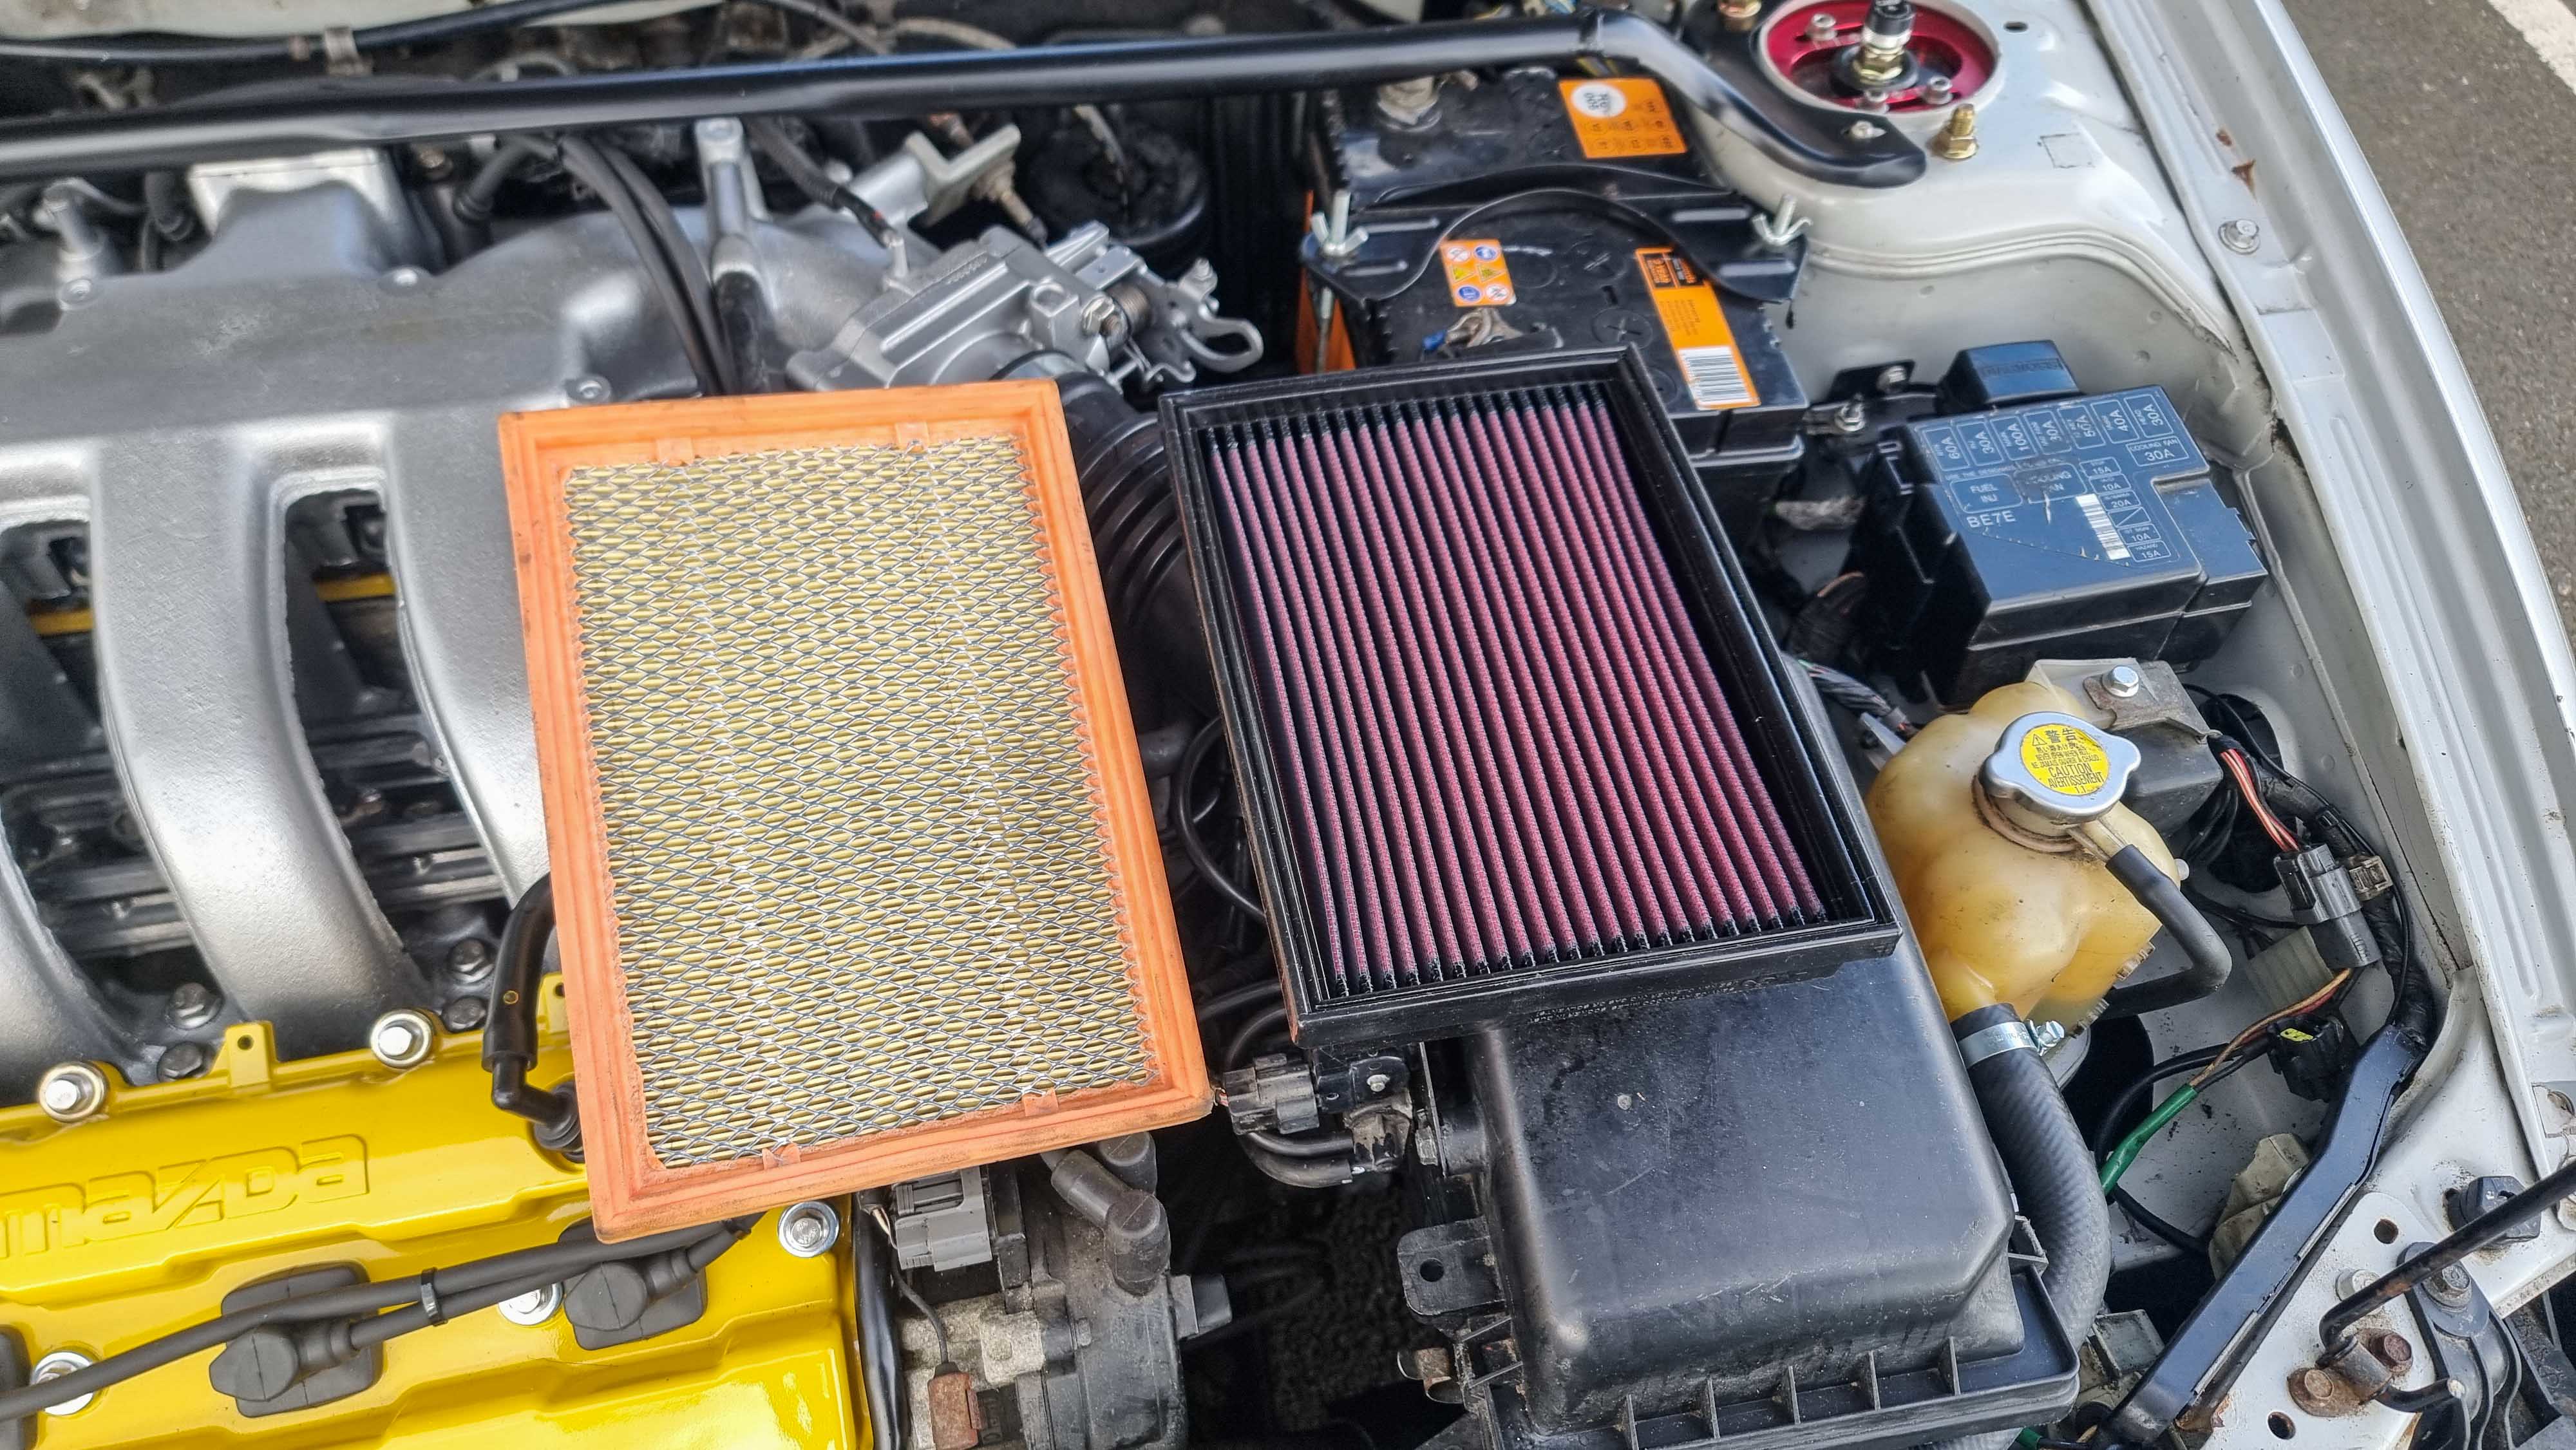
I managed to find a new old stock K&N panel filter. The bag had been opened so chances were high of the oil being non-existant. I ordered a recharge kit (cleaner and oil) and set about re-oiling the filter before installing.
The Youtube video can be found here:
https://www.youtube.com/watch?v=KWYx9-LvPlg
The last part of this update was an interior change. The car came with a steering wheel boss kit so I decided to put it to good use. These cars probably weren't designed for larger people like myself and I'm ashamed to admit that it can be a squeeze getting in and out.
With the battery disconnected and left for a couple of hours I could get to work with removing the airbag. There's x4 10mm bolts holding it on. With the airbag pulled out it revealed the loom, a large blue plug that housed a smaller blue plug and an orange one.
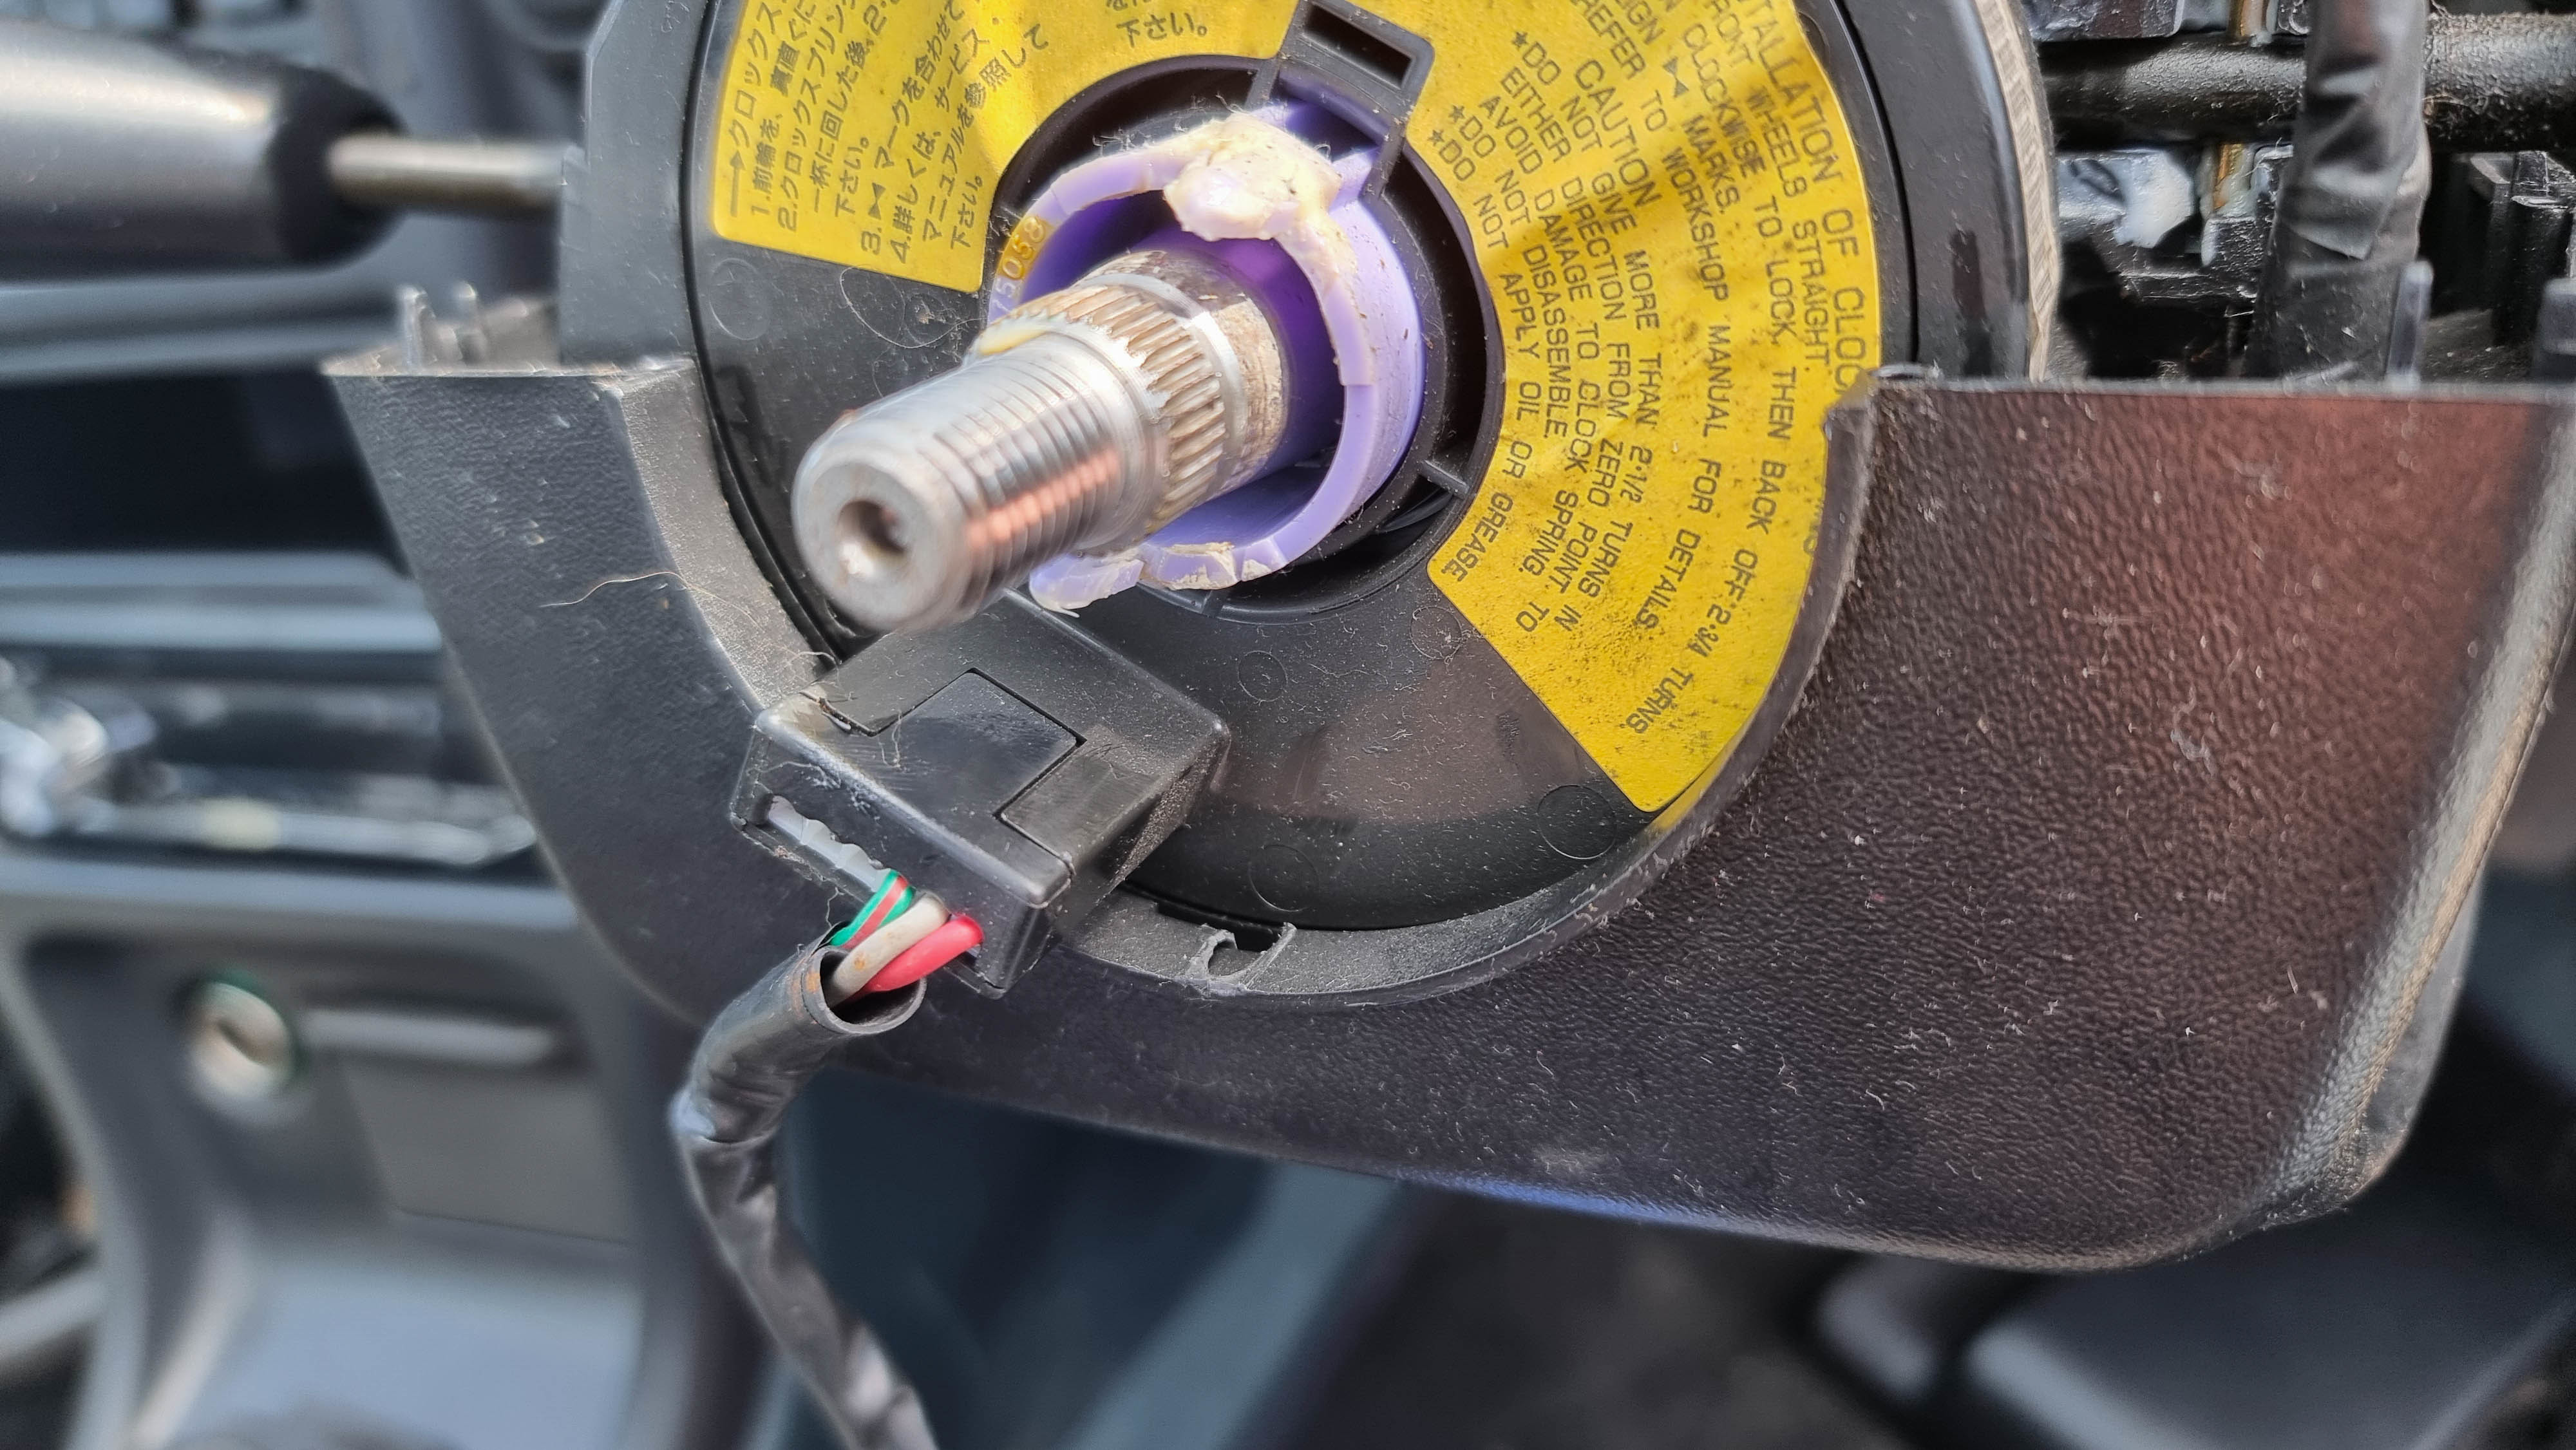
I couldn't unplug the short loom that goes to the clock spring. I followed the wiring back and found another blue and orange plug.
** FOR FUTURE REFERENCE ** The Orange plug with single wire is for the horn. The blue plug with 2 wires are for the airbag
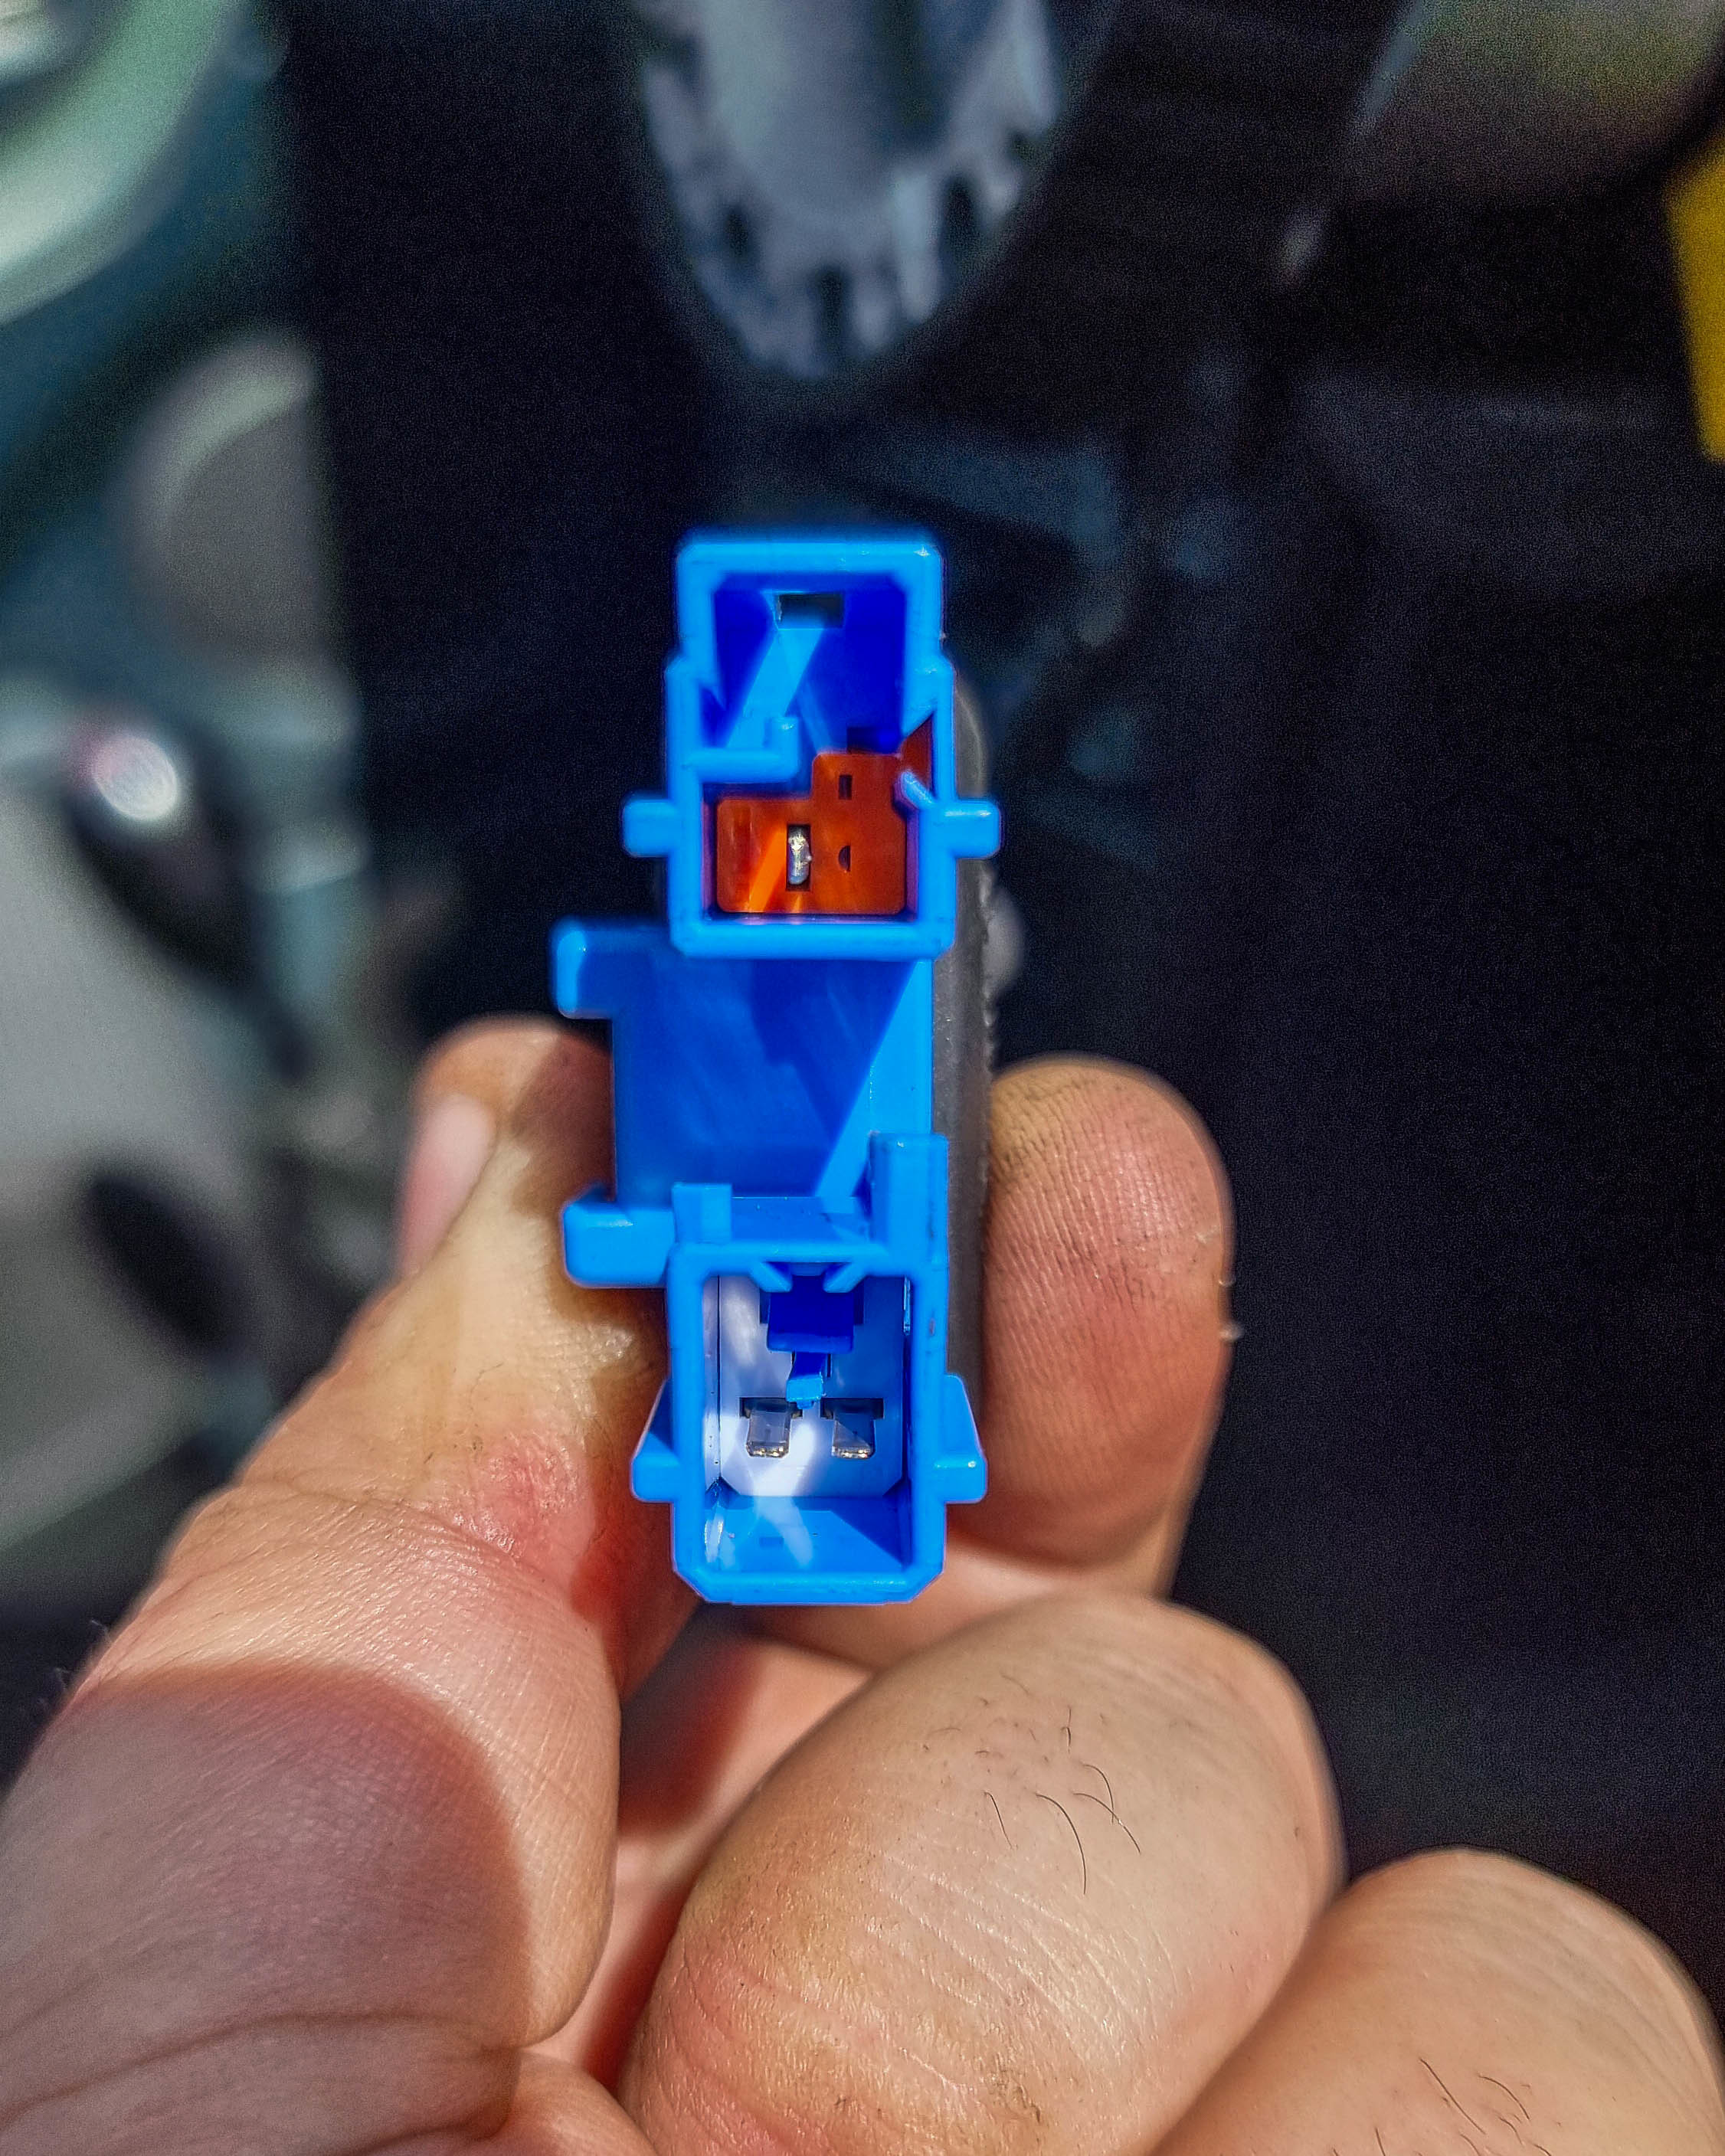
Club member Paul kindly sent me a couple of resistors, I pushed them into the blue plug and taped it up. I wrapped the wiring around the boss and pushed the cover for the HKB boss over the top.
Unfortunately the resistor still put the airbag light on the dash. I'm hoping its from a poor connection, but I didn't have my soldering iron to hand to make a little adaptor. I got the steering wheel bolted onto the hub and went for a test drive.
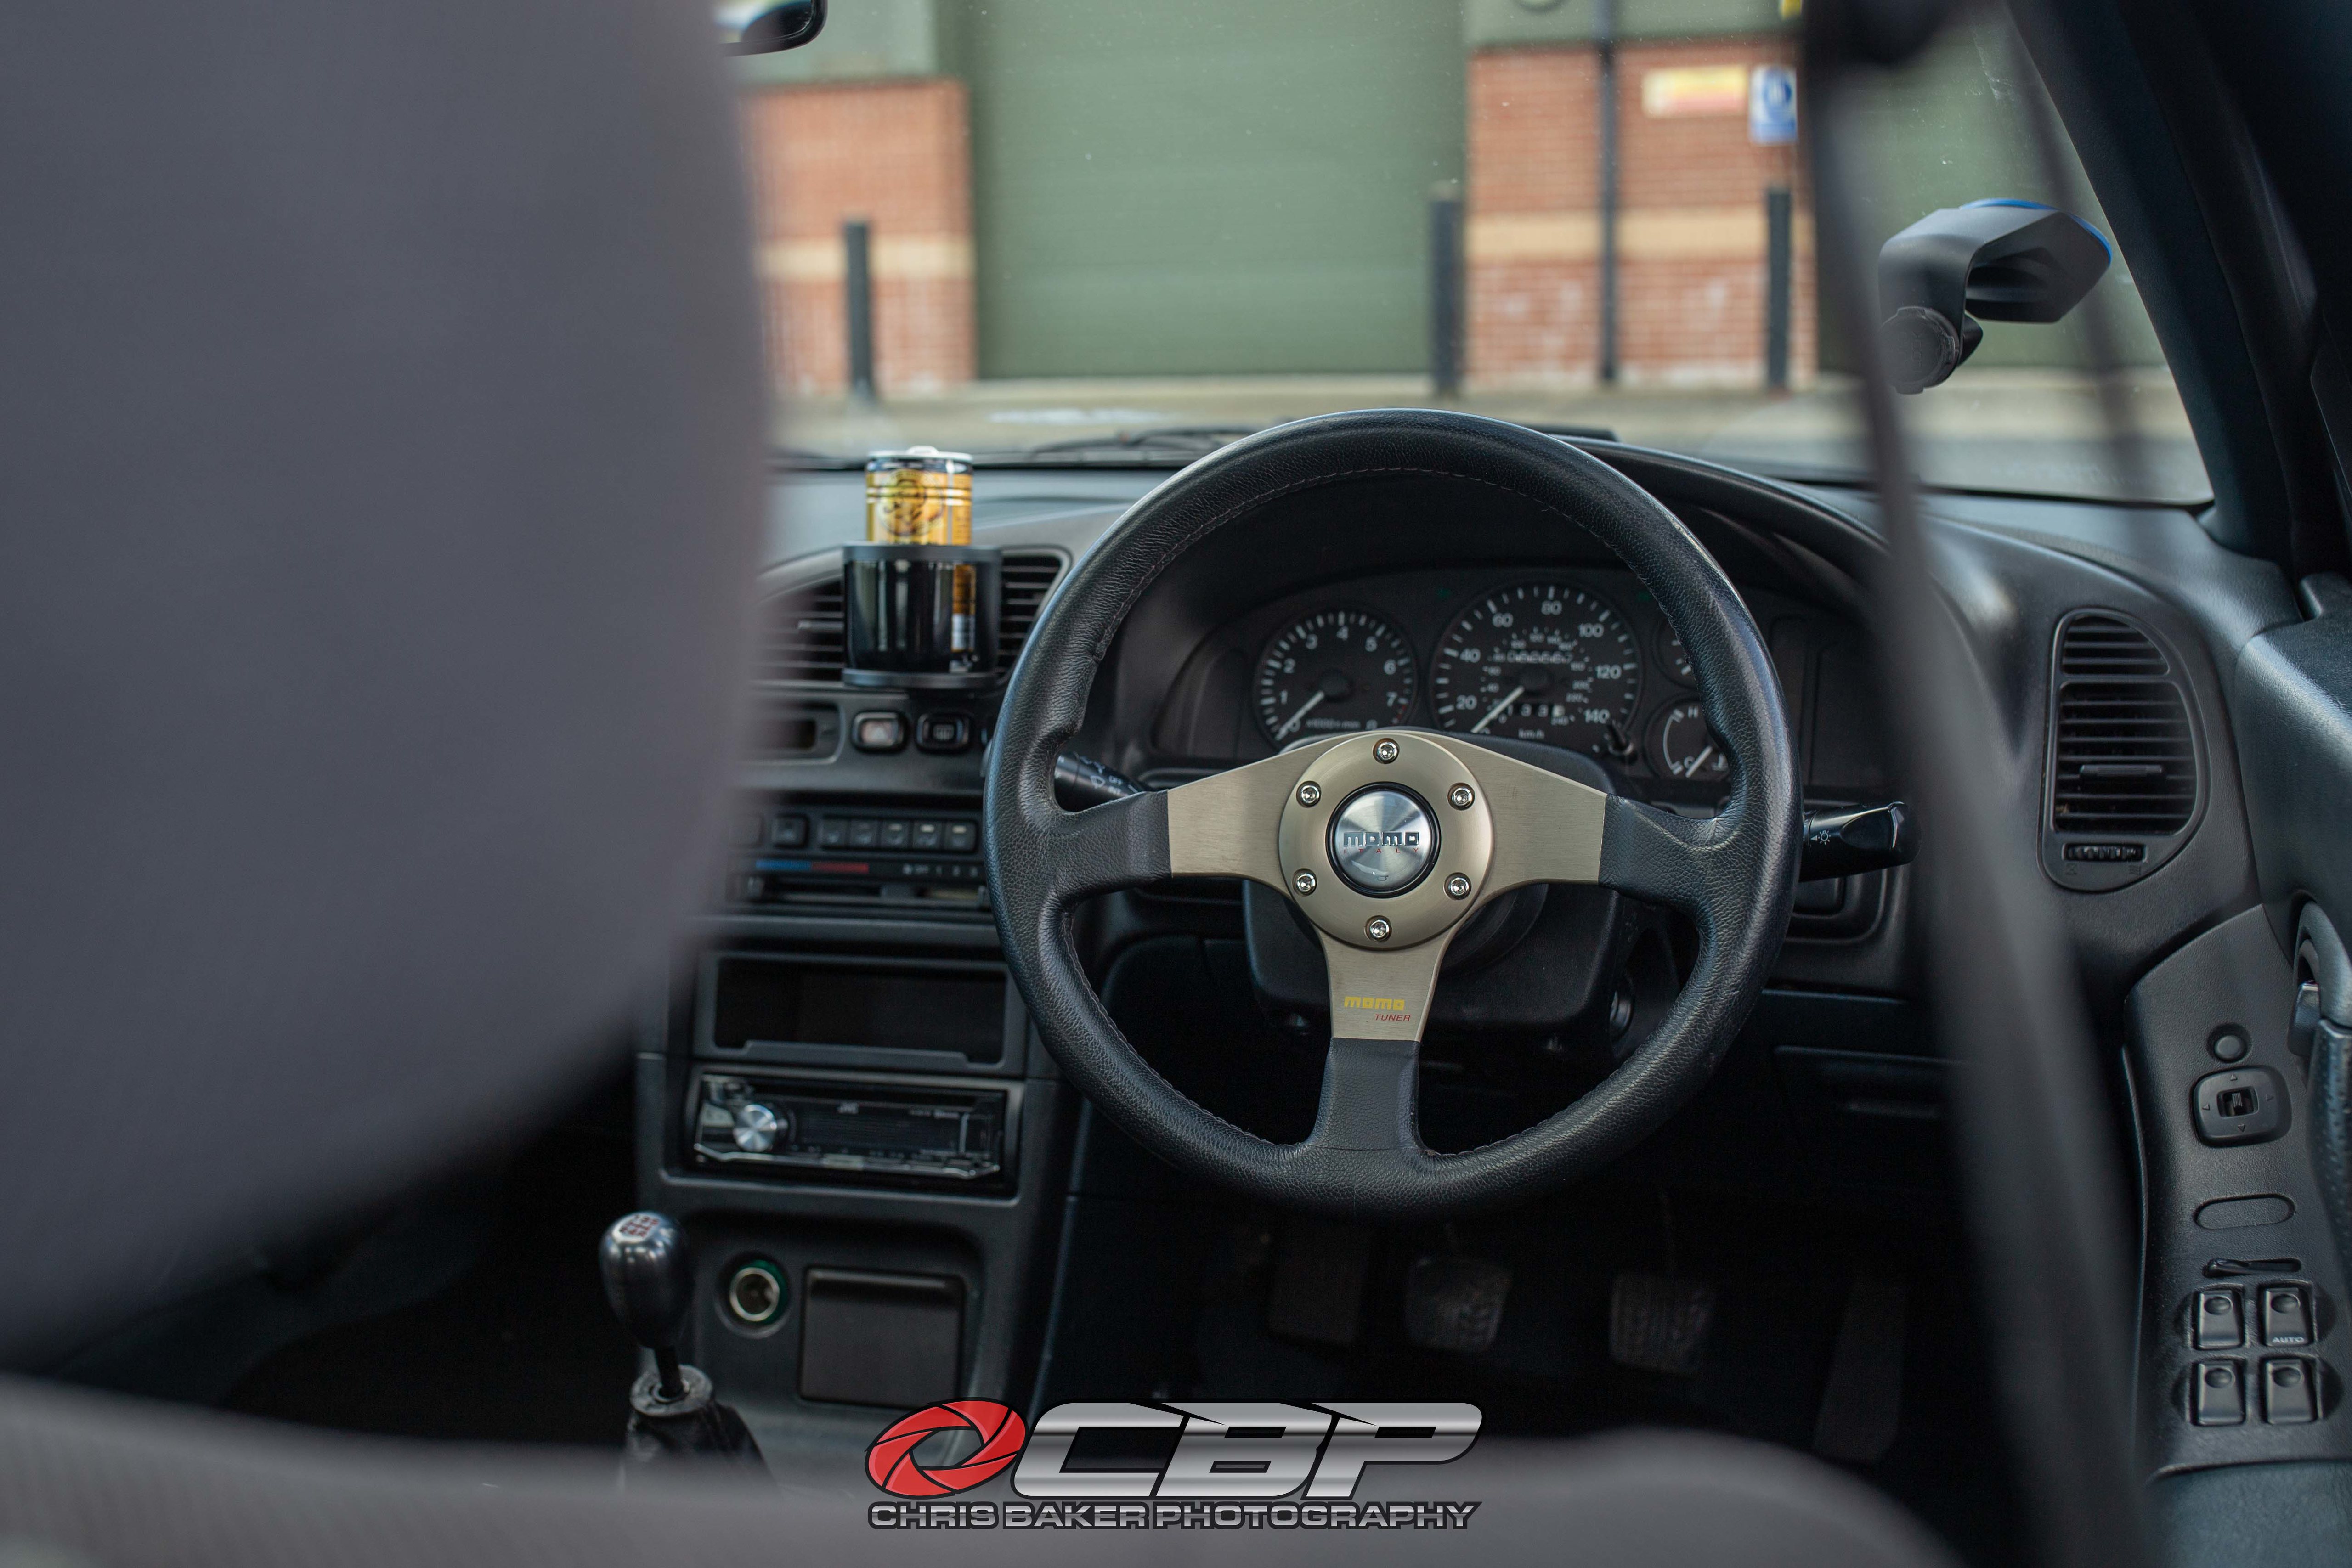
Finding a suitable steering wheel was tricky. The original measures 375mm but most steering wheels seem to be 350mm. I wanted something 90s styled to suit the car better.
After numerous messages to a long list of sellers I finally found this 320mm Momo Tuner on eBay in very good condition.
The youtube video can be found here:
https://www.youtube.com/watch?v=5DyBocEUXoc&t=13s
Sorry for the long read, turns out it was a larger update than anticipated.
The next update is a big one, I've been wheel shopping!
-
The Following User Says Thank You to hoodedreeper For This Useful Post:
 Posting Permissions
- You may not post new threads
- You may not post replies
- You may not post attachments
- You may not edit your posts
-
Forum Rules


 Reply With Quote