


I dunno, lol.
If that's your answer to the question then I have the solution. Over the next day or so while I play manager/mechanic here at the shop I'm going to be doing a very detailed writeup of a full suspension swap complete with pretty pictures.
Many people have been asking for this and now that I have a car here that needs the job done I will be doing the project and taking you along every step of the way.
To preface the actual write-up (which will get posted tomorrow), I will go over a few basic points that will help complete newbies understand what all is going on, and also explain my methodology for certain points of the swap.
To begin, swapping out your suspension is not nearly as hard as some people make it seem. So long as you have all your tools and supplies prepared, there's very little that can impede your progress through the course of the job other than discovering old stock parts that are well past their prime and need replacement. A basic understanding of mechanics, a good tool set and a level head are about all you will need to breeze through this.
For the newbies:
While this isn't a hard project, it is certainly one you want to do RIGHT. This is a major part of your car we're talking about. Skimping out somewhere or calling it "good enough" could lead to disastrous results down the road. Take your time and don't rush things. I know you want to slap your new toys on and go tear up the streets ASAP, but your noggin is worth more than needing to buy new tires every other month.
First thing is tools. A good tool set will make any project go smoothly. You don't have to have the latest and greatest in Matco/Snap On/Cornwell to finish a job. At home, I use a fairly basic tool set made by Husky that has both standard and metric sockets (in 1/4", 3/8" and 1/2" drive) and spanners, an assortment of flathead and phillips head screwdrivers, nut drivers in standard and metric, and some other knick-knacks like extensions and step-ups/downs. That kit cost me $250 and has been nothing short of exceptional for any job I do. Having the right tool for the job is always a good thing. Also, take good care of your tools. The last thing you want to do is replace them after using them for something other than their intended purpose. Clean them up after each use as well. It not only keeps your box and hands clean, but also keeps them working better a lot longer.
Next up is having a good sense of mechanics. There's not much I can say here since you either feel comfortable working on the cars or you don't. What I can say is that common sense is essential here. If a bolt isn't coming off easily, STOP! You don't want to strip it or shear it off. Penetrating lube is essential when working on older cars, so be liberal with it! Other things like that fall into play as well like proper jacking techniques, proper tool usage and many other things.
Lastly is have all your parts and equipment in order. You wouldn't start a project without first having all the parts you need, so be sure you have EVERYTHING you need, be it shocks, boots, bolts, new sway bars, or anything else your project may demand. Also be sure to have your equipment sorted like shop rags, cleaners, lubes, etc.
If it's your first time doing a job, label everything you take off. Using baggies is a good method to help keep everything in order when it's off the car. At the shop we use the bottoms off of milk cartons to hold nuts and bolts. They're cheap if you drink a lot of milk or OJ and can also double as epoxy mixing basins or a plethora of other uses. Making a list of everything you've done is a good thing to do as well. It will let you know where you left off if you take a break, and will also let you retrace your steps in case something doesn't seem right. If you leave your project overnight or even a few days, leave a note on the windshield (or wherever you're working so you'll see it) to remind you if anything is loose or missing if you need to move the car. You wouldn't want a wheel (or worse) to fall off because it wasn't tightened down.
Ok, boring stuff is over. If you feel confident that you fulfill the above criteria then get in there and do it!
This install will be on an NA, but I will also include notes on NB installations since they are ever so slightly different in a few places. The shocks and springs going in are Koni yellows with Eibach springs, but the same steps will apply for pretty much any installation. What I won't cover is coilover adjustment, since everyone is after different things with their setup be it ride height or dampening settings.
Check this thread in the coming days as updates are posted!
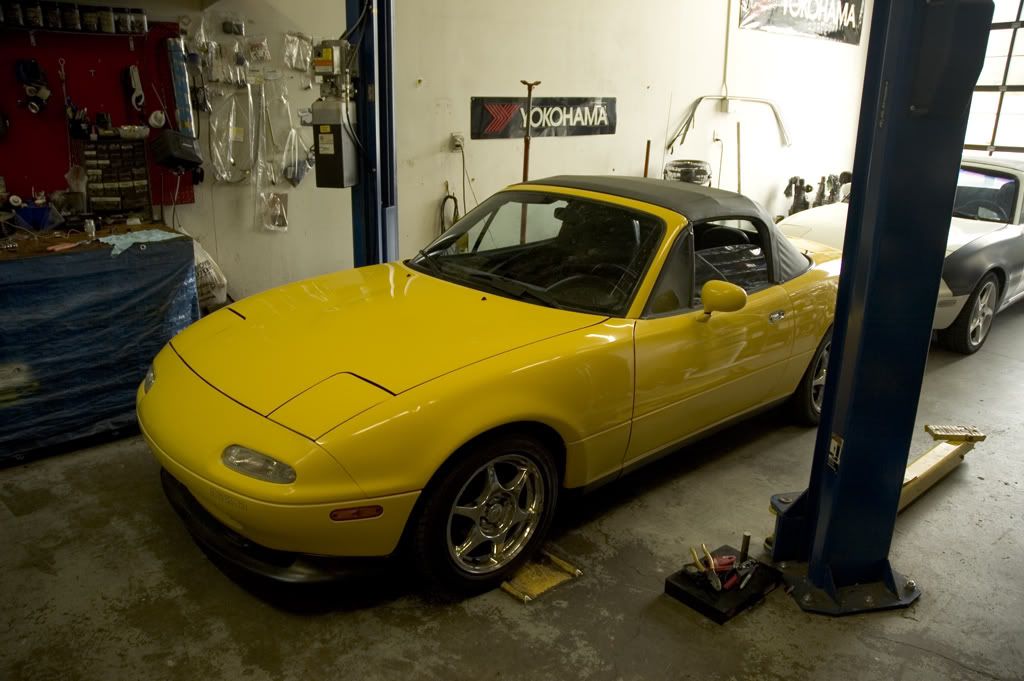
Here's the beast that will be getting the surgery done:
More to come tomorrow from pollen-infested GA!
You caught me, it's really my car under a coat of pollenOriginally Posted by wildfire0310 @ Tue Apr 08, 2008 1:38 pm
It's simply what the customer brought in. I won't go into the ups and downs of any combo since opinions are like assholes and that's a can of worms i'd rather not open
Anywho, here's some progress for today:
I apologize for a few fuzzy pics, it's harder to one-hand an SLR than you thinkNothing vital is lost, just clarity.
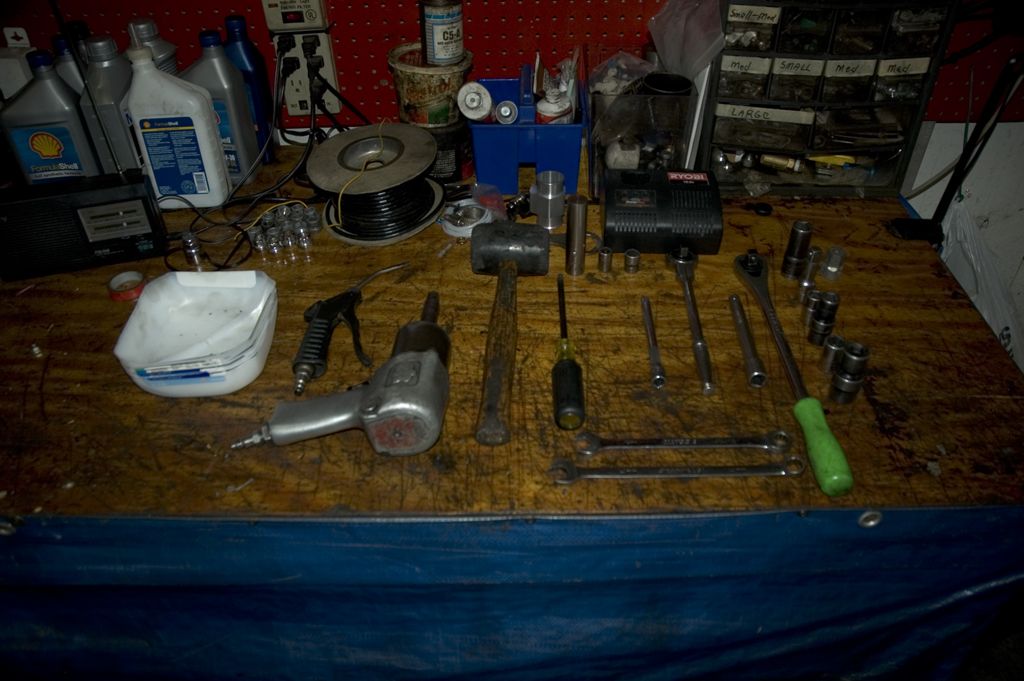
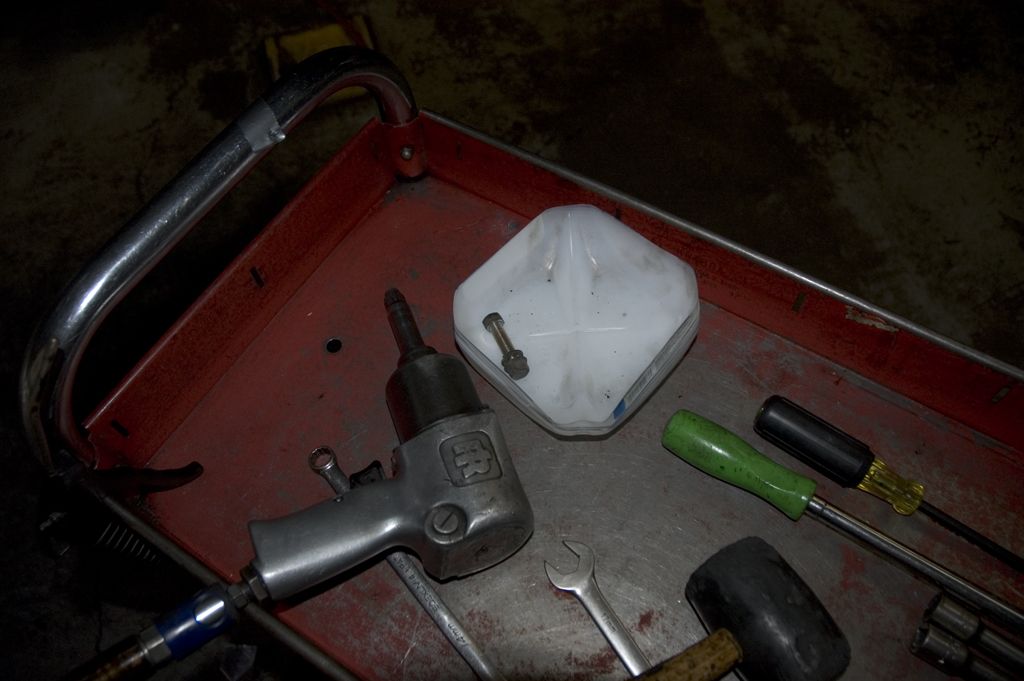
Here is a quick walkthrough of all the tools you will NEED for this job. There are a few others that make it easier, but i'm going for the barebones approach here for those without a toolchest the size of Bill Goldberg.
From left to right: Air gun (i like to have it to blow off any excess brake dust, it helps keep me and what i'm working on clean), Impact gun (not totally necessary, but every home mechanic shouldn't be without one), hammer/mallet, phillips head screwdriver and flat heat screwdriver (not pictured, was in use at the time >_< ), flashlight, 3/8" ratchet with 10mm and 14mm sockets, 6" 3/8" socket extension, 1/4" ratchet with 14mm and 17mm sockets (I have swivel heads of both size because they're easier to get in place with the gun or ratchet) plus whatever socket size your wheel lugs are (most likely 19mm or 21mm), short 1/4" socket extension, and a 14mm and 17mm spanner.
It may seem like quite a laundry list, but to someone who has a basic tool set, all of these shuold be accounted for. If you're missing something from that list, beg, borrow or steal it (please don't) for this project.
Let's Begin!
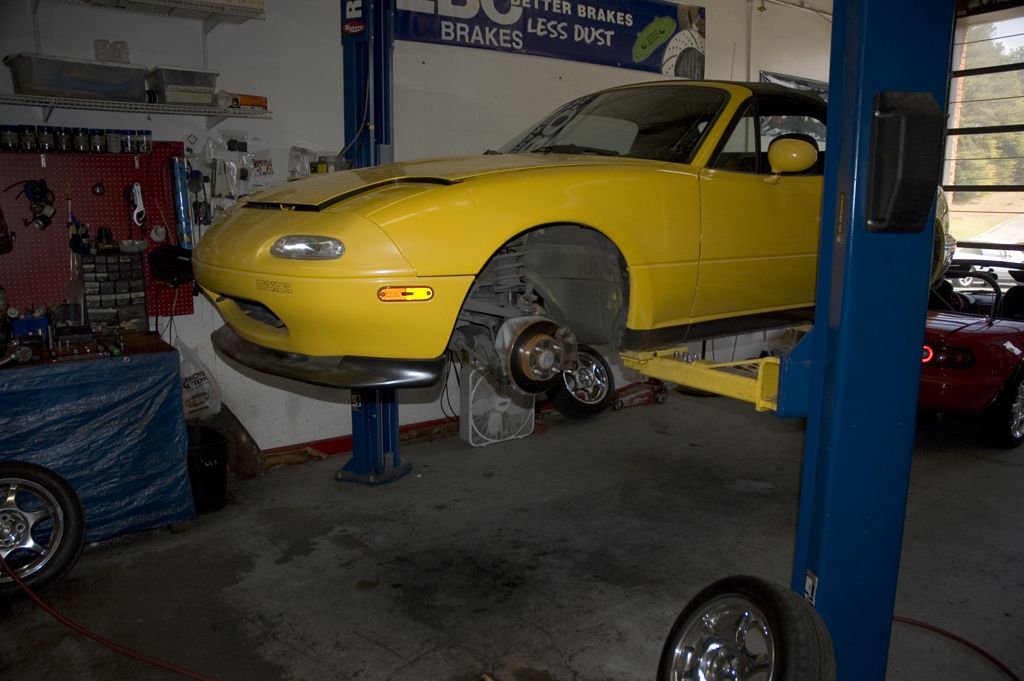
First, get the car up on stands (or a lift) so that all four wheels are off the ground and remove the wheels. Set them aside because you're not going to need them for a while. Be sure to remember which wheel went where because this is a good time to rotate your tires.
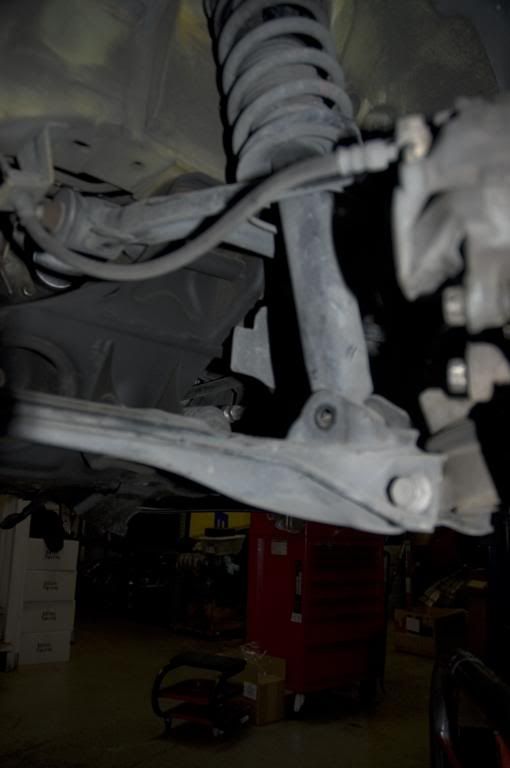
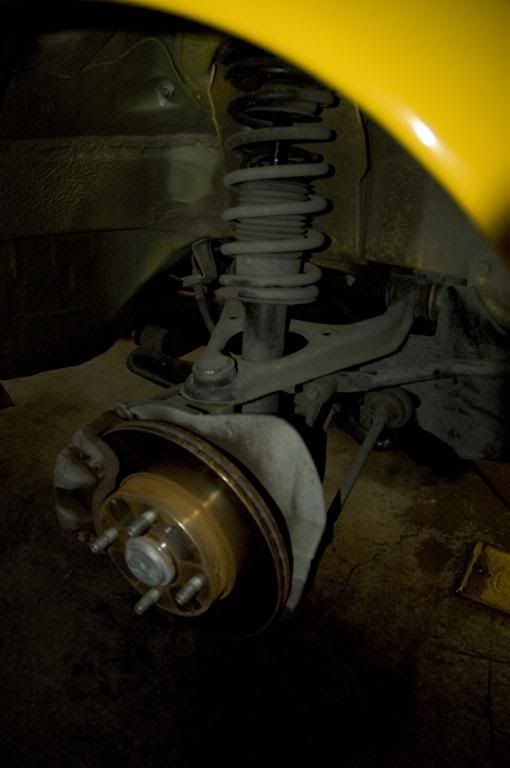
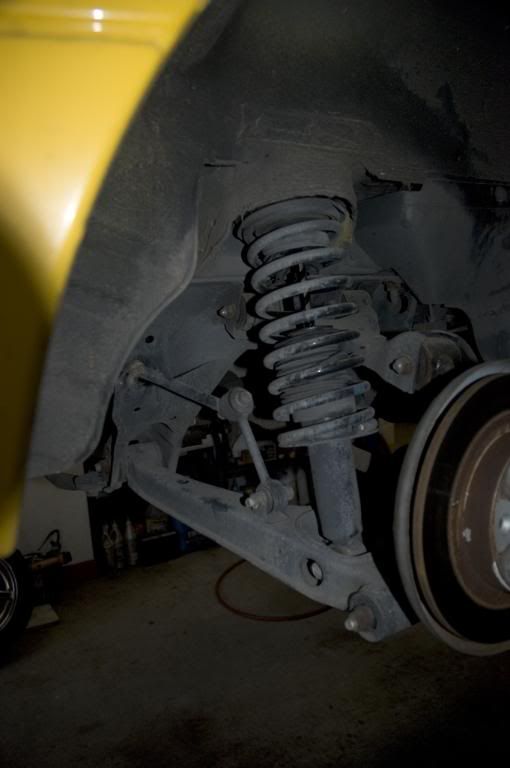
Here's what the front assembly looks like. We can see the shock and spring assembly behind the brake rotor and the upper and lower control arms.
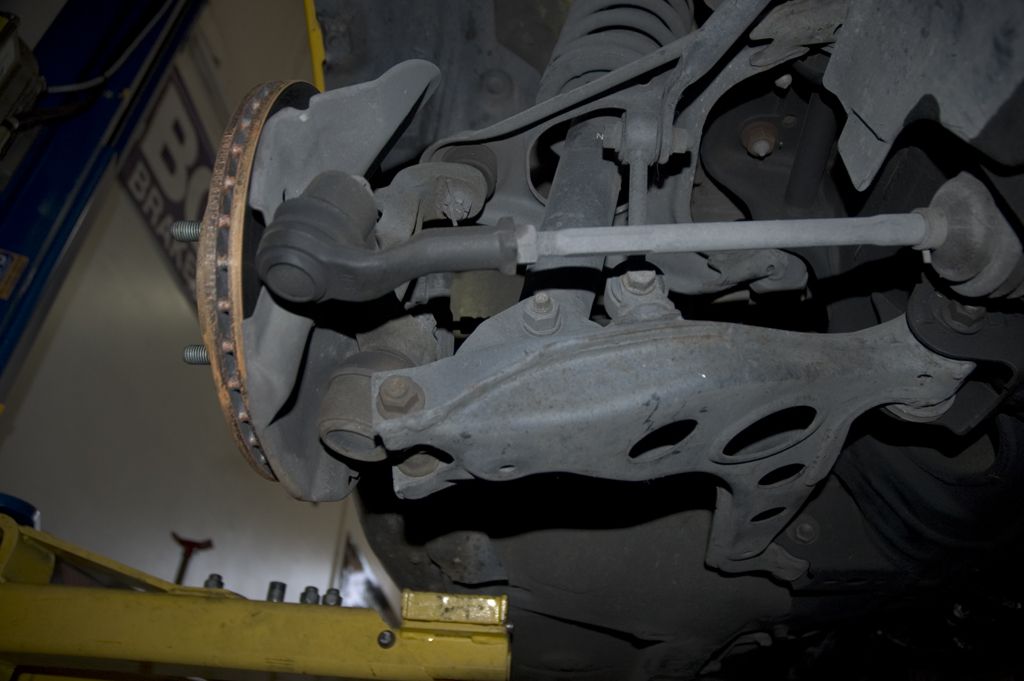
Moving underneath the lower control arm we see three bolts. This is where you're going to start wrenching. From left to right they are for the lower steering knuckle, shock absorber, and sway bar end link.
Here is a view of the back side of the whole assembly. Again, you can see the bolts for the sway bar end link and shock absorber mount.
Now let's hop to it!
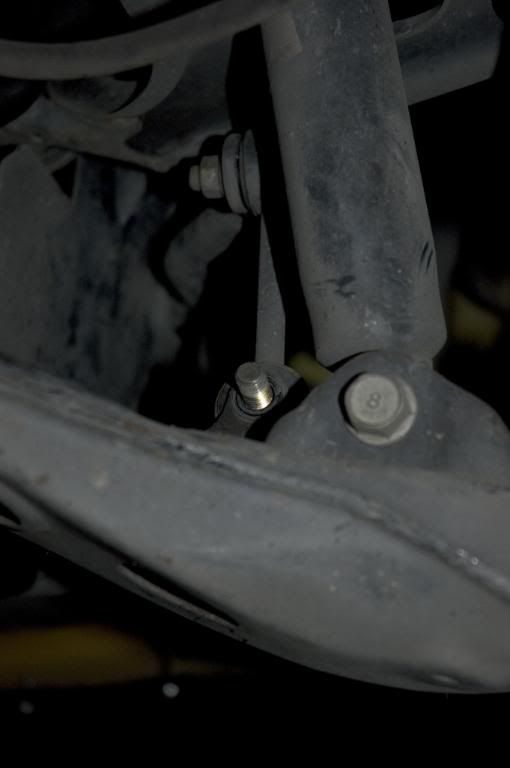
Grab your 14mm socket and spanner and remove the bolt holding the sway bar end link in place. There is a lock washer on this so be sure not to lose it.
You remeber those milk jugs? Yeah, they're handy. I usually use one bottom for each corner since I know where everything goes, but you may want to keep everything seperate for now until you get comfortable. Always re-assemble any bolts and nuts you take off so that you ensure you use the same hardware when putting everything back together. This also makes it harder to lose small items like washers and nuts. d('_'d)


 Reply With Quote