Results 1 to 15 of 15

Thread: Aerodramatics Door Pulls

  1. #1
    Idling - Listen to it purr...
    Join Date
    Dec 2011
    Posts
    14
    Thanks Given
    0
    Thanked 2 Times in 1 Post

    Aerodramatics Door Pulls

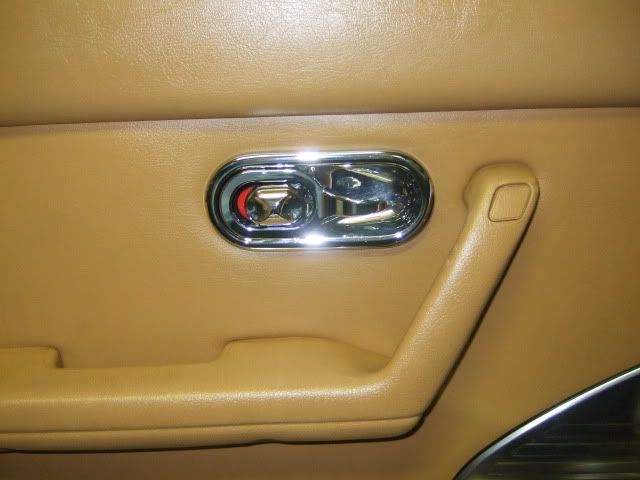
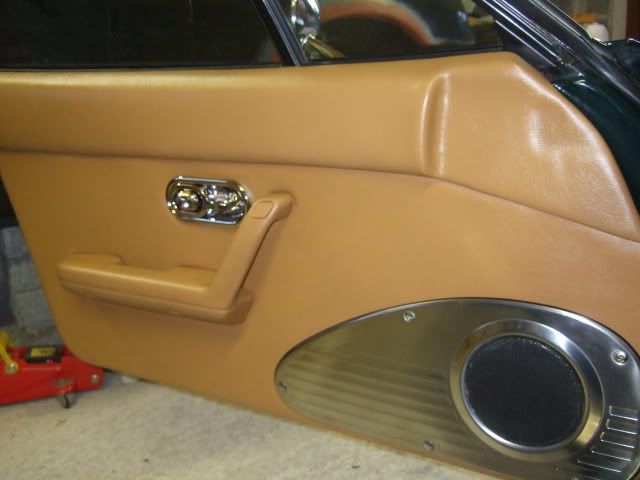
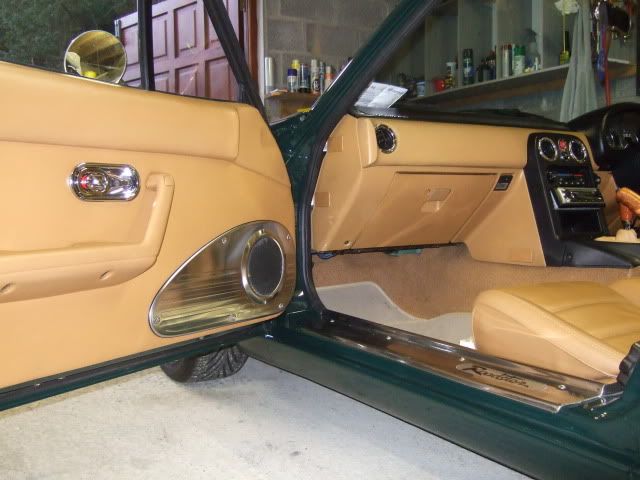
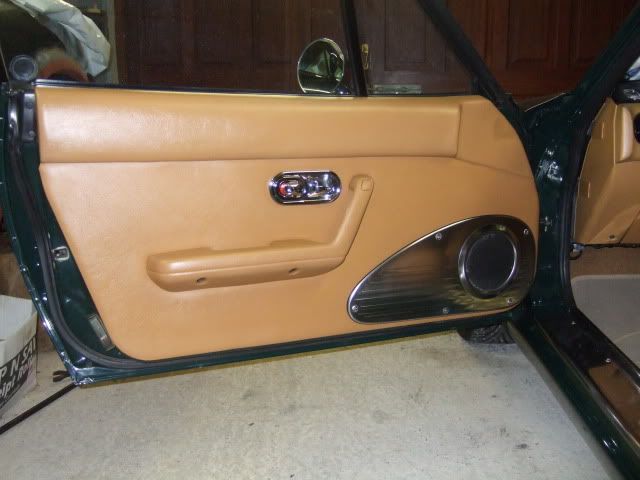
    As the title suggests, I recently purchased these awesome pulls from Phat.

    I got a tiny grub screw to suit the lock buttons but was wondering what you used for the pulls.

    I was going to use rivets but im scared these would be to tight.

    Nuts and bolts seem not correct and i cant find metal clips to suit.Pics would be great.

  2. #2
    2,000 rpm - light wheelspin, no bog here! MartyMcfly's Avatar
    Drives
    Crystal White '92 Miata
    Location
    Chardon, Ohio
    Join Date
    Dec 2011
    Posts
    181
    Thanks Given
    0
    Thanked 2 Times in 2 Posts
    Rivets with washers.

  3. #3
    2,000 rpm - light wheelspin, no bog here! jnshk's Avatar
    Drives
    1997 Chaste White w/ PEP
    Location
    Lake Jackson, TX
    Join Date
    Dec 2011
    Posts
    220
    Thanks Given
    61
    Thanked 63 Times in 36 Posts
    I drilled mine out to the same size as the original door handle pulls (3/16") and used some 3/16" aluminum rivets with a 1/8" grip range and some stainless steel #8 washers (also drilled out to 3/16"). They are a little bit tight at first but with some working back and forth they will loosen up a bit and feel perfect.

    Unfortunately, I'm still waiting on some metal door cups before I install mine, because sexy chrome handles with cheap black plastic cups on red door panels just looks like poo.
    Active: 1991 Mazda Miata (B-Package), JRSC+MS3 [Daily/Project]
    Active: 1995 Mazda Miata (M-Edition) [Full Send Project]
    Hiatus: 1997 Mazda Miata (PEP) [Candidate for Lifted Miata?]
    Hiatus: 1958 Volvo 444 Sport w/ Ford 2.9L EFI and drivetrain

  4. #4
    2,000 rpm - light wheelspin, no bog here!
    Join Date
    Dec 2011
    Posts
    204
    Thanks Given
    0
    Thanked 1 Time in 1 Post
    i used rivets eventually.
    read from here on out - nvm, can't link to **. lolol

  5. #5
    Idling - Listen to it purr...
    Join Date
    Dec 2011
    Posts
    14
    Thanks Given
    0
    Thanked 2 Times in 1 Post
    Thanks guys for the replies.

    I was going down the rivet and washer technique but was worried it would be to tight.

    I will tackle one tomorrow and post pics of finished article.

  6. #6
    2,000 rpm - light wheelspin, no bog here!
    Join Date
    Dec 2011
    Posts
    204
    Thanks Given
    0
    Thanked 1 Time in 1 Post
    Quote Originally Posted by jnshk View Post
    I drilled mine out to the same size as the original door handle pulls (3/16") and used some 3/16" aluminum rivets with a 1/8" grip range and some stainless steel #8 washers (also drilled out to 3/16"). They are a little bit tight at first but with some working back and forth they will loosen up a bit and feel perfect.

    Unfortunately, I'm still waiting on some metal door cups before I install mine, because sexy chrome handles with cheap black plastic cups on red door panels just looks like poo.
    if i had another set (i am still considering grabbing another) this is what i'd do!

  7. #7
    2,000 rpm - light wheelspin, no bog here! jnshk's Avatar
    Drives
    1997 Chaste White w/ PEP
    Location
    Lake Jackson, TX
    Join Date
    Dec 2011
    Posts
    220
    Thanks Given
    61
    Thanked 63 Times in 36 Posts
    Yeah, I had some serious pucker-factor kick in when it came time to do the deed.
    Active: 1991 Mazda Miata (B-Package), JRSC+MS3 [Daily/Project]
    Active: 1995 Mazda Miata (M-Edition) [Full Send Project]
    Hiatus: 1997 Mazda Miata (PEP) [Candidate for Lifted Miata?]
    Hiatus: 1958 Volvo 444 Sport w/ Ford 2.9L EFI and drivetrain

  8. #8
    2,000 rpm - light wheelspin, no bog here!
    Join Date
    Dec 2011
    Posts
    204
    Thanks Given
    0
    Thanked 1 Time in 1 Post
    oh i bet...
    at least no one will ever see the holes (or the area surrounding the holes) even if you do fuck up

  9. #9
    2,000 rpm - light wheelspin, no bog here! jnshk's Avatar
    Drives
    1997 Chaste White w/ PEP
    Location
    Lake Jackson, TX
    Join Date
    Dec 2011
    Posts
    220
    Thanks Given
    61
    Thanked 63 Times in 36 Posts
    Unibit kept me in check and it was all good. God bless the man who invented unibit drill bits.

    And because people love pictures...


    IMG_6900s.jpg IMG_6899s.jpg IMG_6905s.jpg
    Last edited by jnshk; 12-28-2011 at 11:51 PM. Reason: People love pictures.
    Active: 1991 Mazda Miata (B-Package), JRSC+MS3 [Daily/Project]
    Active: 1995 Mazda Miata (M-Edition) [Full Send Project]
    Hiatus: 1997 Mazda Miata (PEP) [Candidate for Lifted Miata?]
    Hiatus: 1958 Volvo 444 Sport w/ Ford 2.9L EFI and drivetrain

  10. #10
    2,000 rpm - light wheelspin, no bog here! MartyMcfly's Avatar
    Drives
    Crystal White '92 Miata
    Location
    Chardon, Ohio
    Join Date
    Dec 2011
    Posts
    181
    Thanks Given
    0
    Thanked 2 Times in 2 Posts
    I just grabbed the thick end of the rivet with vice grips to flatten it out, that way its impossible to see.

    I like it a little tighter anyways. The handle has a better feel with some additional tension.

  11. #11
    Idling - Listen to it purr...
    Join Date
    Dec 2011
    Posts
    14
    Thanks Given
    0
    Thanked 2 Times in 1 Post
    Thanks guys for the great replies.

    I tried fitting one today but the rivet was too short, so off to the machine shop tomorrow.

    I'll definitely go with the drilled out route too for a stronger grip, Jnshk pics look awesome dude!

  12. #12
    2,000 rpm - light wheelspin, no bog here! jnshk's Avatar
    Drives
    1997 Chaste White w/ PEP
    Location
    Lake Jackson, TX
    Join Date
    Dec 2011
    Posts
    220
    Thanks Given
    61
    Thanked 63 Times in 36 Posts
    Quote Originally Posted by MartyMcfly View Post
    I just grabbed the thick end of the rivet with vice grips to flatten it out, that way its impossible to see.
    That is a pretty clever/good idea. I might do this too if I decide that the rivets are too conspicuous once installed in the car. Thanks for the tip!
    Active: 1991 Mazda Miata (B-Package), JRSC+MS3 [Daily/Project]
    Active: 1995 Mazda Miata (M-Edition) [Full Send Project]
    Hiatus: 1997 Mazda Miata (PEP) [Candidate for Lifted Miata?]
    Hiatus: 1958 Volvo 444 Sport w/ Ford 2.9L EFI and drivetrain

  13. #13
    2,000 rpm - light wheelspin, no bog here! jnshk's Avatar
    Drives
    1997 Chaste White w/ PEP
    Location
    Lake Jackson, TX
    Join Date
    Dec 2011
    Posts
    220
    Thanks Given
    61
    Thanked 63 Times in 36 Posts
    I just realized that we haven't discussed the lock buttons on this thread. I dug up my notes from when I first assembled my door handles:

    Hardware used:

    2x #3-48 (1/2" long) stainless screws for the lock buttons. They seem loose at first at the top, but they firm up as you screw them further into the lock button and a #4-40 would only thread in a few turns.

    4x 3/16" (1/8" grip range) aluminum rivets
    4x #8 stainless washers (chosen because the stainless washers are wafer thin), drilled out to 3/16"

    How I assembled them:

    Drilled out the holes in the aerodramatics handles to 3/16" (Holy shit was I nervous about doing this!). I ultimately chose to do this because the original plastic handles were about 3/16" and anything smaller could create potential issues of slop. The various small nuts and bolts combos that I looked at were all too bulky and I decided that the only good solution was to use rivets.
    Placed the stainless washer on the inside portion of the pop rivet (this washer is probably not necessary, but it seemed like it wasn't a bad idea and it helps the rivet look clean and compact once it's pulled).
    Rivet like a boss.
    Lube with some graphite powder or solution.
    Work the handles back and forth until they move effortlessly and do not bind.
    If necessary, use a thin screwdriver and gently tap it between the handle and the mounting tabs to gain a little bit of clearance. If the tabs are bent off to one side or another and causing binding, lay the handles on a hard flat surface with a soft cloth beneath them and with the bracket hanging off the edge, and GENTLY tap the bracket in the direction you need to bend the tabs with a small hammer until the tabs are aligned properly.
    Active: 1991 Mazda Miata (B-Package), JRSC+MS3 [Daily/Project]
    Active: 1995 Mazda Miata (M-Edition) [Full Send Project]
    Hiatus: 1997 Mazda Miata (PEP) [Candidate for Lifted Miata?]
    Hiatus: 1958 Volvo 444 Sport w/ Ford 2.9L EFI and drivetrain

  14. #14
    Idling - Listen to it purr...
    Join Date
    Dec 2011
    Posts
    14
    Thanks Given
    0
    Thanked 2 Times in 1 Post
    I got mine fitted yesterday using the drilling out technique and man they are sweet.

    I got a great fit and they feel great they totally transform the interior, one of my favourite mods so far.

    Pics to follow later.

  15. #15
    Idling - Listen to it purr...
    Join Date
    Dec 2011
    Posts
    14
    Thanks Given
    0
    Thanked 2 Times in 1 Post
    Well as promised heres a few pictures with IL motorsport door cups to finish the look.

    Sorry about the crappy pics.


    Picture of my much loved KGworks mirror, sorry for going of topic.

Posting Permissions

  • You may not post new threads
  • You may not post replies
  • You may not post attachments
  • You may not edit your posts
  •