Page 72 of 75 FirstFirst ... 22626566676869707172737475 LastLast
Results 1,066 to 1,080 of 1120

Thread: This ain't no build thread!

  1. #1066
    Nukuler banned! chiefmg's Avatar
    Location
    N KY
    Join Date
    Jan 2012
    Posts
    1,433
    Thanks Given
    188
    Thanked 1,233 Times in 531 Posts
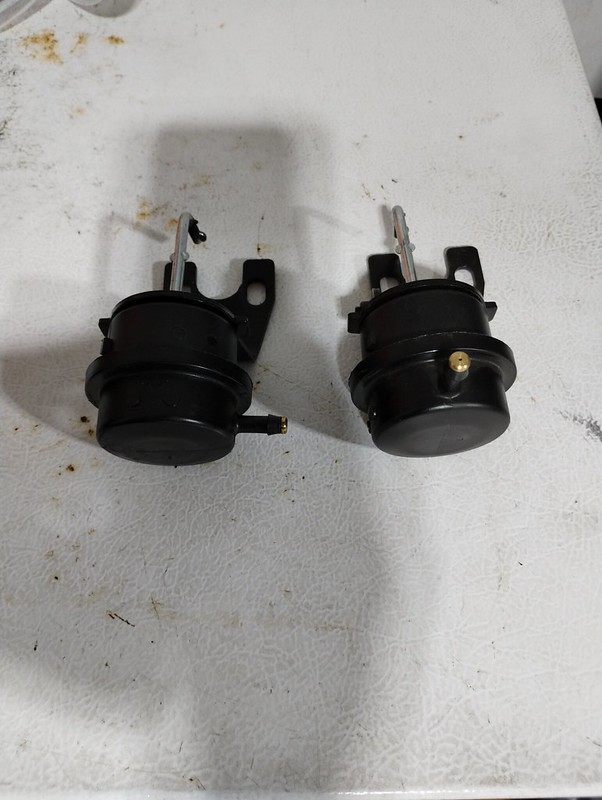
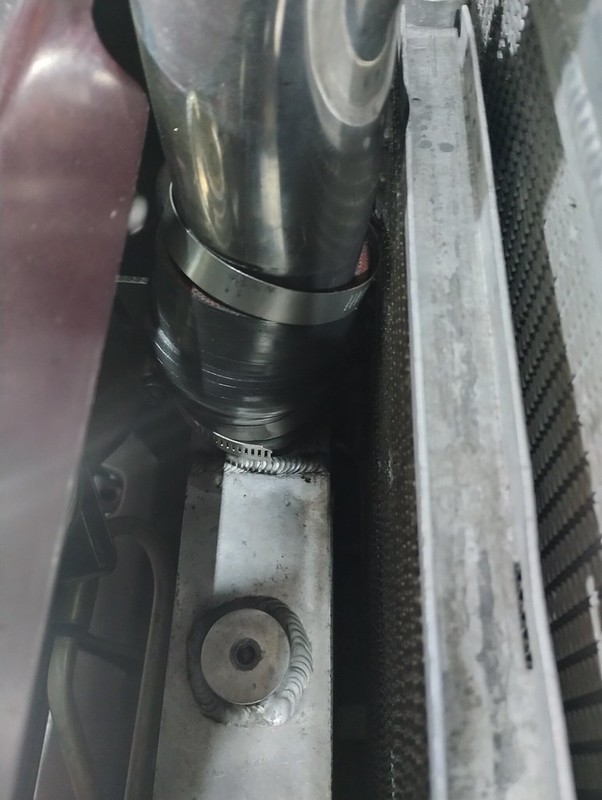
    Yesterday I cleaned everything up, got a new belt for the ‘charger and installed it. Ran to storage to change back to the NB seats, discovered I still am only building about 50% boost so the belt wasn’t the problem. When I got home I looked at my boost pipe connections and all were tight. I then tried moving the bypass actuator using my MityVac. While it did move it wasn’t smooth. Track Dog Racing says these last about 30,000 miles (and 2-3 years), I have about that mileage on it and a lot more years so I ordered a replacement.

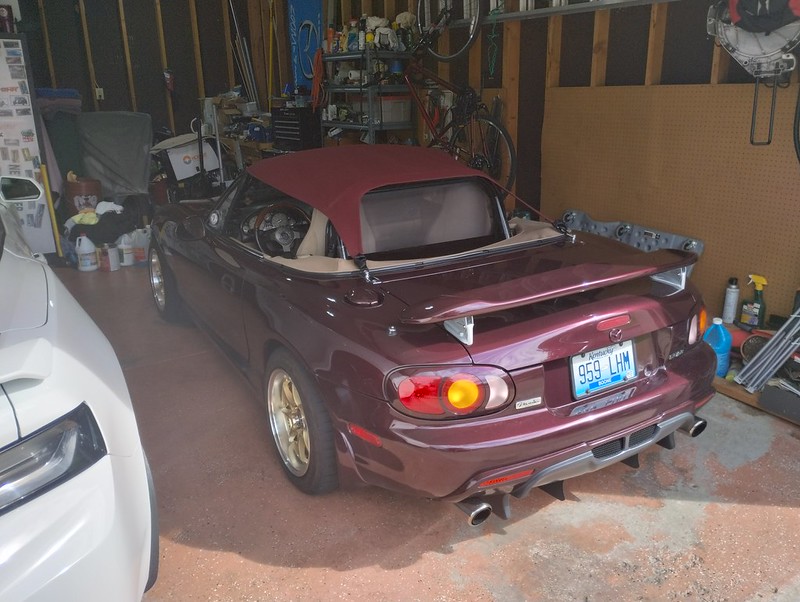
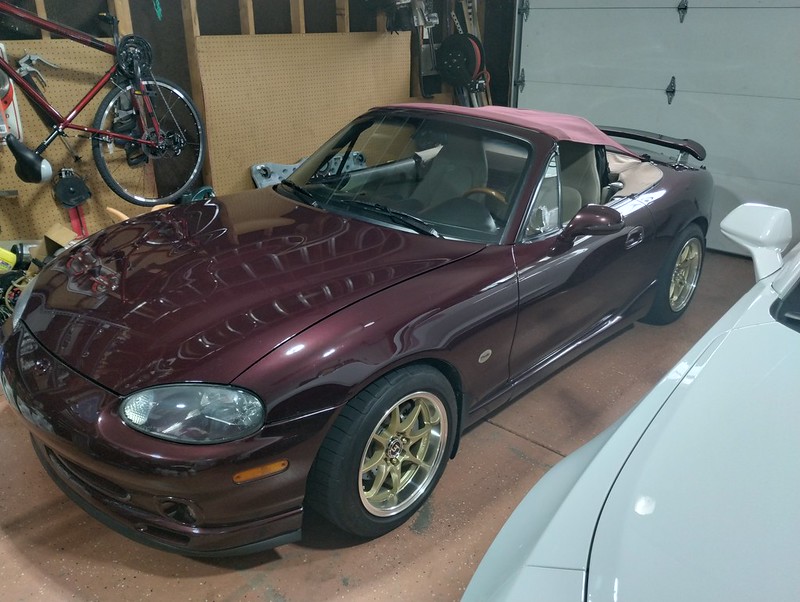
    Got up this morning to a nice day so washed the travel grime off her. Then it was off to run some errands. Of course, despite no rain being in the forecast when I checked yesterday, shortly before getting home a downpour started. Ah well.

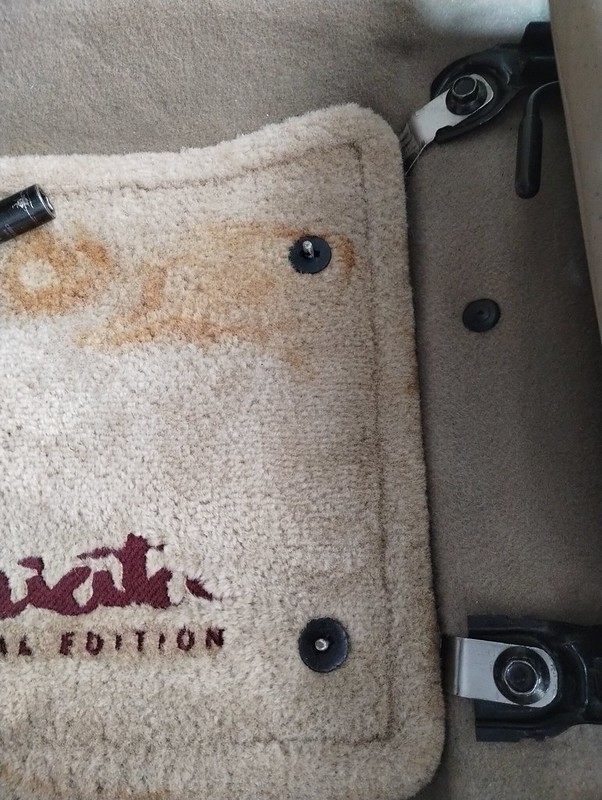
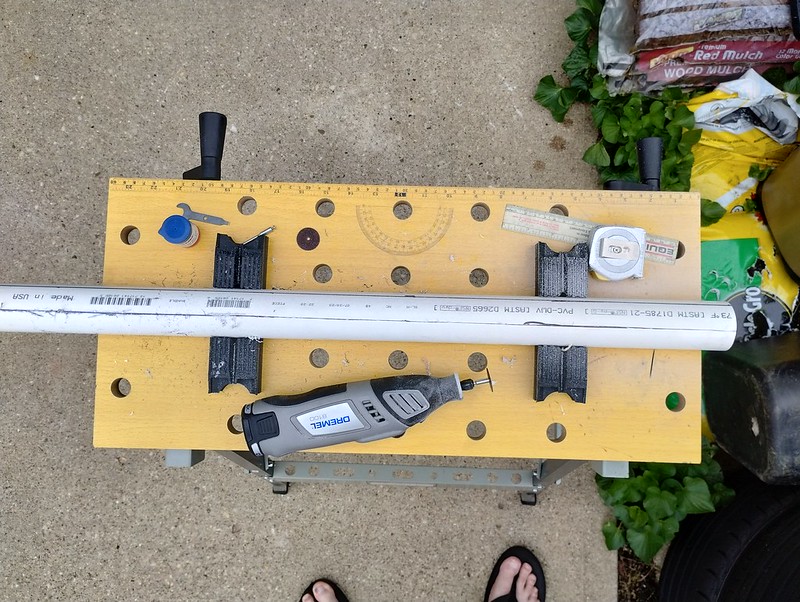
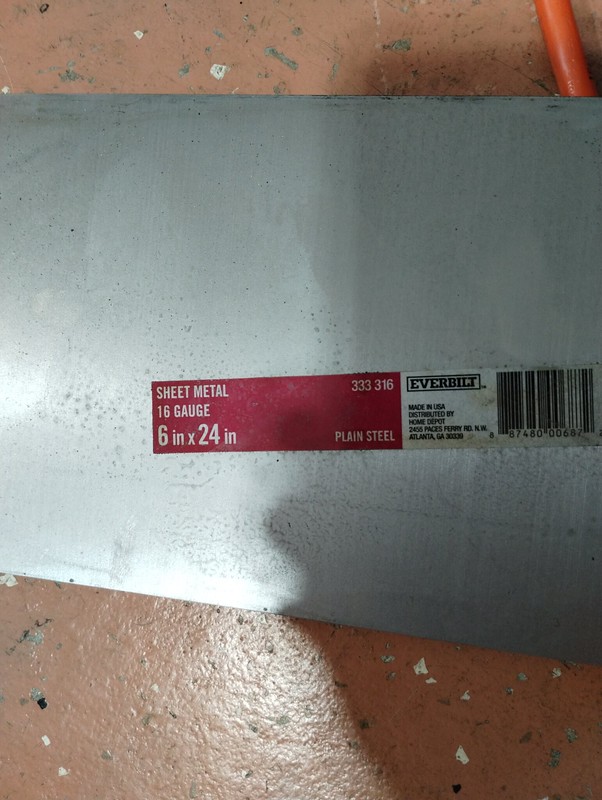
    I have been thinking for a long time about fabricating some sort of bracket to hold the driver’s side floor mat in place. Looking at the wear on the old mat I think it moving around has contributed to that problem. I would prefer not to damage my newish mats in the same way once I get the rust stains cleaned off. I don’t like Mazda’s solution of having big plastic screws into the carpet. So, I swung by Home Depot and picked up a piece of this:


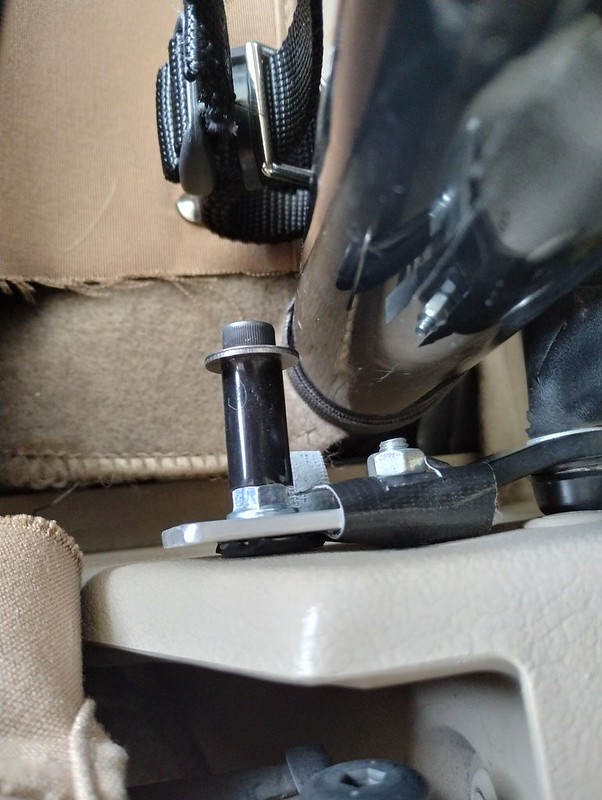
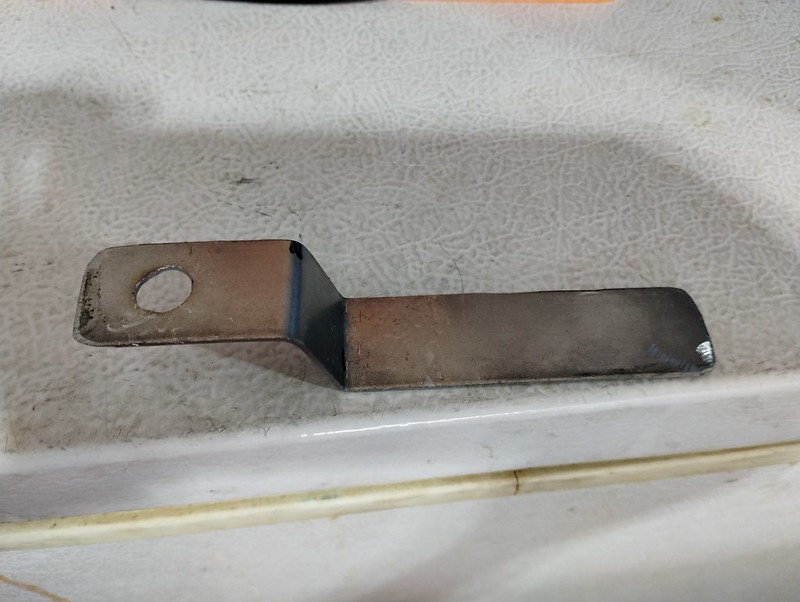
    I also got a piece of 3/16” steel round stock. I ended up cutting off a 1” strip from the sheet. After some judicious bending, measuring and drilling a hole for the seat bolt (also had to Dremel file it a little bigger followed by some hand filing to dress it up) I ended up with this:


    After checking the hole in the mat I think I will be better off with 1/4” round stock for the pin so will head out tomorrow to get that. I will then make another bracket for the inner hole in the mat, get the locating pins welded in place and paint it up. Pictures to follow of the finished product.

  2. The Following 4 Users Say Thank You to chiefmg For This Useful Post:

    Agent☣Orange (08-11-2023),Bryan (08-12-2023),Demon I Am (08-10-2023),HarryB (08-10-2023)

  3. #1067
    6,000 rpm - mere mortals would shift Demon I Am's Avatar
    Drives
    No-ata
    Location
    Raleigh, NC
    Join Date
    Jan 2012
    Posts
    7,336
    Thanks Given
    2,206
    Thanked 1,398 Times in 851 Posts
    very clever! Glad to see you constantly evolving!

  4. The Following User Says Thank You to Demon I Am For This Useful Post:

    chiefmg (08-11-2023)

  5. #1068
    Nukuler banned! chiefmg's Avatar
    Location
    N KY
    Join Date
    Jan 2012
    Posts
    1,433
    Thanks Given
    188
    Thanked 1,233 Times in 531 Posts
    Thanks Tony.

    Got back on the brackets today. The right one ended up being something of a pain due to needing to have it angled. I scrapped the first one I had made. Got the second one to where I thought it would work. When welding the two pieces together I tacked it first and it looked good, then proceeded to run a full weld. That didn’t happen, midweld I heard the one piece hit the floor so I had to redo that weld. It wasn’t pretty when done but it holds nicely. Here a picture of the finished brackets:


    Here is how they look when installed doing their job:


    I had to grind down the pins' outside diameter so the mat would fit nicely without movement. I shot them with some semi-gloss black paint, once dry I’ll fit them for good. I am going to see if I can find some flanged bolts slightly longer for those two front seat bolts just to be sure I have plenty of thread engagement with the brackets in place.
    '00 SE, intercooled BRP MP62, Reverant MS2, Ohlins DFV, Konig Flatout (now X 2)
    __________________________________________________ ____________
    This ain't no build thread!

  6. The Following 3 Users Say Thank You to chiefmg For This Useful Post:

    Agent☣Orange (08-11-2023),Bryan (08-12-2023),HarryB (08-16-2023)

  7. #1069
    Super Moderator Bryan's Avatar
    Drives
    '02 Laser Blue Mica
    Location
    Cincinnati, OH
    Join Date
    Dec 2011
    Posts
    6,259
    Thanks Given
    1,040
    Thanked 2,613 Times in 1,406 Posts
    It was great to see you again. Shame it wasn't long enough! The event keeps me pretty busy
    Quote Originally Posted by DazedAndConfused
    I dont know a word you just said, but that **** sounded COOL.

  8. The Following User Says Thank You to Bryan For This Useful Post:

    chiefmg (08-12-2023)

  9. #1070
    Nukuler banned! chiefmg's Avatar
    Location
    N KY
    Join Date
    Jan 2012
    Posts
    1,433
    Thanks Given
    188
    Thanked 1,233 Times in 531 Posts
    I'm just glad we got to speak for the amount of time we did. Plus, I have a picture of it for proof!

    Went to Ace last night and picked up some bolts. They are M10 X 1.25, I got 30mm in length. No flanged bolts so I got a couple of large washers in SAE size that fit nicely. I installed the mat brackets this morning, everything looks great. Worked on getting the rust stains out of the mats I bought, made some headway but more cleaning is required.

    Received my new bypass actuator so swapped that in. I tested it next to the old one with my MityVac, what I found is the old one was leaking by. When I pulled a vacuum on it and held it, after about 3 seconds it would slowly start to extend. By contrast the new actuator held fully pulled in. One thing to note (mentioned on the Track Dog Racing site) is the vacuum nipple on the new actuator is situated at a different angle from the old one like so:


    New one is on the right. This meant I had to use a longer piece of hose and the routing doesn’t look as nice as the old one. I had to wait for a test drive due to rain, but finally got out to do that. Unfortunately, while it did need to be replaced the bypass actuator wasn’t the cause of my low boost. I’ll be changing out injectors in the next few days so will take a hard look at the rest of the intake system to see if I can find the culprit.

  10. The Following 3 Users Say Thank You to chiefmg For This Useful Post:

    Agent☣Orange (08-13-2023),Bryan (08-12-2023),HarryB (08-16-2023)

  11. #1071
    Nukuler banned! chiefmg's Avatar
    Location
    N KY
    Join Date
    Jan 2012
    Posts
    1,433
    Thanks Given
    188
    Thanked 1,233 Times in 531 Posts
    Received what I was waiting for to install my mystery purchase from MATG. SNS Parts had a Project-G bikini top in maroon for sale that he posted in his pre-MATG teaser. I dithered about it but once I saw it on the first day for vendors I said screw it and bought it. As it turned out I was actually lucky that it fits. If you have never looked into one of these, you have to measure the distance from your windshield header to the back of your rollbar and provide that to Project-G so they can make your top the correct size. I should have done some research prior to purchasing it but it worked out.

    The latches on the bow were well used (both had the screw fix for broken locks), I went ahead and ordered new factory ones off eBay. Those won’t be here for another week or so. The part I was waiting on was a 3-D printed adjusting piece that fits on the front of the center brace for the top. Project-G used to make one in metal but that is NLA. I was reading one of my friend’s build thread and saw where he had found the 3-D printed one so I ordered it up (thanks Bryan). Here is the product link: https://vernie.shop/products/center-...ata-bikini-top It’s well made and functions as advertised.

    The installation of these tops is pretty well documented (see RevLimiter’s blog) so I won’t go into the whole thing. I cut the center brace to length for the adjuster. It was a little fiddly getting the top bow to stay in place while getting the center brace tight. I then put on the rear straps to the Frankenstein bolts. The straps are very short once tightened, probably due to my Harddog Ace rollbar being installed more to the rear and being shorter compared to other bars. It also isn’t as wide which creates a curved effect at the rear. I was missing the screws to attach the side straps to so looked at what I would need and made a trip to Ace. Ended up with Allen head screws in M6 X 1.0 that were 50mm in length, along with a couple of flange nuts, fender washers and metal spacers. After thinking about it, I decided to first try using some silicone hose pieces as spacers since that is what Project-G does. Here are all those parts:


    I used the nut as I attach my windblocker to the car and it gives me a good stop to hold that in place. Here is a picture of the screw installed:


    Pulling those side straps tight served to pull the back sides of the top around the rollbar accentuating the curvature due to the HD Ace bar.

    Here’s how the finished product looks:


    You can see how the rollbar drives the shape of the top. I can see out of the sides with no problem, my head does lightly touch the top though. I’ll get some distance shots from outside when the rain stops.

  12. The Following 3 Users Say Thank You to chiefmg For This Useful Post:

    Agent☣Orange (08-14-2023),Bryan (08-14-2023),HarryB (08-16-2023)

  13. #1072
    Super Moderator Bryan's Avatar
    Drives
    '02 Laser Blue Mica
    Location
    Cincinnati, OH
    Join Date
    Dec 2011
    Posts
    6,259
    Thanks Given
    1,040
    Thanked 2,613 Times in 1,406 Posts
    Ahhh, so you did buy it! I love mine but I need to get a little lower in the car, too.
    Quote Originally Posted by DazedAndConfused
    I dont know a word you just said, but that **** sounded COOL.

  14. #1073
    Individual-1 ☚ ☻ ☛ Agent☣Orange's Avatar
    Location
    🍊SWFL🏝
    Join Date
    Apr 2010
    Posts
    21,593
    Thanks Given
    4,766
    Thanked 4,321 Times in 2,545 Posts
    I think I still have a set of the chromed strap hooks for the Frankenstein bolts. If you're interested, I can dig through some boxes.


    No todo que es oro brilla.

  15. #1074
    Super Moderator Bryan's Avatar
    Drives
    '02 Laser Blue Mica
    Location
    Cincinnati, OH
    Join Date
    Dec 2011
    Posts
    6,259
    Thanks Given
    1,040
    Thanked 2,613 Times in 1,406 Posts
    Not gonna lie: if Gene (may he rest in peace) had figured out how to do the KeeniTop without requiring me to drill into the windshield header, I'd have bought it instead of the ProjectG. It's very nice, but it's also very expensive!

    Mike, how are you doing your center brace? Check my build for how I did mine if you want some info.
    Quote Originally Posted by DazedAndConfused
    I dont know a word you just said, but that **** sounded COOL.

  16. #1075
    Nukuler banned! chiefmg's Avatar
    Location
    N KY
    Join Date
    Jan 2012
    Posts
    1,433
    Thanks Given
    188
    Thanked 1,233 Times in 531 Posts
    Quote Originally Posted by Agent☣Orange View Post
    I think I still have a set of the chromed strap hooks for the Frankenstein bolts. If you're interested, I can dig through some boxes.
    Thanks for the offer. If you are talking about what I think you are, mine came with the bikini buckles so I'm good.

    Quote Originally Posted by Bryan View Post
    Not gonna lie: if Gene (may he rest in peace) had figured out how to do the KeeniTop without requiring me to drill into the windshield header, I'd have bought it instead of the ProjectG. It's very nice, but it's also very expensive!

    Mike, how are you doing your center brace? Check my build for how I did mine if you want some info.
    I already looked at yours and that is what I did. Bought that same adjuster and cut down my brace. I had to clean up the notch at the back for the rollbar from whoever had it previously.

  17. The Following User Says Thank You to chiefmg For This Useful Post:

    Bryan (08-15-2023)

  18. #1076
    Nukuler banned! chiefmg's Avatar
    Location
    N KY
    Join Date
    Jan 2012
    Posts
    1,433
    Thanks Given
    188
    Thanked 1,233 Times in 531 Posts
    Found my boost leak! Started removing stuff this morning to change the injectors, found this on the outlet of the intercooler:


    When I removed it, I saw what appeared to be damage to the intercooler spigot from the boost pipe hitting it. I sanded off the roughness so the boost tube wouldn’t get cut.

    Swapped out my FiveO Motorsports 550cc EV14s for Deatschwerks 700cc injectors. Side by side comparison of the two (DW on the right):


    The DWs appear to be slightly shorter which I feel will provide a better fit. While I had everything off I removed one of the isolators for the fuel rail to make sure I didn’t have them in backwards. Measured the extension on both sides of the center part, both were the same dimension. DW thoughtfully included some lube for the O-rings which helps them go together without issue. Buttoned everything back up, taking extra care to get all the boost tubes nice and tight. While pulling around I noticed the passenger side intercooler mounting bolt was a little loose so I tightened that up (thank heaven for pivoting ratcheting wrenches or I would have had to pull a bunch of stuff out).

    Test drive afterwards showed good drivability and no discernable fuel smell. Based on past experience I will withholding calling it good until I get more miles on her, but for now I’m happy. She's back to screaming under full boost.

    While out I took some more pictures of the bikini top:


  19. The Following 3 Users Say Thank You to chiefmg For This Useful Post:

    Bryan (08-15-2023),HarryB (08-16-2023),Martin (08-15-2023)

  20. #1077
    Nukuler banned! chiefmg's Avatar
    Location
    N KY
    Join Date
    Jan 2012
    Posts
    1,433
    Thanks Given
    188
    Thanked 1,233 Times in 531 Posts
    I put some cogitation into how I could raise the rear of the bikini top. Paid a visit to Home Depot and bought a piece of 1 ½” PVC pipe and a couple of 45 degree ells. First step was to decide how much of a strip to cut out. First try was 1”, after seeing how that would set on top of the rollbar I decided to cut an additional Ό” off. I did this using my Dremel with a cut-off wheel:


    Next step was to cut to length and glue the 45s on. That ended up looking like this:


    Finally I needed some slits so I could use the Velcro strips I have (used for things like extension cords and the like). I tried a couple of ways but ended up using a small drill bit to punch holes, then use the bit to connect them all. That looks like this:


    It’s been tested and works well. I’ve got some semi-gloss paint on it, once that dries and I install it for the final fitment I’ll post a picture of that.

    When I was picking up grandkids from school yesterday, she was getting hot. I kept that in check but noticed there was a lot of heat coming into the cockpit despite the temperature being full cold. All signs suggest that the thermostat is bad so I ordered a new one of those.

    At some point I’ll get through all these little niggling problems.

    Finally, today I received the new top latches I purchased off eBay to replace the ones on the bikini top. Those are installed and work wonderfully well. I need to check into the screw sizes for those as one of the ones on the driver’s side was shorted than the rest.

  21. #1078
    Super Moderator Bryan's Avatar
    Drives
    '02 Laser Blue Mica
    Location
    Cincinnati, OH
    Join Date
    Dec 2011
    Posts
    6,259
    Thanks Given
    1,040
    Thanked 2,613 Times in 1,406 Posts
    You going to Cars and Coffee tomorrow? Love to see what this looks like!
    Quote Originally Posted by DazedAndConfused
    I dont know a word you just said, but that **** sounded COOL.

  22. #1079
    Nukuler banned! chiefmg's Avatar
    Location
    N KY
    Join Date
    Jan 2012
    Posts
    1,433
    Thanks Given
    188
    Thanked 1,233 Times in 531 Posts
    Quote Originally Posted by Bryan View Post
    You going to Cars and Coffee tomorrow? Love to see what this looks like!
    I was planning on it, but unfortunately until the new thermostat shows up and is installed she isn't going anywhere.

  23. #1080
    Individual-1 ☚ ☻ ☛ Agent☣Orange's Avatar
    Location
    🍊SWFL🏝
    Join Date
    Apr 2010
    Posts
    21,593
    Thanks Given
    4,766
    Thanked 4,321 Times in 2,545 Posts
    I must get a cordless Dremmel now.


    No todo que es oro brilla.

Page 72 of 75 FirstFirst ... 22626566676869707172737475 LastLast

Posting Permissions

  • You may not post new threads
  • You may not post replies
  • You may not post attachments
  • You may not edit your posts
  •