Parcel Farce / Royal Fail we call them.


Parcel Farce / Royal Fail we call them.

I have been eyeing the same kit to add to my Elise seats (soon to be reupholstered), since I really like the OEM heated function. I already have the OEM switches as my car came with them, need to figure out wiring as I will not be using any of the provided stuff though.
Regarding shipping delays, this is not the real transit time. USPS scans their incoming packages after they clear their sorting facility/customs, and this is what takes time. It has been anything for 4 days to 3 weeks for parcels I have sent out.
chiefmg (02-17-2023)

Thanks for that info Harry. I had someone who is from the UK mention on another site that Chicago Customs was the cause for my delay in receiving this. Maybe by posting it in my build threads that knowledge will get around.
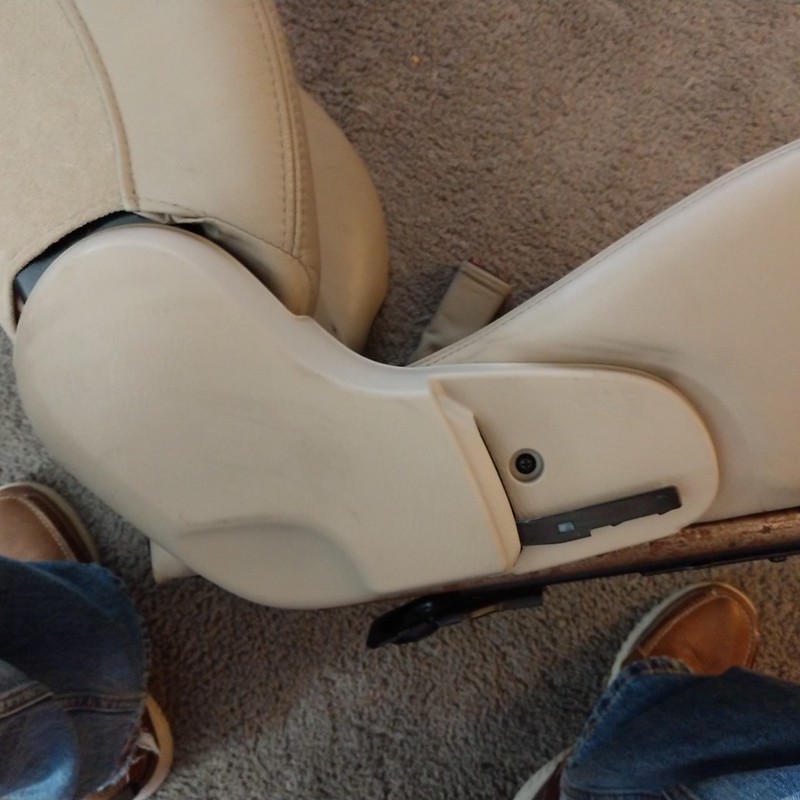
Didn’t have much going on today so decided to dive into installing the heater pads. Pulled the passenger seat and dug in. I am running NB2 seats so my disassembly relates to those. First you need to separate the back and bottom of the seat. First off you remove the recline lever by pulling it forward. It slides onto a metal lever and is only held on by a tab that provides a spring loaded function. Once that is off remove the small screw hiding behind that.
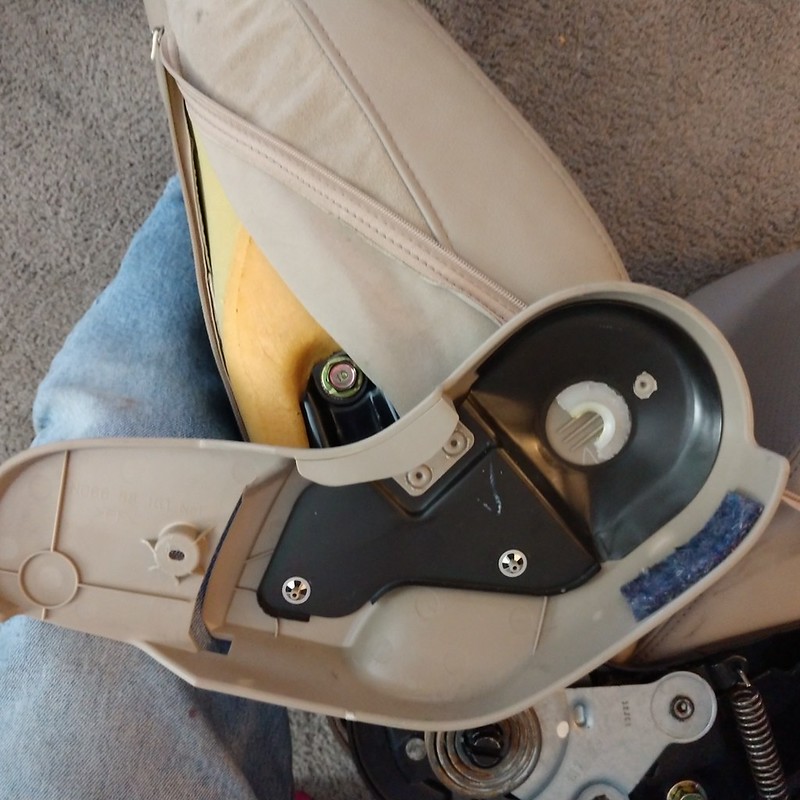
You next remove the trim piece. This is accomplished by sliding it back and upward to get it clear of the mechanism. You can see the half-moon shaped white piece that holds it on here:
Next I removed the small inside hinge bolt, and then pulled the black insert out of the trim piece before removing the trim piece:
Next you undo the two zippers at the bottom of the seat back to access the outside bolts:
Once all that is off the seat back is free. Now you start removing the hog rings. I used two needle nosed pliers and a flat blade screwdriver to pry if I had to.
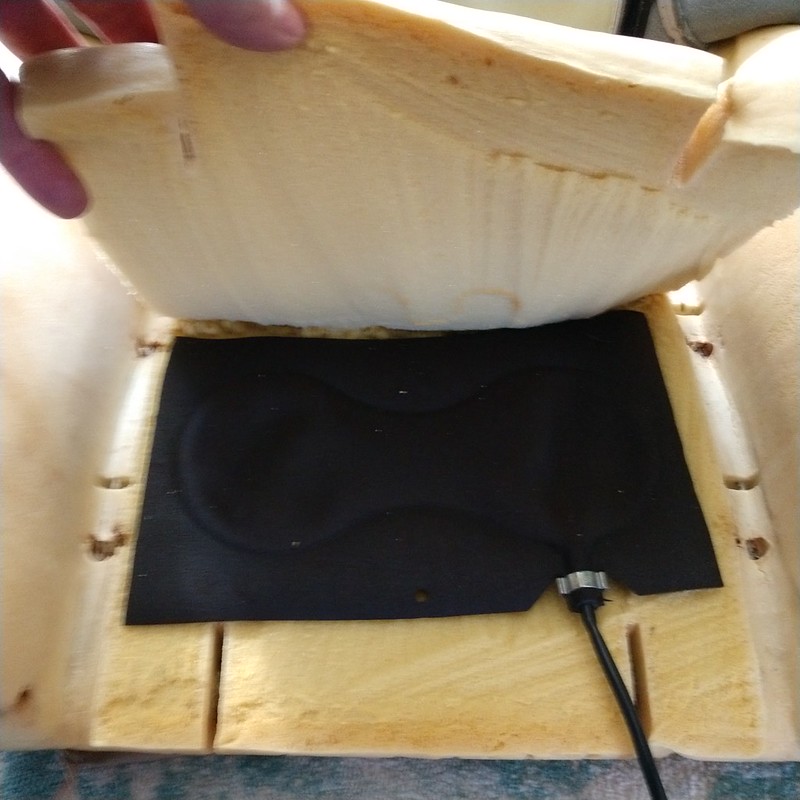
After these first five you peel the cover back and remove the hog rings as you go. I counted 16 total for what I got to. Here is the seat cover pulled back:
I then laid one of the heater pads on the foam to see where I need to cut it. The pads have two areas with space between the heating coils, you cut across those areas to shorten them as needed. Take care not to cut through any of the coils. For my use I removed one of the sections. The instructions say to not have the heating coils lay across any gap in the foam (used for hog rings to secure the cover). I cut out the space between the two remaining sections of the pad. Once you have that all set you remove the backing from the double-sided tape running down either side of the pad and lay it in place.
One tip to make life easier, figure out where you need to remove the fabric of the pad for cover hog ring access before you tape the pad in place and cut it then. I used an X-Acto knife for this but for the second pad I started the cuts and then did the rest with scissors before taping the pad in place.
After that is done all you need to do is replace the hog rings so the cover is back in place. I have seen some folks say to use zip-ties instead of the hog rings, but I’m a masochist so put the hog rings back on.
Next up is the seat bottom. You will need to remove the sliders (total of six bolts). Once that is done the bottom will look like this:
Then it’s back to removing hog rings to pull the cover back so it looks like this:
I counted 21 hog rings removed for this one. Repeat the same steps for installing the heating pad. I made the same cuts as I did for the back pad for both length and hog ring access (no picture of that as I was on a roll and wanted to get it done). Once that’s done you just reverse the disassembly steps until it’s all back together. Be sure to route the wires for both pads to the inside of the seat. It took me about 2 ½ hours to complete this work.
I’ll continue once I start doing all the wiring hook-ups. One thing I did note is that the wiring connectors for the heating pads were not all the same. Three had a red wire on one side of the connector, the fourth had the red wire on the opposite side of the connector. I don’t know who made the connectors up but someone wasn’t paying attention.
Last edited by chiefmg; 02-18-2023 at 08:16 AM.
Agent☣Orange (02-25-2023)
Ended up not doing what I had planned today so pulled the drivers seat to get those heater pads installed. This one took a bit longer because I have a pneumatic lumbar support installed and I didnt want to lose it. Followed the same procedure to separate the seat back and bottom, pulled back the back cover and took a look at what I could do. I figured it wouldnt be a good idea to put the lumbar bladder over the heater pad. There is a foam lumbar support at the bottom of the seat, I figured I could lay the bladder behind that. I started my cut with the X-Acto knife, then used a fine (24 TPI) toothed hacksaw blade to cut up through the foam by hand. This is how that ended up:
I left the foam attached along the top side to provide some stability. The lumbar bladder I have is the one Moss sells, I bought it second-hand so saved some money. After some checking I trimmed the ends of it and then put it in place like so:
Once the seat cover was laid in place the bladder was held firmly.
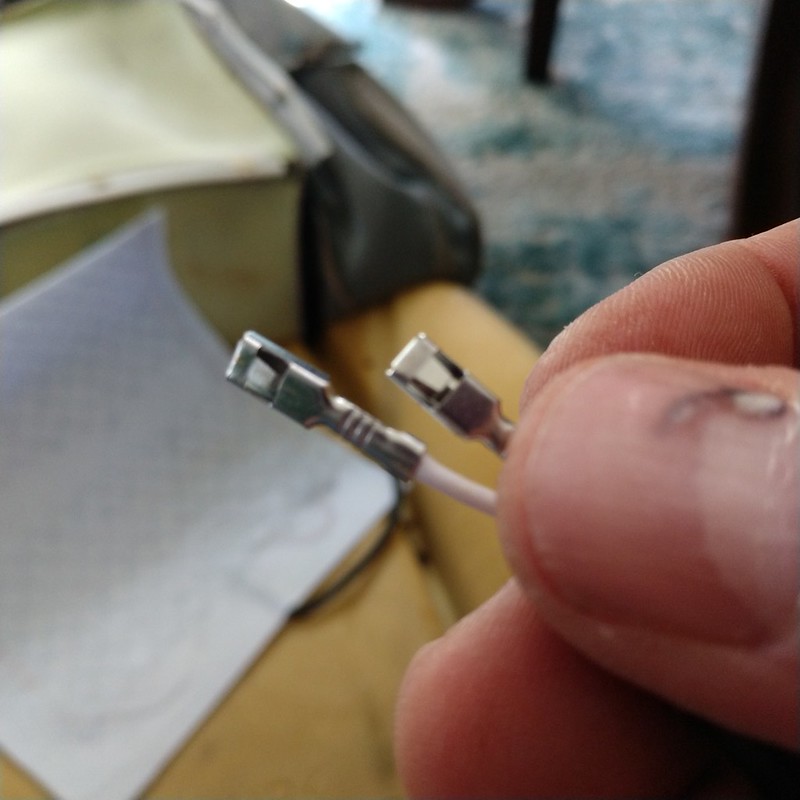
As I mentioned in my last post one of the pad connectors had the wires reversed from the others. Its fairly easy to change this. If you look at the connector you will see two smaller rectangular openings next to the main openings. If you insert a small metal piece (I used a jewelers screwdriver) you can depress the lock and remove the connector end. Here is the opening, and a shot of the connector on the wire showing the small tab that locks it into the plastic part of the connector:
Got that changed over. Another helpful tip I didnt do on the first seat, the piece that acts as the anchor for the inside hinge bolt is sheet metal with sharp edges. I managed to cut myself doing the passenger seat, didnt feel it or even notice it until I saw some blood drops on the heater pad. In the interest of avoiding this today I put some Gorilla tape over the metal like so:
Finally, since I neglected to post a picture of the pad installed in the seat bottom yesterday here it is:
You may notice that there is some overlap of the pad at the back of the seat. This just wraps under once you put the cover back on. For some reason the drivers seat bottom only had 18 hog rings (same number for the seat back though).
Thats both seats with the heater pads installed. Next up, the rest of the wiring.
Agent☣Orange (02-25-2023),Bryan (03-06-2023)
Headed back to work soon, had some training last week so I wasn’t able to proceed with the installation. Have my usual last-minute things to accomplish which keeps me from completion but today I did connect the wiring harness up to the driver’s seat pads to test them out. I used an older battery charger to provide the power, making sure I kept the positive and negative connections separated (I used the rest of a shower pan insulator sheet for that). What I found was that at the low setting I only had voltage (about 0.5v) at one of the pad connectors. Switched the control to the high setting and the relay changed over and gave me 12v at both connectors. What I will do when I get to finish the installation is to check the output and make sure to connect the connector that is powered at the low setting to the back pad. Stay tuned to this space, I’ll be back sometime in the future…
Agent☣Orange (03-08-2023),Bryan (03-06-2023),HarryB (03-06-2023)


Safe travels and thanks for all the detailed projects.
No todo que es oro brilla.

Should have the Bikini Top installed by the time you get back
Originally Posted by DazedAndConfused
Thanks, and it's my pleasure.
More like you better.
Didn’t have time to post this before leaving home, but I wasn’t really happy with the color gold I used on my diecast wheels. I bought another car (an Audi this time) with the same wheels and then ended up trying two different Tamiya gold colors to get what was closer to my actual wheels. Champagne gold first which was very pale, so then I gave titanium gold a shot. We have a winner!
As you can see it’s on my desk light where it will remain during my work stint. It is bookended by a Hot Wheels FB RX-7 on the other side.
Agent☣Orange (03-19-2023),Bryan (03-15-2023),HarryB (03-15-2023)
Only waiting on one more piece to start putting it together
(Of course the fact that it hasn't stopped snowing really kills the old motivation, ya know?)
After 24.5 hours of travel time yesterday, I got home around midnight. Only slept for about three hours (time zone changes are a bitch when you get older). Had to wait for the stores to open and get a new chamois as someone thought it a good idea to dirty up my old one. Once that was in hand, washed her filthy butt. Once that was done I went to storage to pick up my summer wheels/tires and the Recaros. Just got done installing those in prep for MATG. I'm going!
Glad you'll be able to make it!
chiefmg (07-23-2023)
Yesterday I went to two Cars & Coffee events. When leaving the first one, I smelled gas strongly. I then noticed that my gas gauge was dropping a lot quicker than it should be. Had a look around at the second stop but nothing appeared. Headed for home after that to the same gas smell and gauge movement. Once in the garage (and shade) I took another look around. It appears that I may have a leak from at least one injector O-ring so the top of the intake manifold and the fuel rail will be coming off. I’ll also hoist her into the air and check the hoses for the fuel filter (didn’t see any leaks from there but want to be thorough).
Up early again this morning so started a more comprehensive search for my second inflatable lumbar bladder. I looked on Friday when I installed the Recaros with no joy. Luckily it ended up being in the first place I looked this time. I guess my mind does retain some things.
Yanked off the upper intake manifold to find the injectors for #1/4 cylinders showed signs of leakage past the upper O-rings. After attempting to obtain fuel injector seal kits from big box auto parts stores and not having much success, I went to my old standby local place (that was closed on Sunday) and got four kits. Got those all installed today.
Since I was already deep into things I decided it would be prudent to pull the supercharger and change the nose oil. I found the intercooler and charge air pipes had some oil residue in them when I removed parts for the intake manifold removal so set about pulling those for cleaning. Had all that off early this morning (thanks to a still-off sleep schedule). I kind of forgot what a royal PITA it is to get that intercooler out. I used something called Oil Eater (that I used before for cleaning the grease out of hub bearings preparatory to replacing that) for the intercooler with hot water and let that soak for a few hours. The charge air pipes got some BraKleen run through them to clean. Drained the oil out of the ‘charger, I got more than three ounces but less than four (spec calls for four) so good that I am doing that. I drained what I could then dumped in some denatured alcohol to flush out the nose. Did that a couple of times and now have it airing out. I took the time to do some cleanup around the area underneath the ‘charger and intake air hose since that normally isn’t accessible. I’ll let everything air dry overnight before starting my assembly.
HarryB (07-26-2023)
Never a dull moment, right? Glad you figured this out before MATG.
chiefmg (07-26-2023)
You and me both!
Up very early again so continued on. Measured out 4 ounces of Jon Bond Performance synthetic oil and added that to the ‘charger snout. Proceeded to install the intercooler, supercharger and then lined things up so the charge pipes were happy. Tightened the intercooler onto its bracket with the pipes in place. Took my time getting everything together, had some hiccups but nothing terrible until I was installing the charge pipe going into the intake manifold. The clamp kept moving off the coupler as I tightened it. After several different attempts to fix this (including looking online for a different reducer that is longer which is now en route) what finally worked was tightening the clamp on the charge pipe so it would line up properly, then tightening the clamp on the intake manifold. She fired right up after that. There were no signs of any fuel leaks.
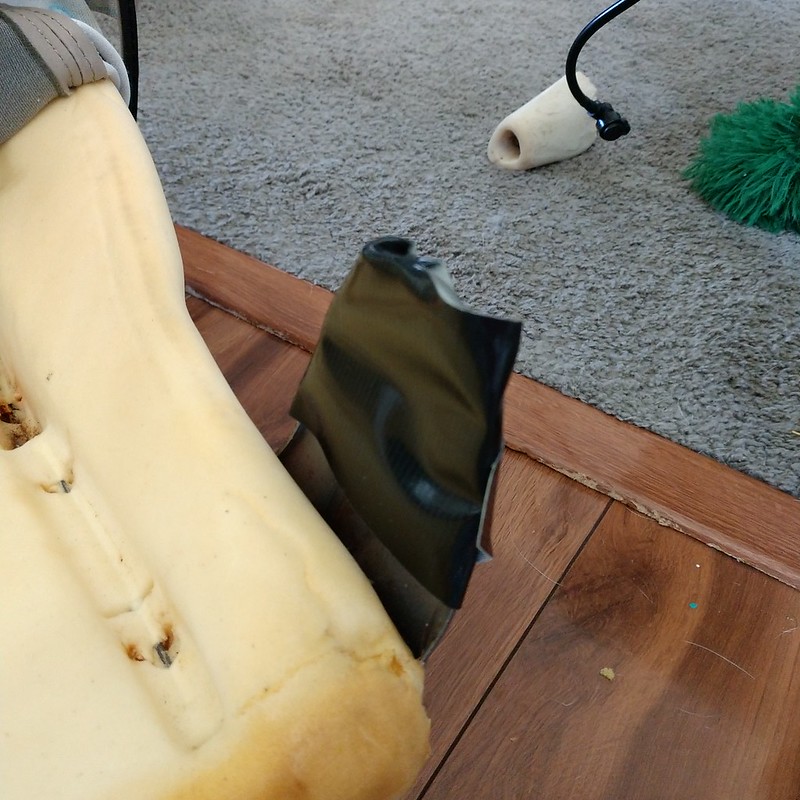
Forgot but when I was doing the injector seals yesterday I decided to put a sleeve on the front fuel supply hose to the fuel rail for some protection. You can see the zip-ties I have holding it in place on either end:
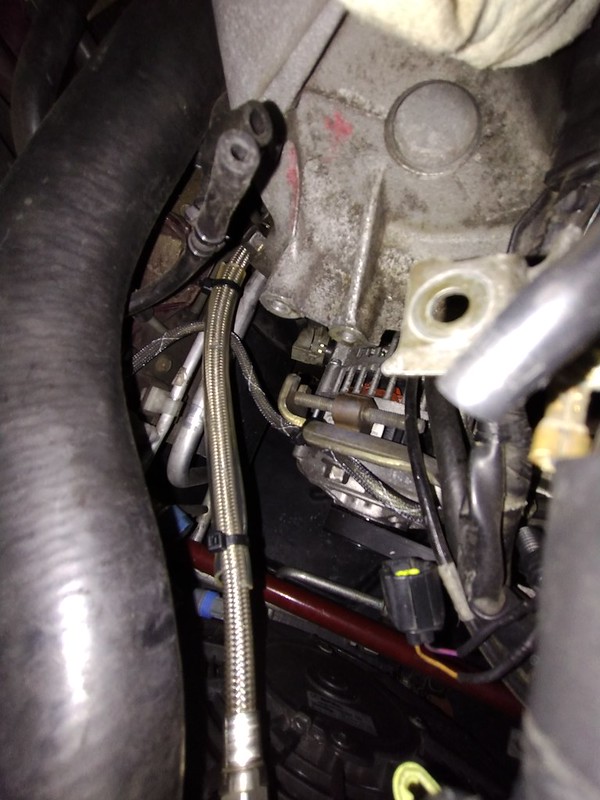
Shifted her around so I could hoist her into the air. Started my oil/filter change. While that was going on I went rear to front underneath looking for anything leaking or otherwise out of the norm. That included removing the cover over the fuel filter and checking the condition of the fuel hoses there. I was very happy that everything looked good.
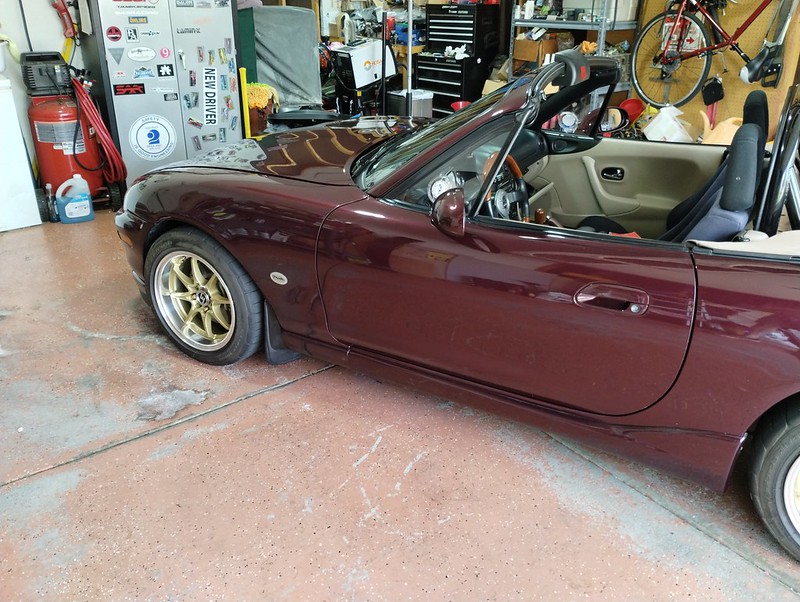
Next up I installed the generic front mud guards I bought a while back. I used two of the existing fastener locations for this. I replaced the lower screws with ones from the guards. For the first one I tried making a template to locate the holes but that didn’t turn out as well as I had hoped. I just winged it for the second one and it came out better. I will note that there is a recess in the front of the side skirt for the bottom screw, I used washers to take up that distance so the screw had a solid backing. Here are pictures to show how that looks:
At this point I only need to adjust the rear brakes and give her a good bath/waxing to be ready for MATG. Here’s a glamor shot from C&C on Saturday:

 Posting Permissions

 Reply With Quote