


I got the idea for this project from another forum, but as those instructions resulted in fixed vents that did not rotate, I wanted to expand on the idea and see if I could get the vents to rotate as well. It was easier than I thought it was going to be.
jester911 has an alternative walkthrough if you can't find or don't want to use the Eclipse vents, found here: Eyeball vent alternative... - MiataRoadster.net
---------------------------------
I tried this out and have to say that I'm very impressed overall. No more having to deal with drooping eyeball vents and installation is very easy. Compared to the eyeball vents, the Eclipse vents provide more directed airflow and when one or two vents are closed, produce much stronger airflow. It was nice to find that with the passenger side vents closed off I was actually getting pretty cold with the a/c on and the fan on "1" compared to not feeling much of the air at all with the eyeball vents at the same setting.
Note: this is for an NB Miata, I have no idea if this will work for NA Miatas. It most likely will work fine in the outer vents, but the center vents in the "tombstone" would be the area for concern.
First, remove the eyeball vents from your Miata. This job usually requires some force, but try to be as careful as possible. If you want the vents to rotate, you'll want the clips inside the dash to be intact. I used the wire method (loop wire through the eyeballs) and straight pulls but still ended up with one broken clip. After the fact I found that if you pop the outer ring of the eyeball vent off, pull the eyeball out, and then rotate the sleeve, it slides right out with no fuss. I'd obviously recommend that method.
You obviously need a set of four vents from a 3rd gen (2000–2006) Mitsubishi Eclipse:
You'll then need to remove the internal flapper (held in via clips and easily pops out) and cut the vent where shown below. I used a hack saw and it was very easy to cut. I found it better to hold the vent while cutting as this prevented any wear damage from resting it on a hard surface. If you want to rest it while cutting, I suggest laying down something that will protect the face and edges of the vent. This makes more sense when you work on the project.
Photo by MJohnny
Remove the rough edges with some sandpaper, 100-150 grit will do the job well, and clean the vents up.
You can remove the arm that controlled the internal flapper by cutting it off where shown below with some snips, this will allow the louvers to open past 90°, but not by much. Or you can just leave it in place, it won't disrupt the operation of the louvers.
Photo by MJohnny
Now you're ready to install your new vents, you have a choice of two options. First, you can push the vents in to where they "click" into place and this will allow them to rotate. So you understand how this works, refer back to the picture that shows the red cut line on the vent and notice the very slightly recessed ring around the vent just above that line, the clips in the dash of your Miata (one of them shown below) will hold the Eclipse vent in place via that ring and allow the vent to rotate.
As mentioned, I had one clip break off during removal of the eyeball vents. The Eclipse vent still stayed in place just fine, but it obviously was not as well mounted.
I shot a quick video showing installation for this option:
That being said, I found that I liked the second option and installed my vents in the fixed/recessed format, just looked a little better and more stock IMO. Once the vents are set, I found that there is actually no need to rotate them (and it keeps pesky passengers from changing things). But if you want to change it later on, just pull the vents back out slightly and they will stay in place and rotate just fine.
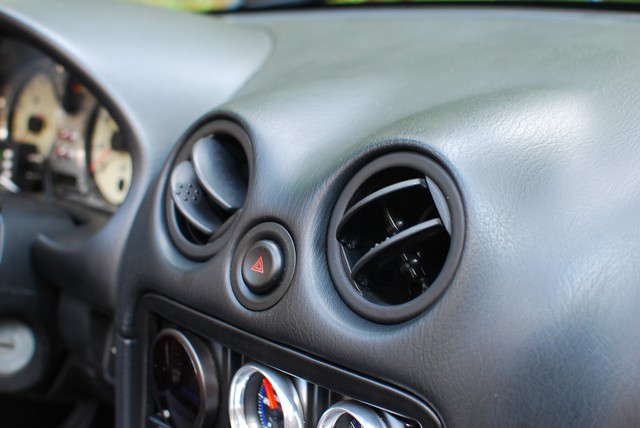
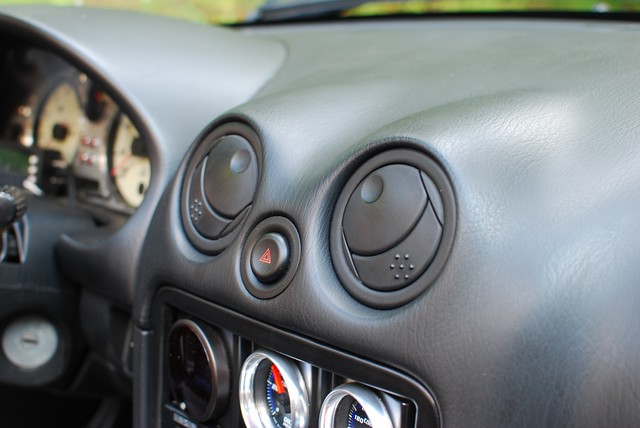
Not recessed/able to rotate:
Recessed:
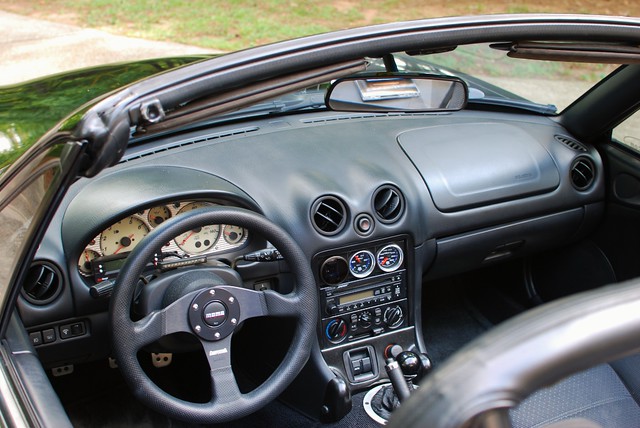
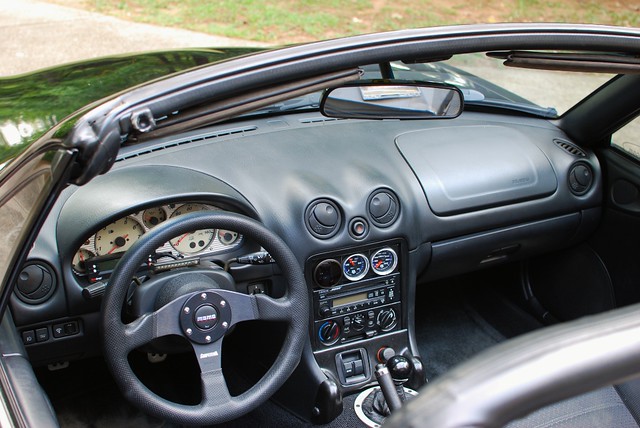
And some pictures of the finished product, the vents are positioned at the angle I found to provide the most airflow and adjustability in the fixed format:
Good Luck! And feel free to post up any questions, comments, or concerns!


 Reply With Quote