Looks awesome man!!! Great job!!!


Looks awesome man!!! Great job!!!
I've got a lot less horsepower - luckily they are Japanese horses - usually in better shape and more motivated.
pacman 99 (11-08-2014)

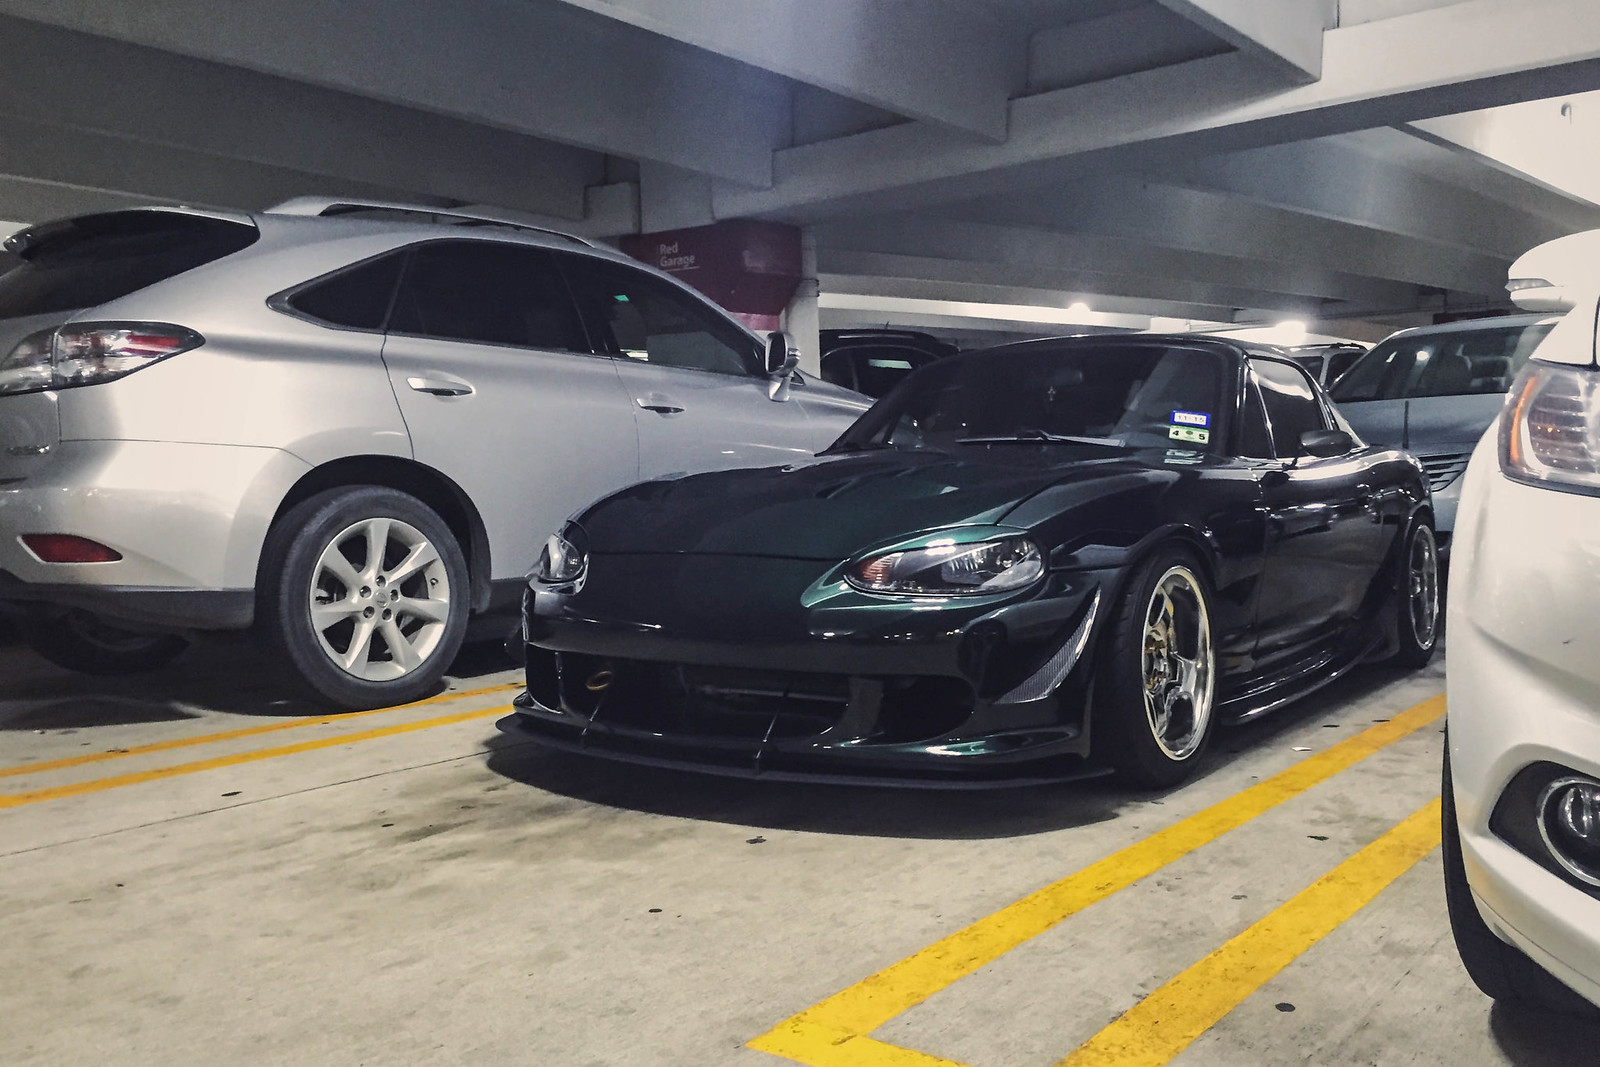
Fun little art project I started working on. No where near done.
Ihatecars (11-22-2014),RotorNutFD3S (11-15-2014),Vegard (11-19-2014)

That's sweet!

LOLs...I would not have the balls to drill into my bumper, man!!! You are one brave soul, but the result looks great. The holes aren't anywhere noticeable anyway. I can't even imagine how much more (aesthetically) you have planned.
Yup it hurt me a bit to do that. They are not visible so it shouldn't be so bad if the splitter gets removed.Originally Posted by pnoy1duh

Only two things left on my exterior plans. Fastback and maybe a GT wing with a flat S2 racing trunk.

S2 RACING trunk has been on my wishlist for quite a while. I would absolutely love to order one of those in the future but my money always goes to engine parts.
I know you always have mentioned it.
This weekend I gave the car its first car wash in a month. It felt good to spend time on the car again after being out of town for vacation.
Went to my neighborhood car meet. Was glad to see a familiar face.
I'm sure Nic took better pics than me
Ihatecars (12-02-2014),RotorNutFD3S (12-03-2014)

It was great seeing you this weekend.
I took a few pictures of your car that I think turned out pretty darn good. I'll try and get them edited and posted soon.
My build thread and my Instagram.
Nothing much has been going on with Fiona.
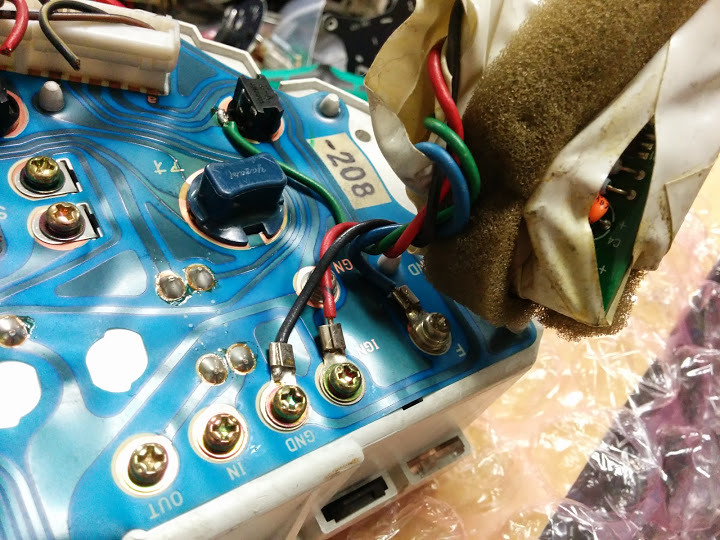
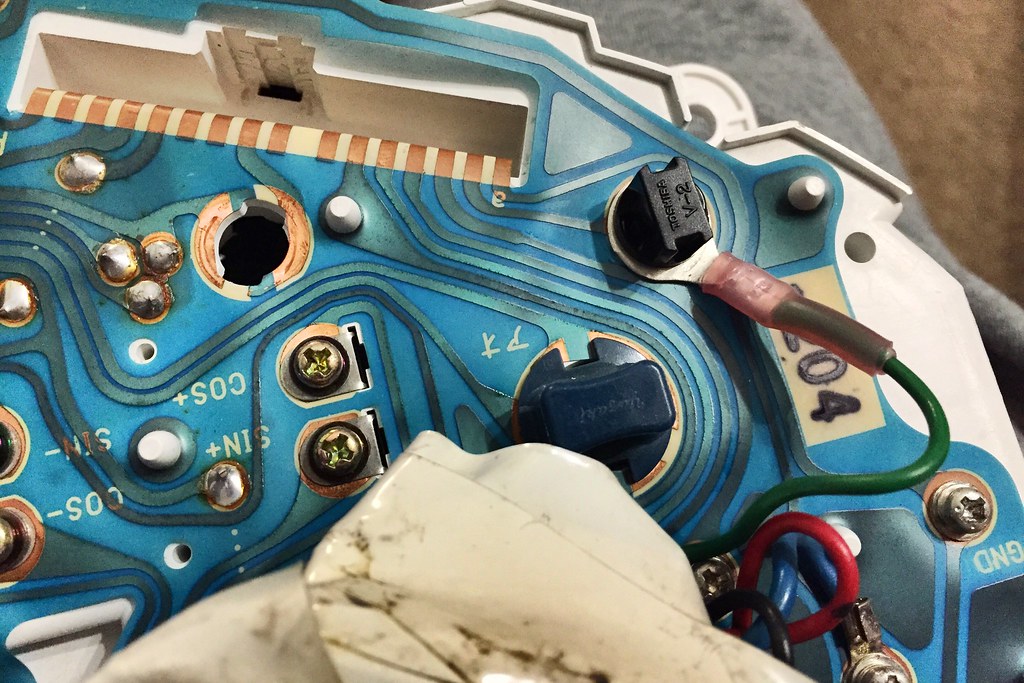
A few weeks ago I purchased a low gas light conversion kit for NB1's made by "scenturion". These were only available on 03+ NB's I believe. Essentially it's just adding the circuit board from a 03+ NB to your existing gauge cluster.
Kit came complete with a low gas gauge face and circuit board with wires and terminals already attached.
The wire that goes to the light bulb was supposed to be soldered on to the blue plastic circuit sheet. I decided to take it a step further and give this a terminal as well to make it easier to install and be removed.
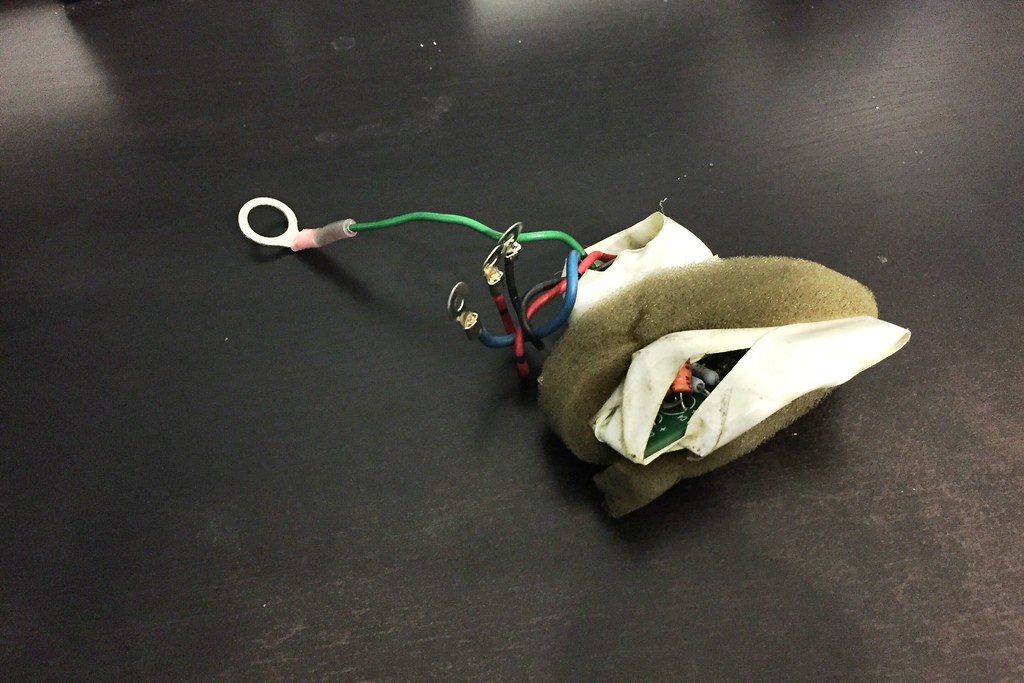
A 3/8 ring terminal was the size I end up using. It's a tad too big for the light bulb but that would be fixed later.
The light bulb would need about 2mm of plastic removed from the groove that allows the bulb to twist and lock onto the plastic. A sharp box cutter blade can easily chip out a chuck a plastic from the bulb. Just make sure not to cut too much or else you'll have a loose light bulb and it won't lock tight.
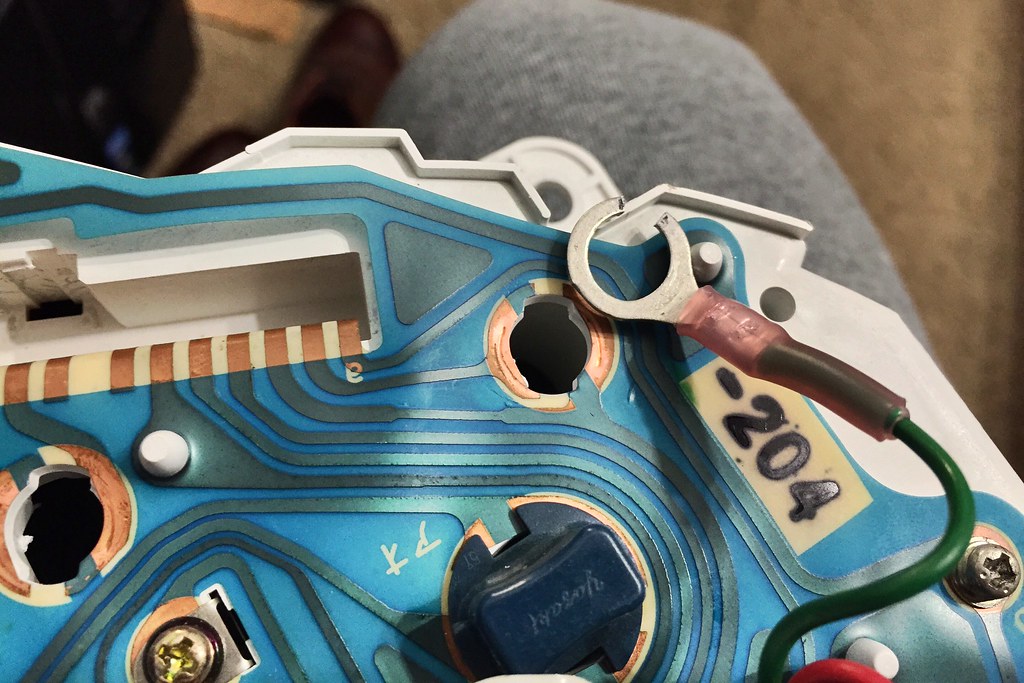
Unscrewing the bolts and matching the wires to the reference pic was the easiest part.
Next was to cut a chunk from the ring terminal where there's a free spot and not used by the bulbs contact points (2). Using a plier I compressed the ring down to the size I needed for the bulb contacts. Pretty much converting it to a spade terminal. I also added a bend to the terminal so it wont contact another area in the blue circuit panel.
If you compressed just the right amount you can squeeze in the light bulb thru the gap and lock the bulb in place.
Last but not least. Replace the cruise light gauge with the low gas gauge.
You just leave the board hanging on the back since its a tight fit once you install it back in your dash and you'll need to wiggle it around until you find the right spot.
I never let my gas get very low buts its nice to have a extra feature there to warn me just in case. My gas needle is a bit off anyways so its cool to have a back up.
In other news I'm still not done with my art project. Wheels and tires is all that's left though.
I also bought some new aero parts. One should be arriving next week. The other was purchased at REV9 Autosports. I couldn't pass up the huge sale !
RotorNutFD3S (12-30-2014)
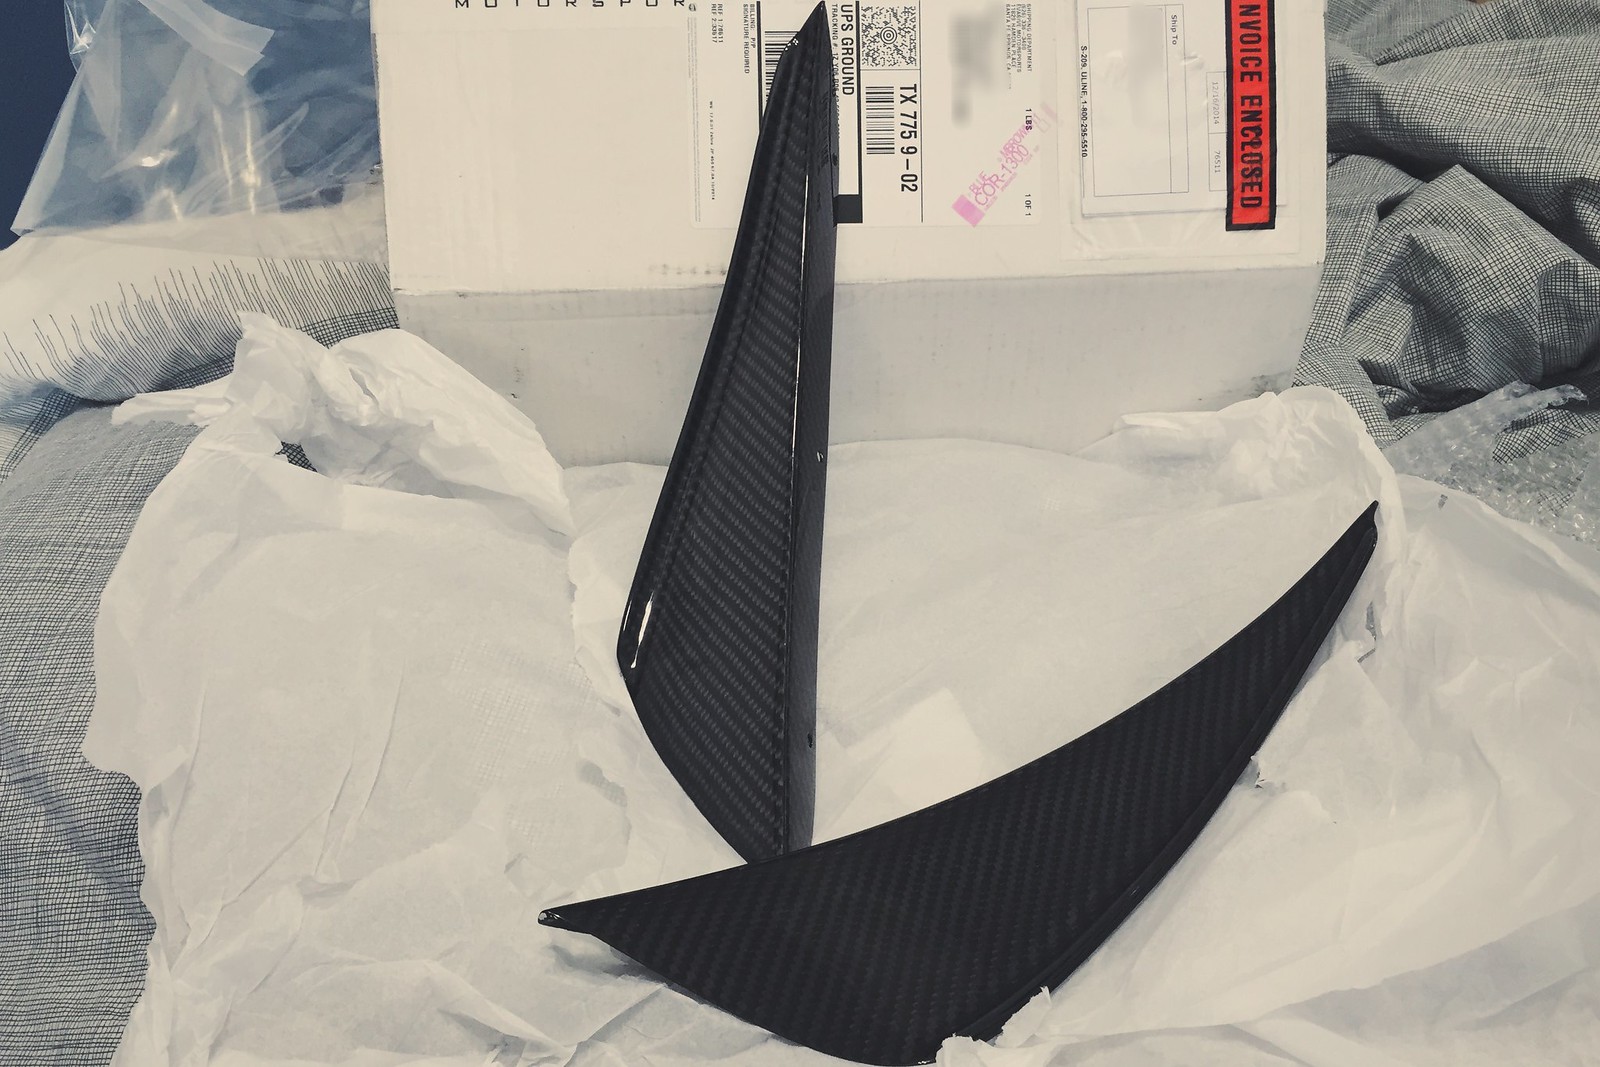
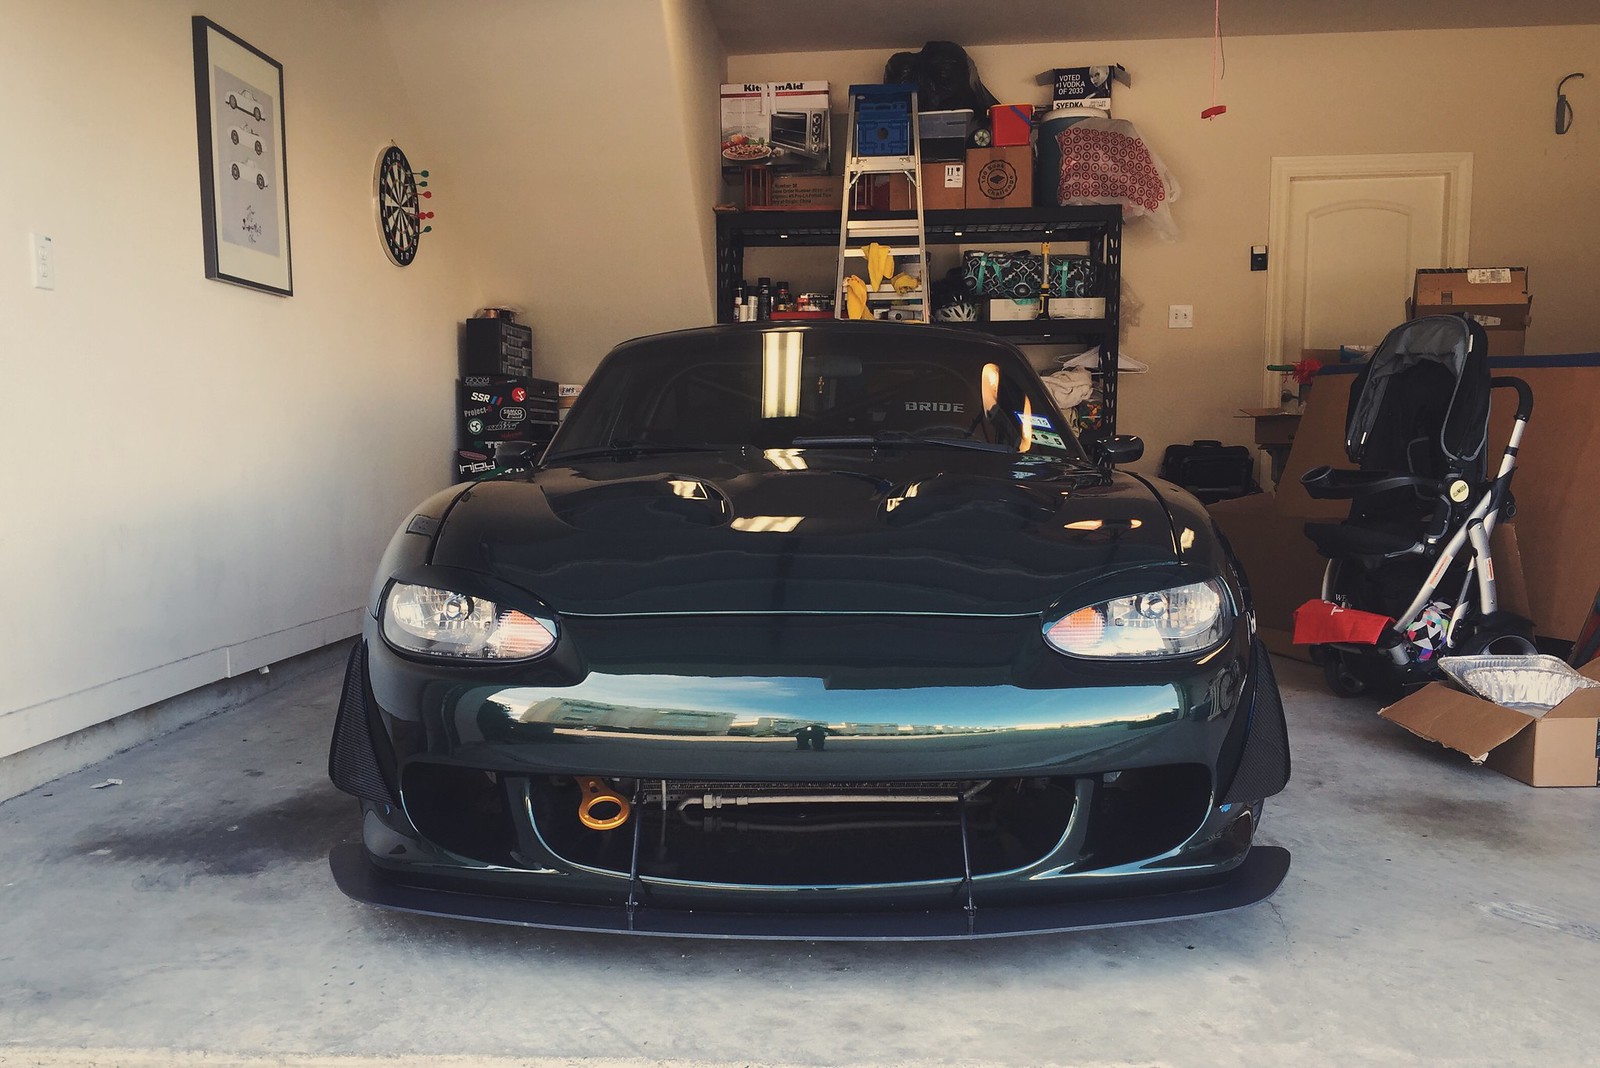
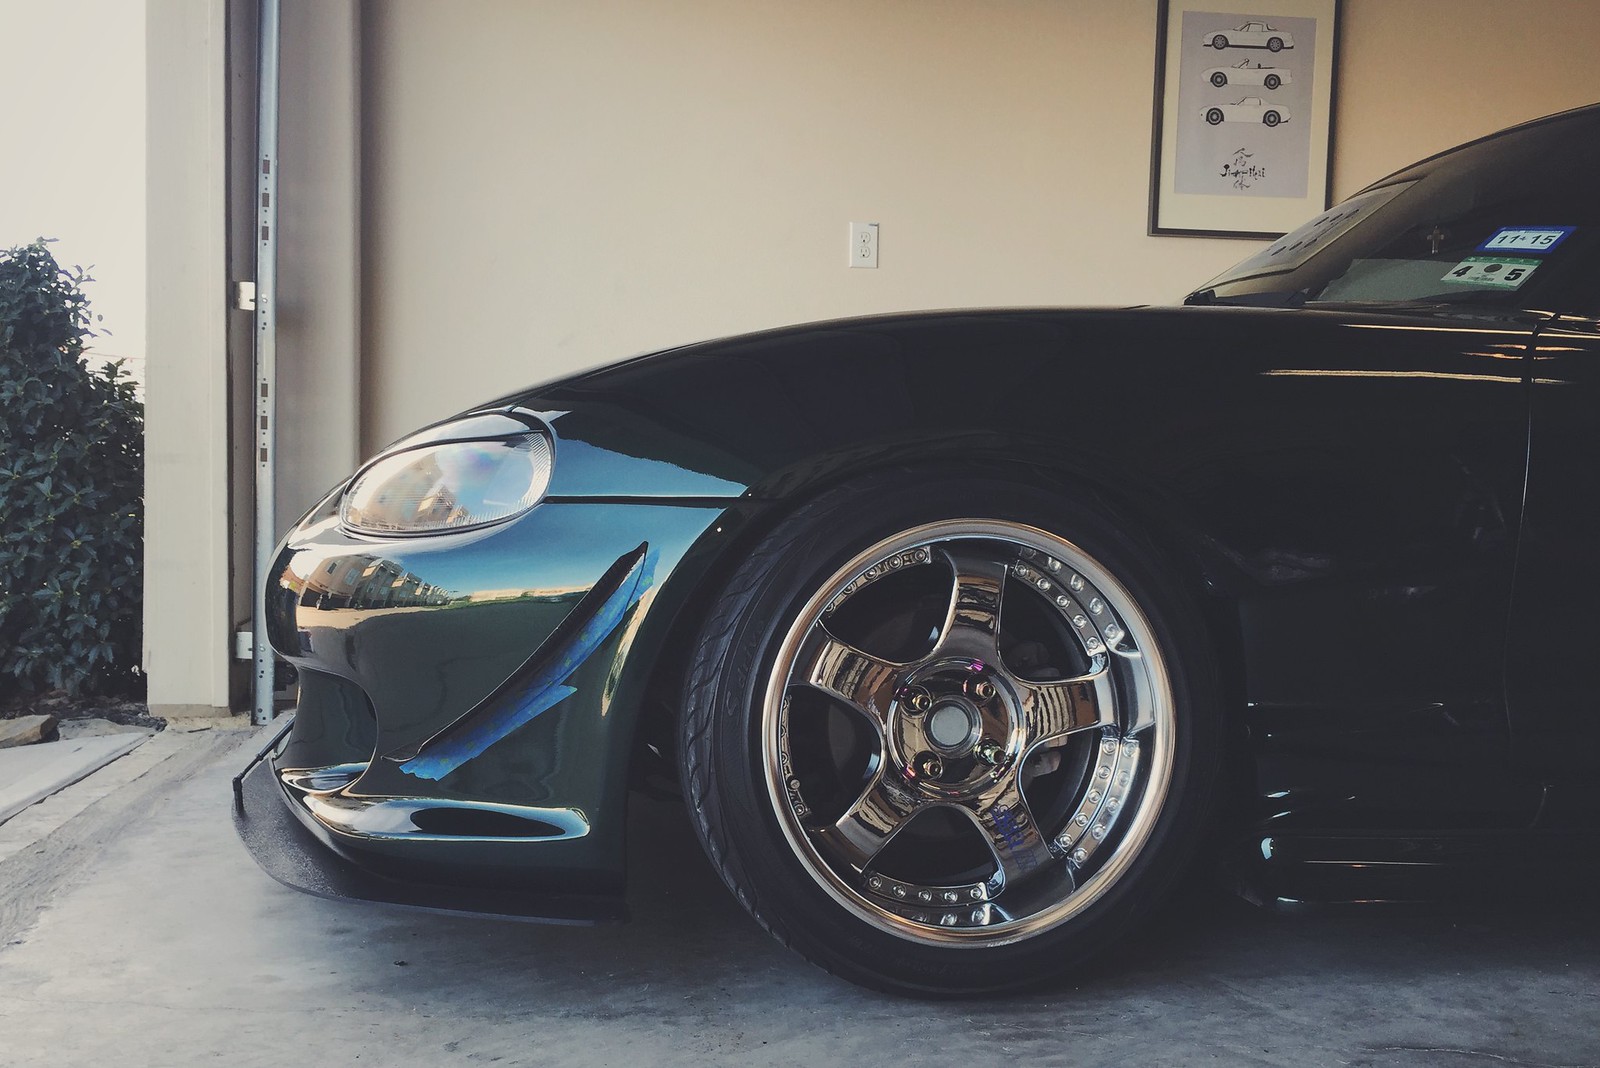
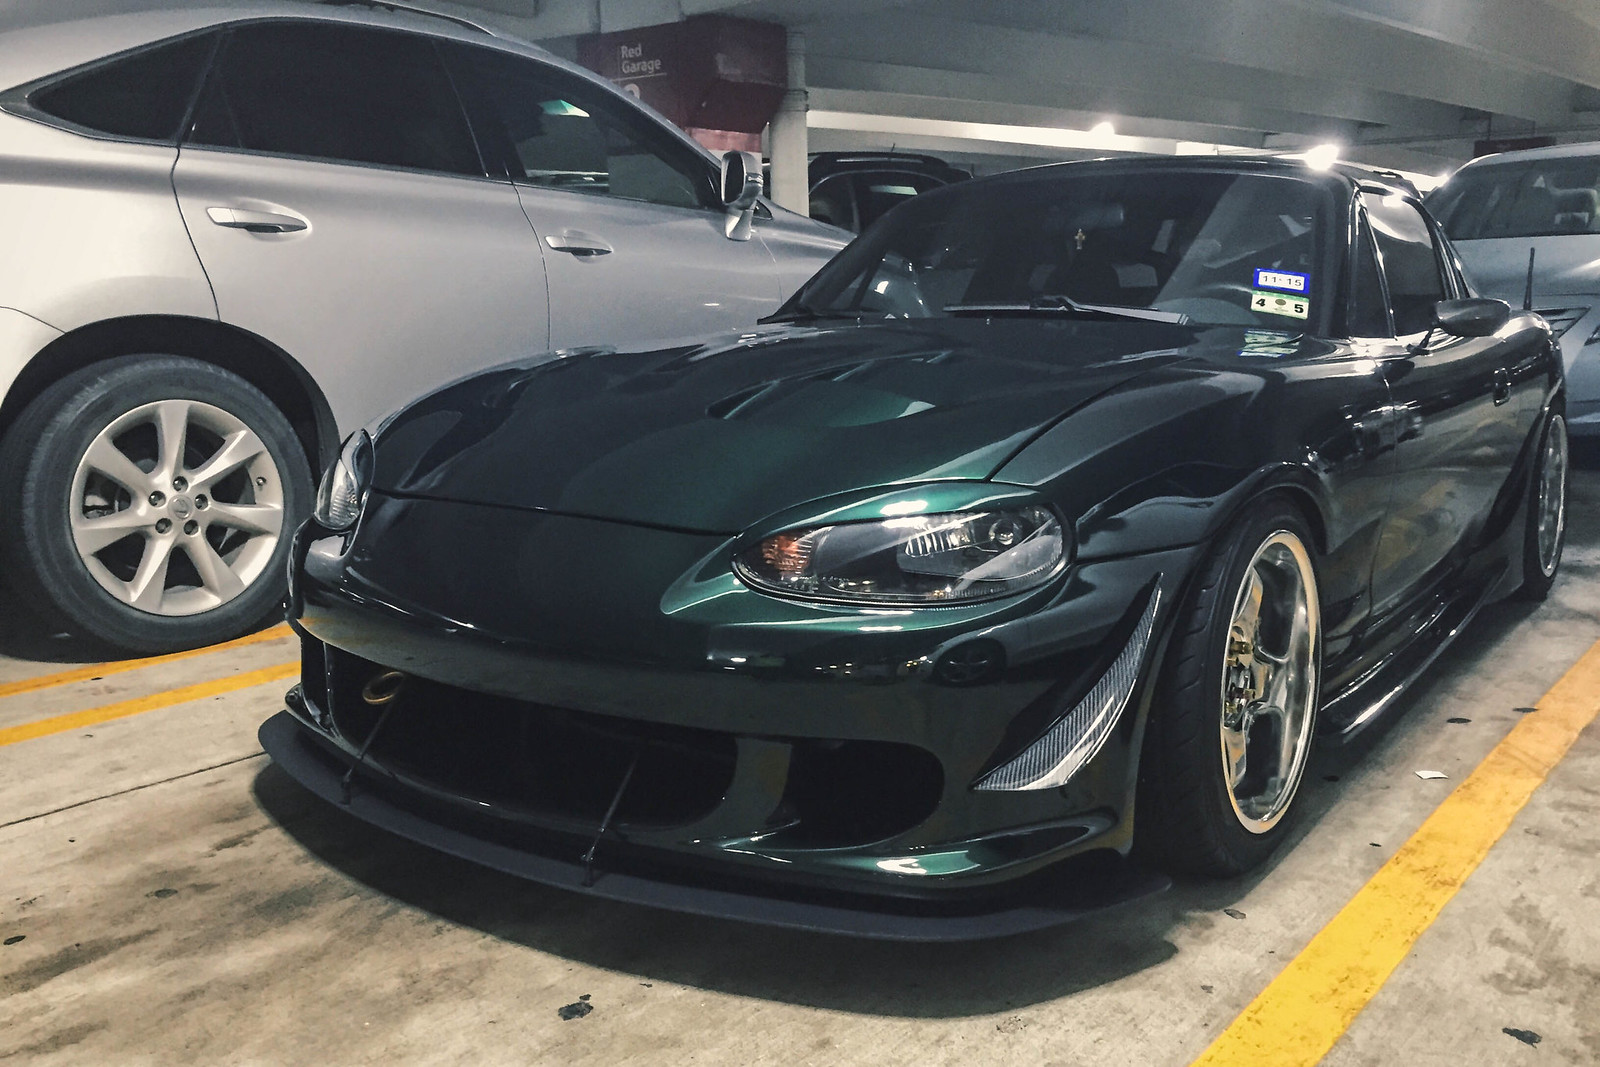
Bought some APR 3D front canards. I took a gamble and went with the S2000 model.
GV canards are too pricey at around $300 shipped. CarbonMiata ones are cheaper but are molded to fit the OEM front bumper. These APR ones were on sale for $230ish shipped so I went that route.
I test fitted them on the AutoExe front bumper and the fitment is not that bad at a certain angle. Any other angle and the middle portion starts leaving a big gap. I really really really don't want to drill into the front bumper so I think the way I have them mocked up right now is the way I'm going to go. Not sure if they are doing their job at this angle but it will do in the meantime.
In order to match the aggressiveness in the front I also purchased canards for the rear. Well sort of. GV calls them "rear garnish". I bought them from Rev9 Autosports holiday sale and saved $50. Wooohooo. That completes my Christmas gifts to myself.
You can see the small piece here on this pic. It's placed right above the rear wheel arch where the quarter panel and the rear bumper come together. It will be painted to match the car

Last edited by pacman 99; 01-05-2015 at 08:06 PM.
Amazing....I've always thought of the same pieces for my car (other priorities though). They look great.
Thanks man! Hope you can eventually one day get back to your car project.

This is an amazing build thread and and even more amazing car. Thanks for sharing with us. It definitely gives others and myself some inspiration.
pacman 99 (01-06-2015)
Digging the canards. Too bad they don't fit too well. I've sure you'll figure something out.
My build thread and my Instagram.
Canards are officially on. I ended up using multiple layers of 3m double sided tape to fill in the bigger gaps.
atxsbigwalt (01-29-2015),RotorNutFD3S (01-29-2015),tsingson (01-29-2015)
 Posting Permissions

 Reply With Quote