Great upgrade. Yes, I know you have the wheels sorted, but these look MASSIVE on the car. Like it's on 20" or something.
Sent from my iPhone using Tapatalk


Great upgrade. Yes, I know you have the wheels sorted, but these look MASSIVE on the car. Like it's on 20" or something.
Sent from my iPhone using Tapatalk
HarryB (02-09-2017)

Very well done, Adam. I'm really excited to see what you do with your NC. You've done so well with Sharka I know the Stormtrooper has a lot of good in it's future.
My build thread and my Instagram.

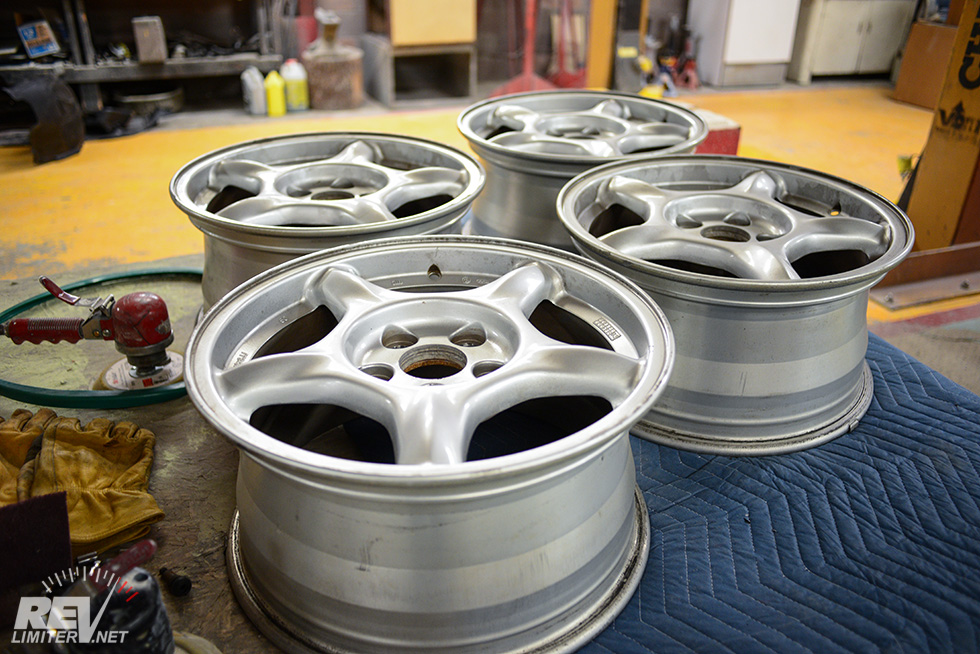
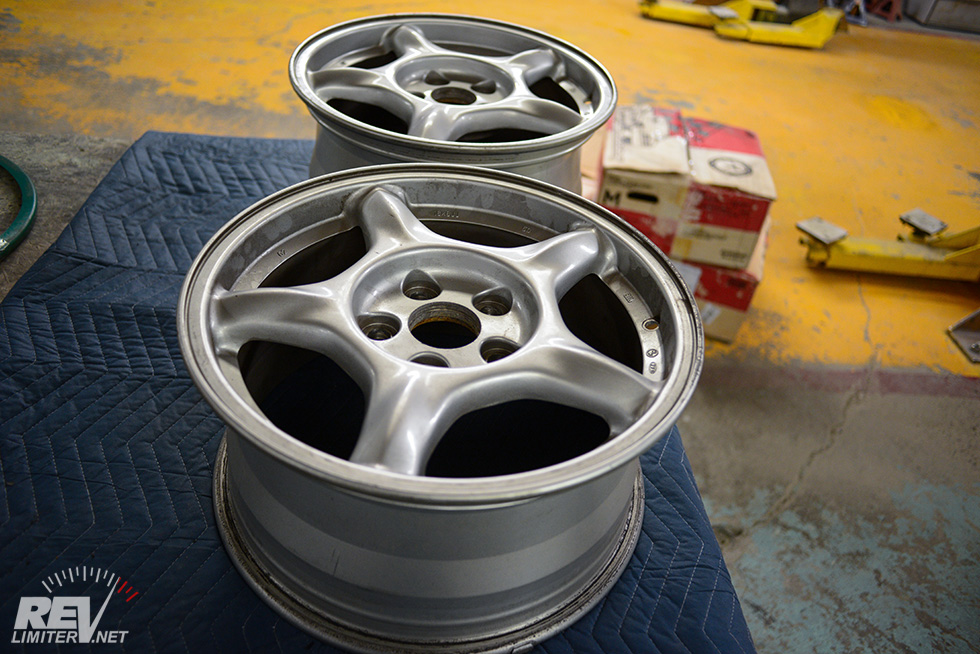
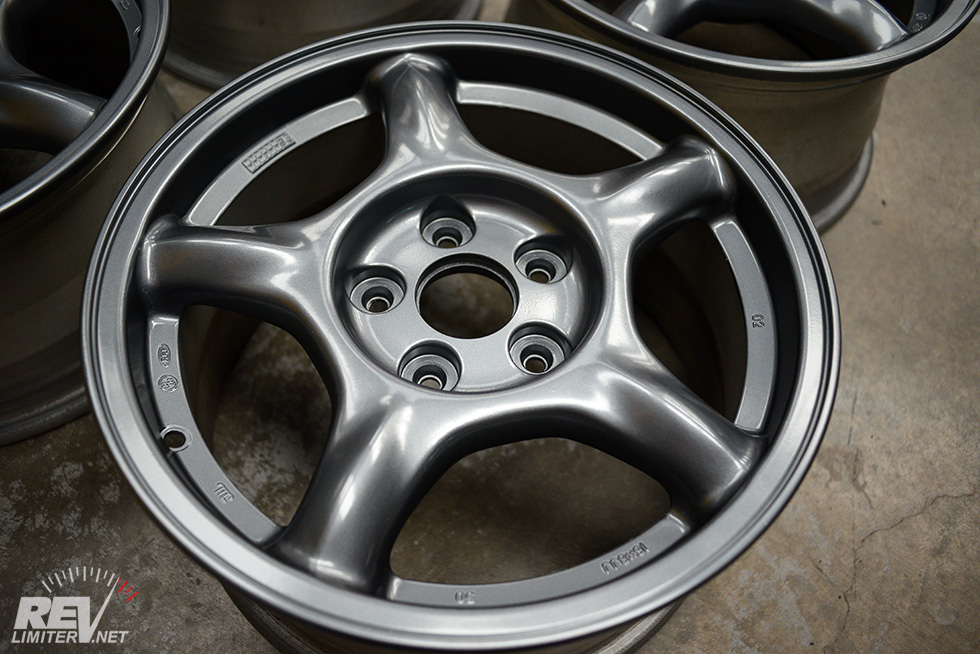
Yes sir. FD RX7 wheels.
All empty space. These are the 13.8 lb version. That seems insane to me in a 16x8 wheel. That's lighter than RPF1 specs.
Vintage 90s goodness.
I got the wheels on a Saturday night. I opened them and made sure they were round. I closed them up and took them immediately to Carmer’s, the shop that painted Sharka and my family car. And Sharka’s rollbar. And every other paint project I can find.
A quick shout out to Corey (corifto), a good friend and someone with an amazing talent for finding goddamn anything in the world with only a few minutes work. I sent him an off-hand email about the car and that I was looking for wheels. Within an hour, he got me in contact with someone selling a set for a good price.
A couple days passed and the wheels were in my hands. And they were fantastic. Thank you Corey!!
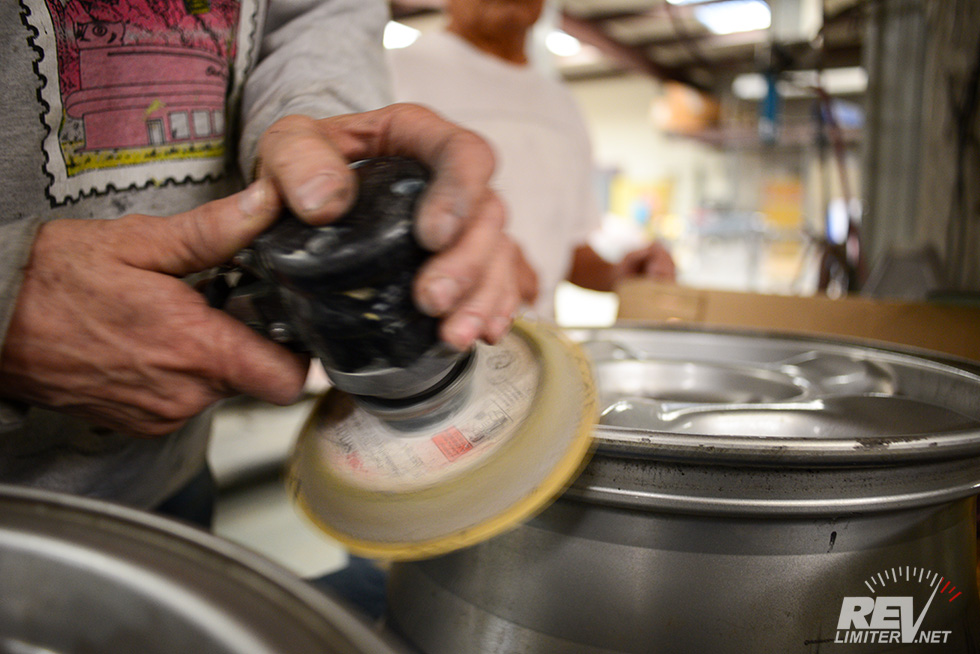
Back to the paint.
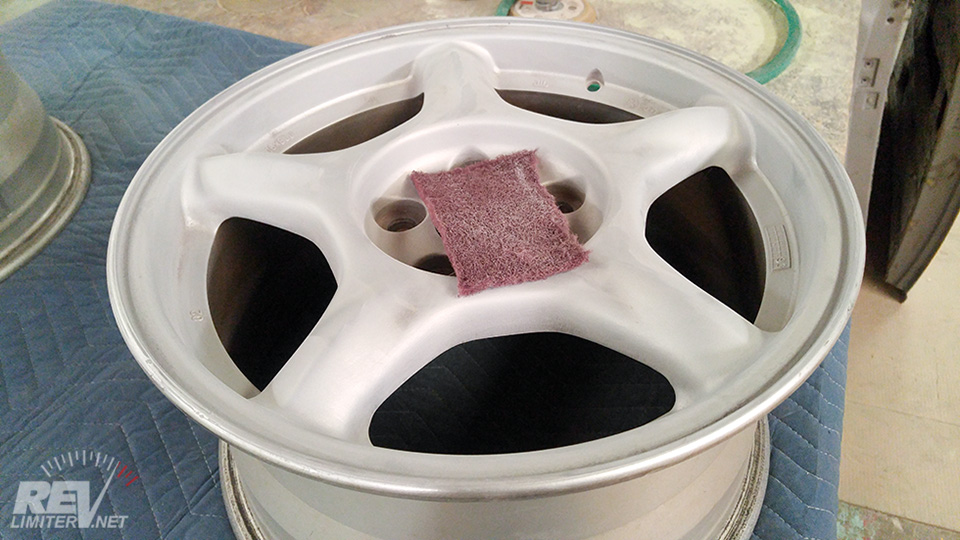
Like 10 minutes later and a wheel was already scuffed for primer.
Not bad eh? I kinda like the scuffed finish.
but a couple days later...
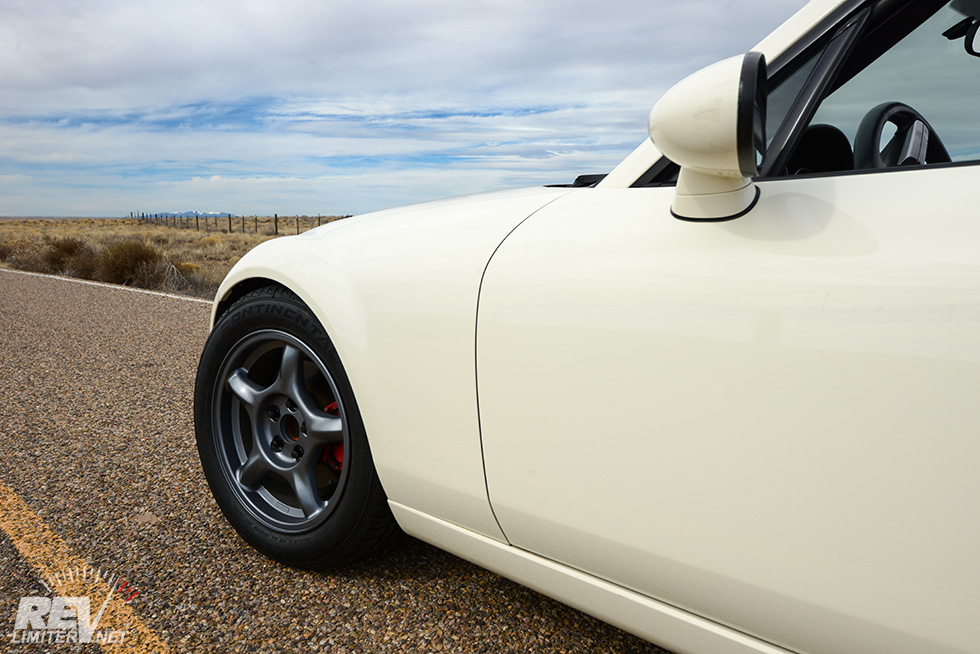
Porsche platinum satin.
John (posts as Louros on CR) really knocked it out of the park with this suggestion. I was smitten by the color immediately and had to have my wheels painted in it.
I love this finish. It’s paint. It’s not black. It’s not the ever-popular gunmetal finish either. It’s… got so much depth. And it’s not too shiny.
In this finish, the wheels will still exist when you look at the car (and when I take a photo). They won’t be just featureless black areas under the wheel wells. The wheels will still have depth and detail.
I owe John something for this suggestion. Thanks again my friend!
And now for tires.
I opted for some Continental DWS in 225/50 size. They’re on super-sale right now at Tire Rack due to a new model coming out and I’ve had them on the Mazda3 for a couple years. For all season tires, they’re fantastic. Just the thing for Stormy.
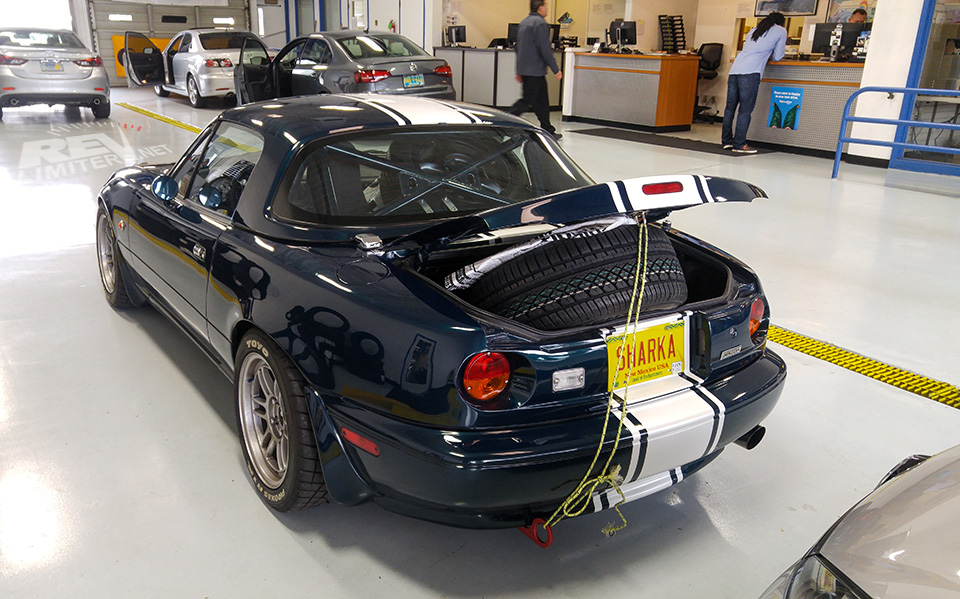
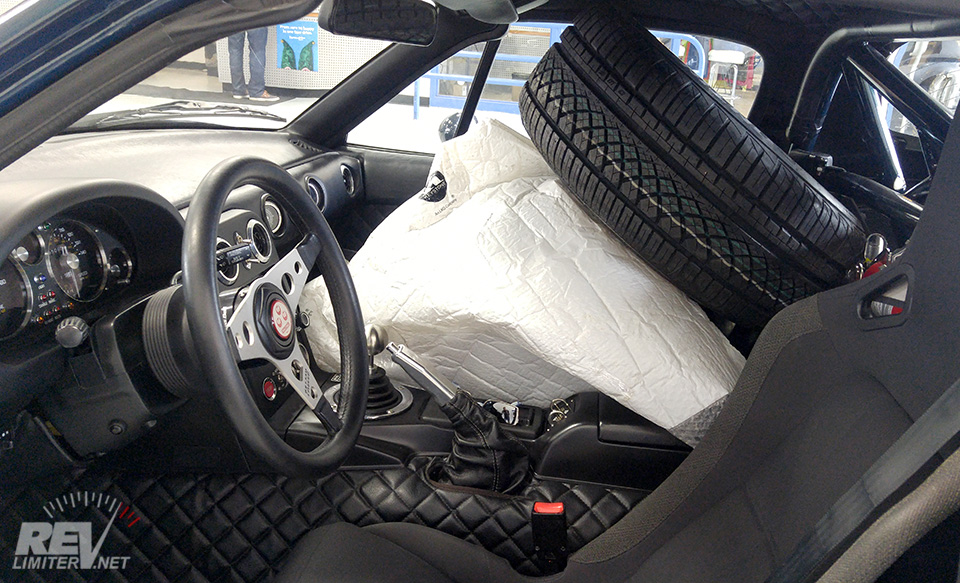
Oh hai Sharka!
My 3 buddies.
I got the tires road-force balanced at the local Mazda dealer. While there, I was told there was no way I was fitting all of them in the car.
hahaha! I love playing that game.
We drove home like this. Sharka loved it.
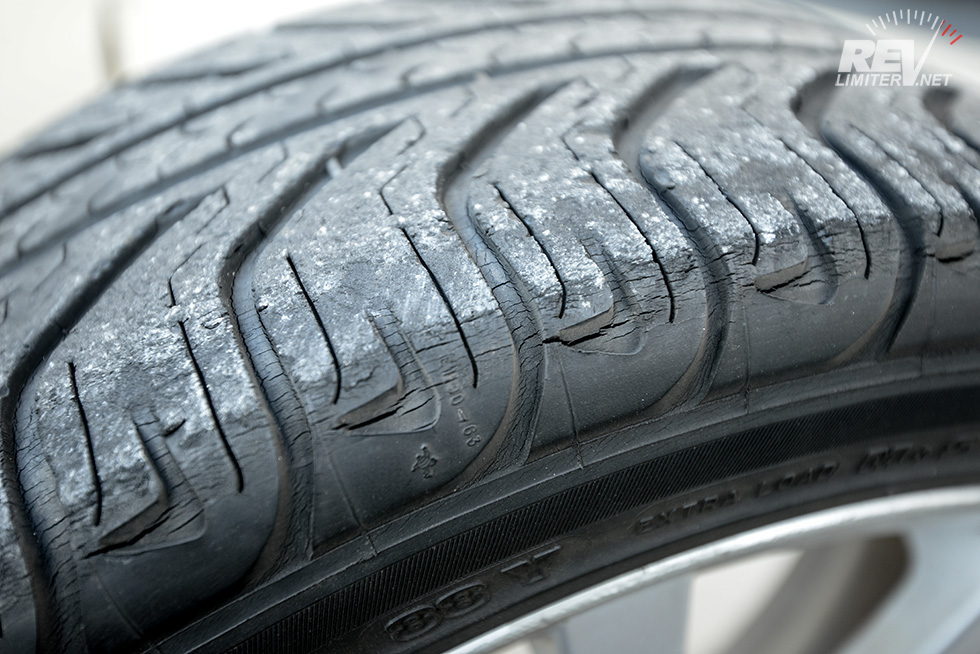
A few words about Stormy’s old tires – yuck. Ouch. Holy shit. And perhaps “no.”
The rears were 3 year old Coopers. Nothing wrong with those, they just weren’t nearly as sticky as the DWS all seasons going on the car. But the fronts?
8 year old Michelin tires. Totally dry rotted and cracked to hell. There were cracks INSIDE the tread. Just… horrible.
There was even a nice gash in the sidewall that I never noticed until removing them.
Bye bye old tires.
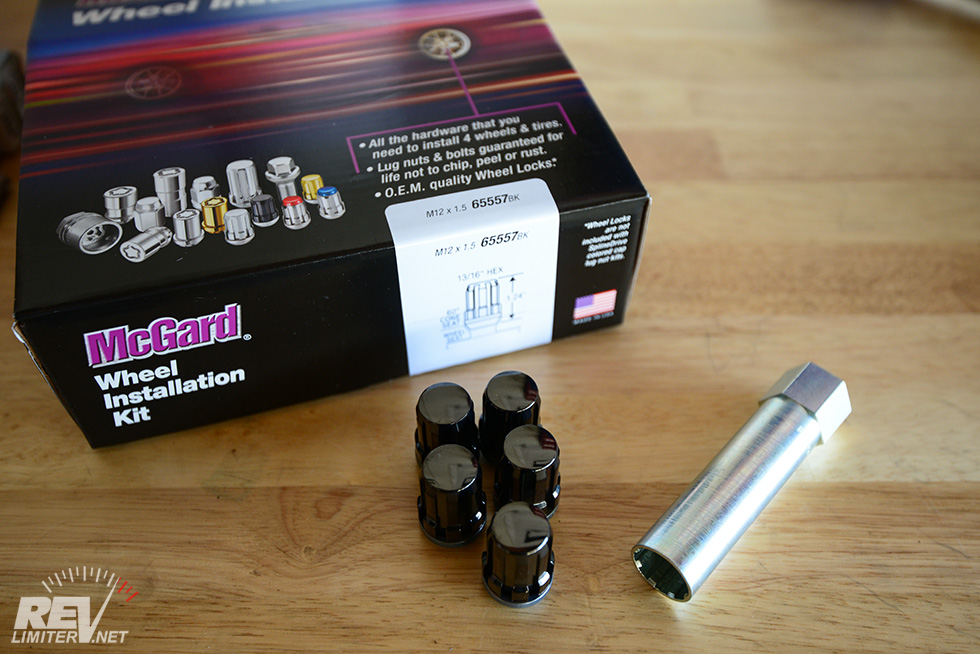
McGard lug nuts in black with the fancy spinning seat? Yes please. The spinning seat will help ensure that the nice Platinum Satin paint doesn’t go away with every wheel on/off cycle.
And one more thing before the reveal.
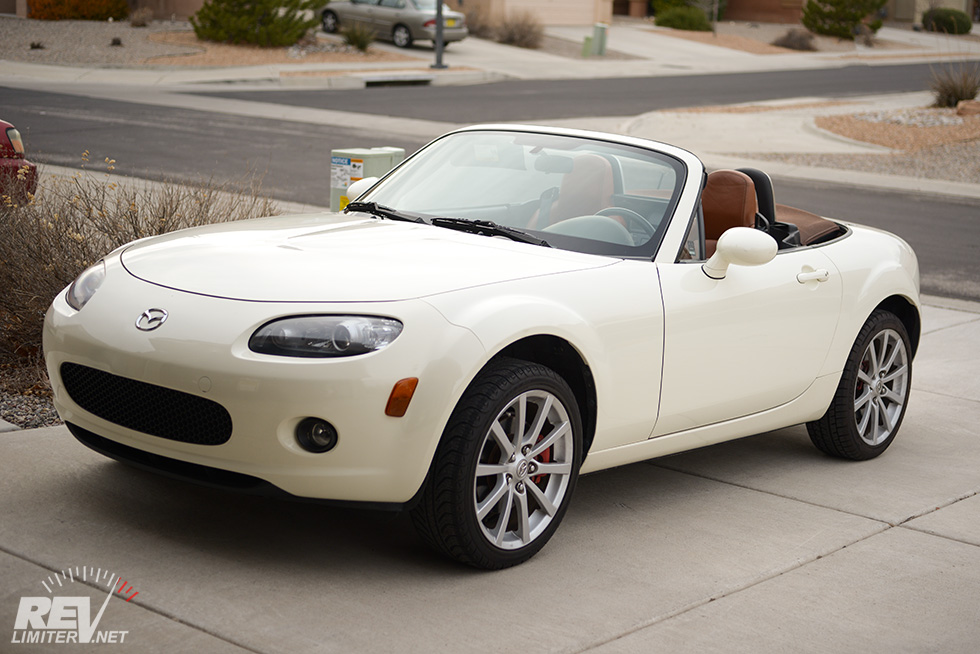
I wanted to do a quick reminder of where Stormy used to be. This was snapped so very long ago. 9 days prior to the writing of this blog entry.
Nine days.
Look at those wagon wheels. That ride height. The lack of attitude.
Shameful.
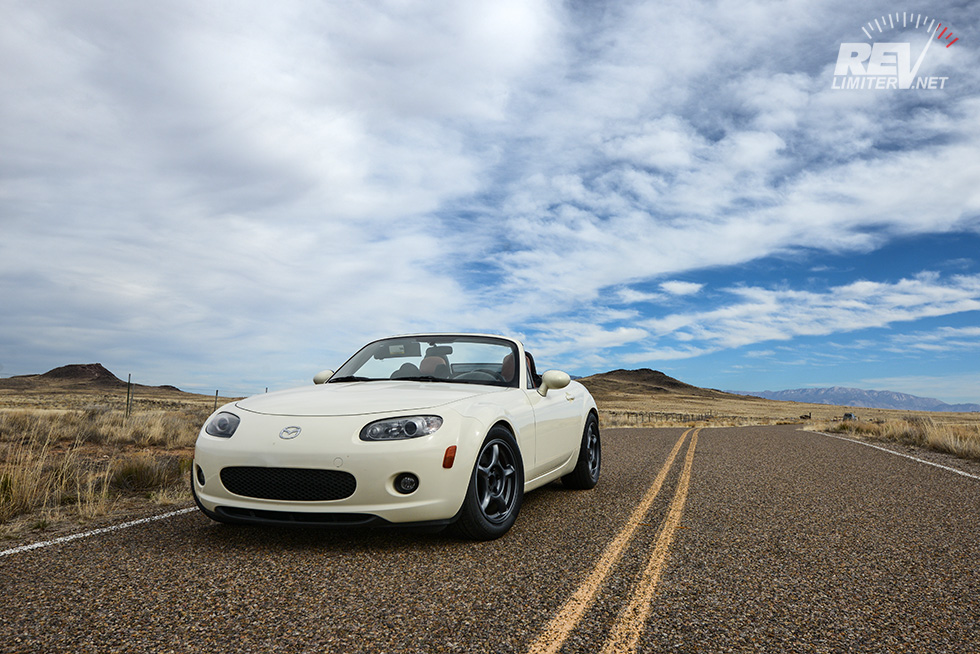
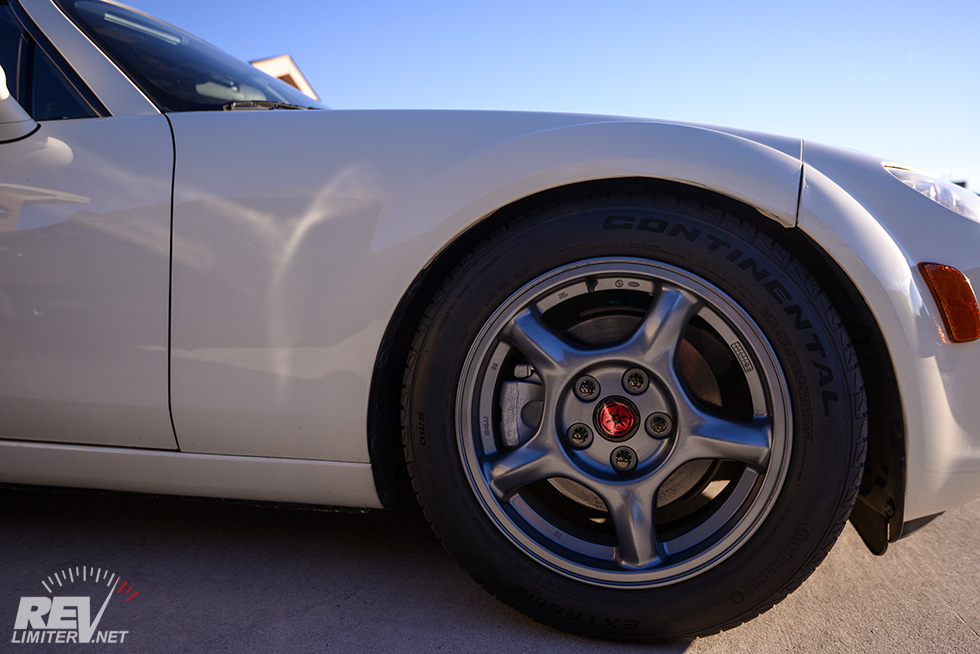
That's so much better. That's a Miata.
Let me try to get some thoughts together and stop gushing about the wheel and color choice.
They ride SO MUCH BETTER than the dead 17s. Holy crap. No comparison. Bumps are not jarring and the suspension is easily able to control the weight. The old wheel/tire combo was 41 lbs. The new one is 34. That’s a huge difference.
And the extra grip? Yes sir. Though I feel a bit silly talking about “grip” when all season tires are in the room, but these Continentals grip nicely. Especially in 225 size. They’re nothing like Sharka’s Toyos, but they are night and day between what used to be on the car.
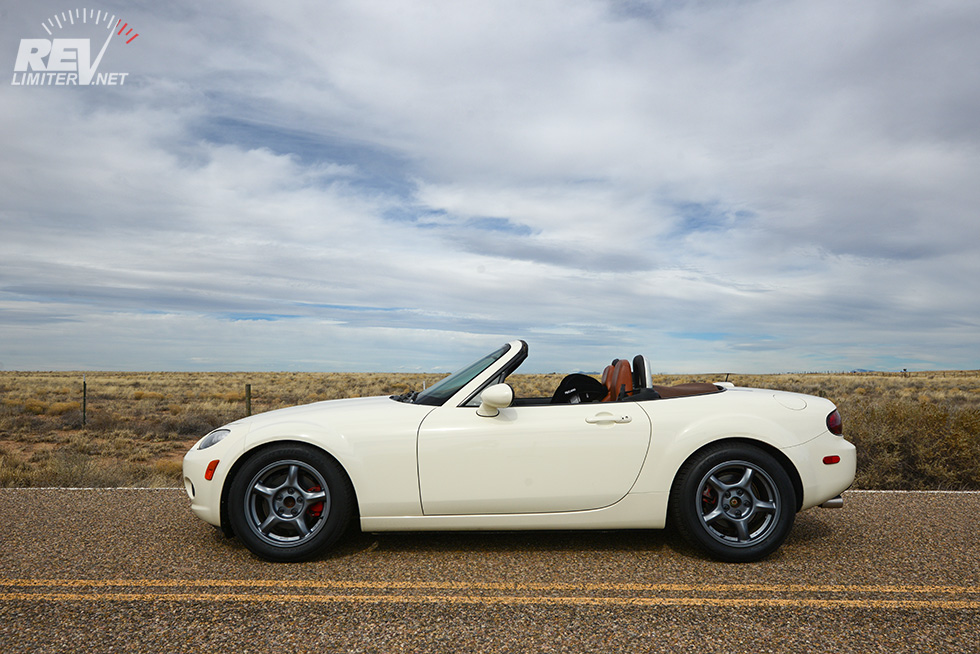
And they look so nice under the fenders. The extra rubber, the extra wheel offset, and the color. So very good.
(those red toenails have to go.)
Agent☣Orange (02-12-2017),BRGNA8 (02-12-2017),Dandy (02-12-2017),Greasemonkey2000 (02-13-2017),HarryB (02-13-2017),JamieH (02-12-2017),Martin (02-12-2017),MiataQuest (02-12-2017),NCGreasemonkey (02-13-2017),Paul B (02-13-2017),Phatmiata (03-08-2017),RotorNutFD3S (02-12-2017),RustRat (02-13-2017),speedypenguin (02-13-2017),tsingson (02-12-2017),vote4pedro (02-21-2017)
Stormtooper calender next year?
Seriously, I love this car. I've been thinking "NC" for quite a while now. Just can't part with the Italia, though.

Perfect wheels, gorgeous color. 9 day NC transformation. Much impressed Mr. Limiter, much impressed!!

That is delicious!!!
Follow on Facebook
http://www.facebook.com/96BRG
Follow on Instagram
http://www.instagram.com/96BRG
http://www.instagram.com/95NA8C
Why "part with"????? Just add an NC to the front curb.Originally Posted by Martin


BRGNA8 (02-12-2017)

I'll gush for you, Adam. I love the choice of wheels and the choice of color for them. RX-7 wheels on a car with RX-8 underpinnings - Love it. There is really something to be said for having an idea of what you want the car to be before you start modifying. I think, with maybe the exception of the Club model, the NC was born to be a tourer. You are not fighting that touring tendency at all. You are enhancing it. Well done.
My wallet isn't fat enough

Revlimiter,
you and I have the same taste I too bought the NC first thing I did was to purchase FD wheels
HarryB (02-13-2017)
I can’t believe I’m blogging about this. Spark plugs. Don’t they barely deserve 3 words typed about them ever? But here I am.
Because the Stormtrooper’s plugs were damn near welded to the head and required some heroics. I thought I’d blog about said heroics and hopefully help out some other folks.
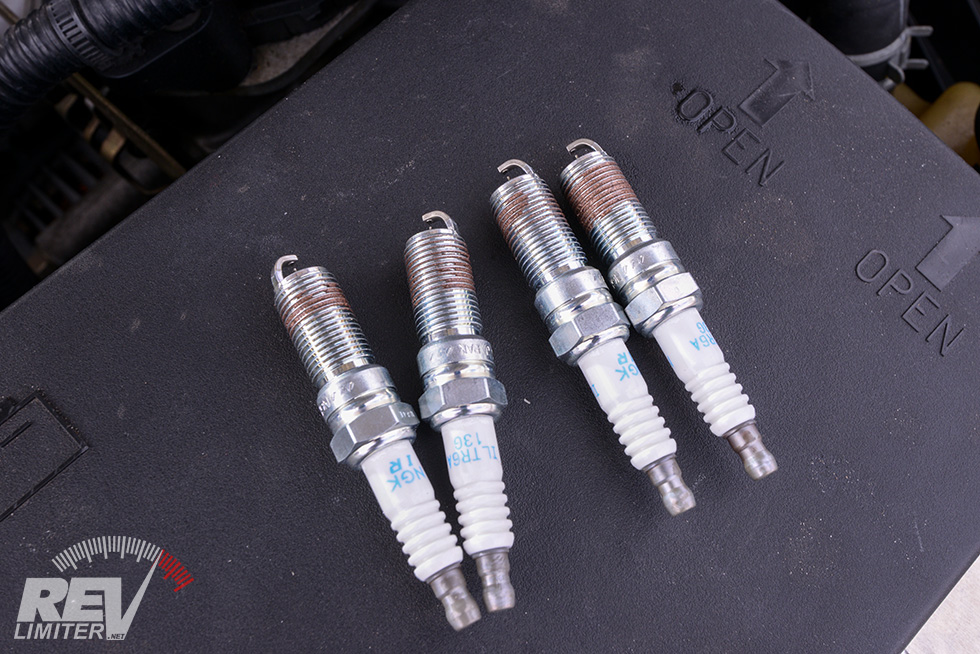
Back story – I bought some new plugs for Stormy. Nothing special. I got a set of NGK “laser” Iridium stock plugs (ILTR6A-13G or NGK 3789). The plugs apparently get changed about every 50k on NC Miatas. At 156k, Stormy was due.
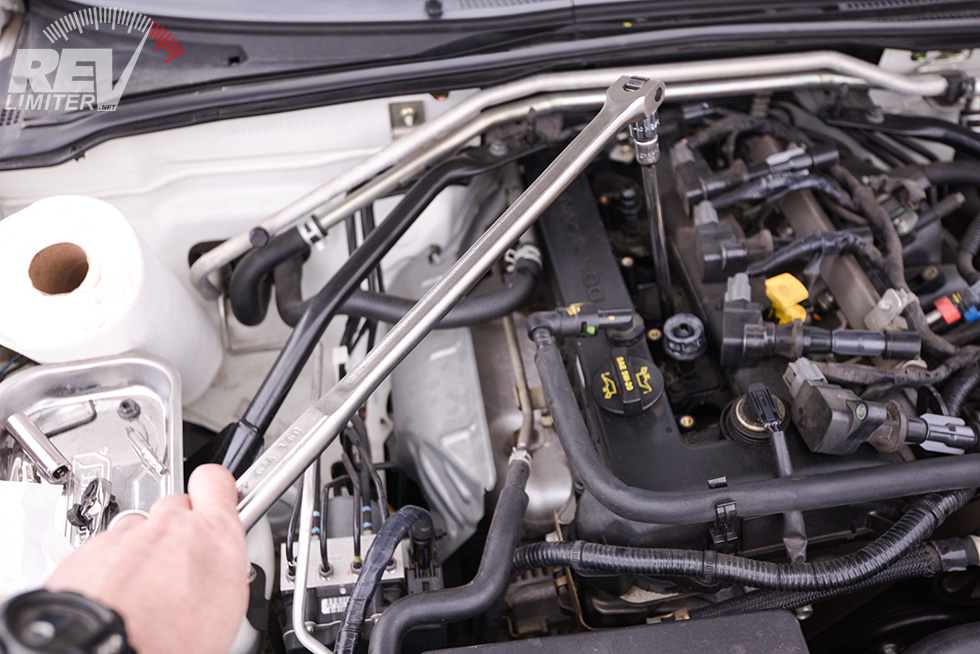
I grabbed my trusty 3/8″ ratchet, extension, and spark plug socket and attacked plug #1.
and… nothing. I grunted and groaned. Nothing. That plug was IN there.
I grabbed a breaker bar and applied that to the poor spark plug. And I strained and grunted again. And finally…. CRINK CRINK CRINK.
Just the worst sound and feeling ever to have come out of an aluminum cylinder head. It was the sound of threads coming out of the head. I stopped right there and regrouped.
This post is about the regrouping.
A bit of research revealed this is pretty common with Ford trucks. The plugs get welded to the head and break apart when you try to remove them. Owners need to use a special technique to get them out.
1: Work on a stone cold engine. This is very important. Park the car and then work on it wherever you parked it the next morning. Don’t move or start it. You have a better chance of success with a cold engine.
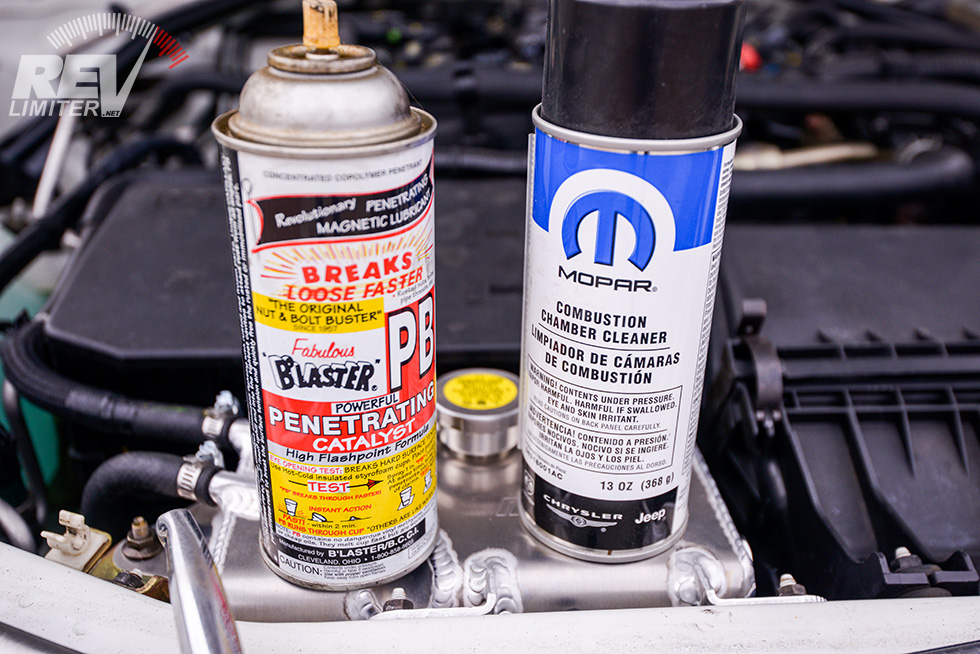
2: Carb cleaner + penetrating oil will help. Note the cans I used above. They are really way overkill for this. Like bringing a bazooka to a shooting gallery. But I didn’t have any carb cleaner on hand, so MCCC had to do.
Spray the carb cleaning in each plug well. You don’t need a lot, but you want to soak the threads around each plug.
Then add some penetrating oil to help lubricate the threads. Don’t use WD-40. Use a silicone oil or something like that. I’m a huge fan of PB Blaster. It’s an almost magical fluid.
Let the fluid combo sit for a couple minutes. You really don’t need to wait long, just a bit to let things start to work.
3: Break each plug free, then re-tighten. It’s nerve wracking to break the plugs free, but it has to be done. No time like the present.
Once things are slightly loose, just re-tighten and let sit for another few minutes. You’re trying to get a bit of fluid down the threads. You can even go back and forth breaking free and re-tightening for really stubborn plugs.
Note, you do not need to fully torque each plug back in place. Just a bit of tightening is needed.
4: Remove the plugs. After an initial struggle on each plug, they all came free easily. Maybe the first turn was hard after performing the above steps, but all following turns were very very easy.
And holy crap did it feel good getting those plugs out without destroying the head. Such relief. OMG.
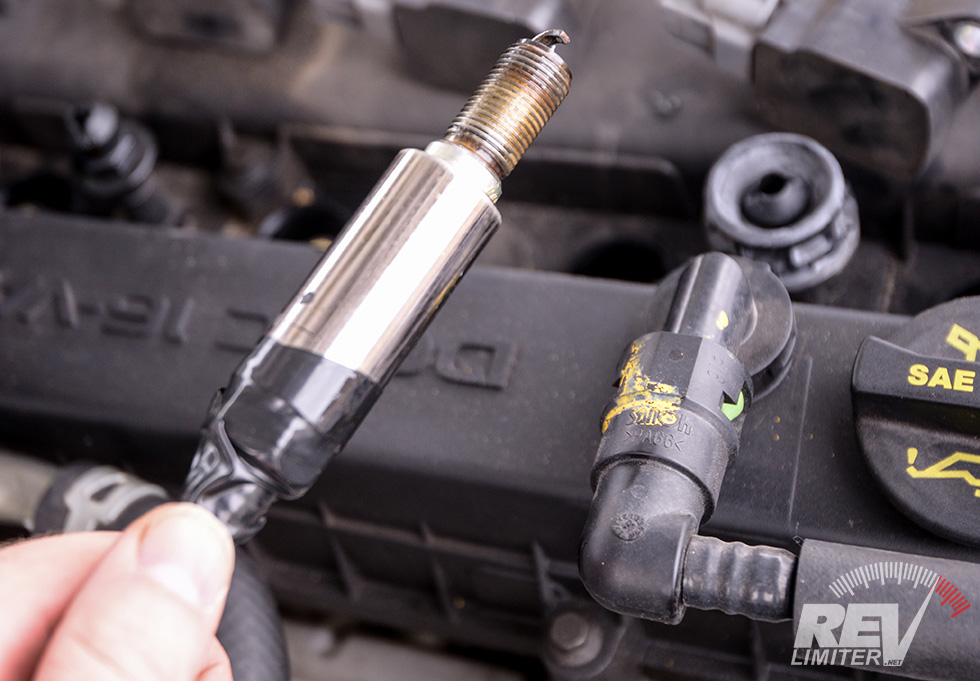
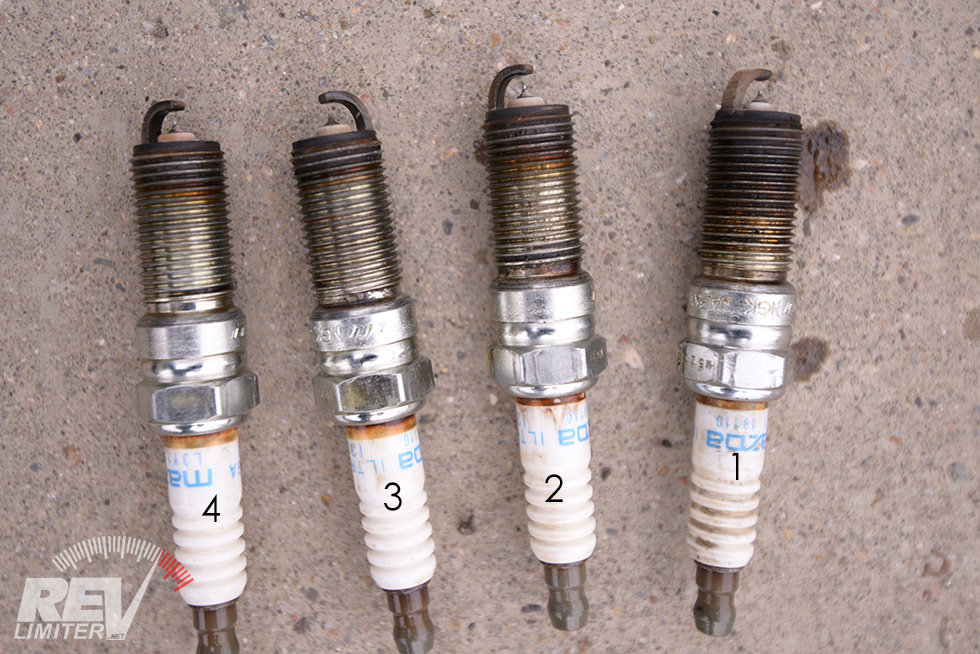
I was pleased to not find FoMoCo plugs in the engine. Those would have been the factory original plugs. The ones I found were the exact ones I was installing, just stamped with MAZDA. So someone changed these between 50 and 100k miles.
Yay for basic maintenance!
The plugs looked pretty good. No red flags that I could see. Correct heat range plugs on a stock engine.
I gave each plug a bit of anti-seize compound before installing. This seems to be a bit controversial now days. I researched this topic and found all manner of opinions on modern spark plugs and anti-seize.
Some folks claimed modern plugs don’t need any compound at all. Others liked nickle based anti-seize. The vast majority seemed to like the classic copper anti-seize.
I’m not here to suggest anyone out there do one thing or another. I used the copper stuff. I’ve done that with every plug I’ve ever changed for the past 20+ years and never had a problem removing a spark plug. I crossed my fingers and greased up the Stormtrooper plugs.
I torqued to 8-10 ft/lbs, which is factory spec. I used my 1/4″ drive in/lb wrench to do it. It’s such a cute torque wrench. I should have snapped a pic.
And that’s it. Way more than I ever expected to type about spark plugs IN MY LIFE.
Agent☣Orange (02-21-2017),BRGNA8 (02-28-2017),HarryB (02-22-2017),NCGreasemonkey (02-21-2017),Phatmiata (03-08-2017),RotorNutFD3S (02-21-2017)

I've used copper grease on my plugs as well. So far so good.
Link to the most lack-luster build in MR history

When I did my 2005 Ford Expedition plugs, I used the nickel stuff. I broke 7 of the 8 plugs in that one but luckily I had the Lisle tool to assist in chasing the body of the plugs.
NCGreasemonkey (02-21-2017)
Hmm. This isn't a Miata part.
I’ve always been fascinated by 3D printers. Fascinated and kinda intimidated. See, I’ve got next to zero 3D CAD skills. I can (and do) draw in 2D all day, but none of the programs I use for gauges are setup for a Z axis. So… no 3D skills.
Yet.
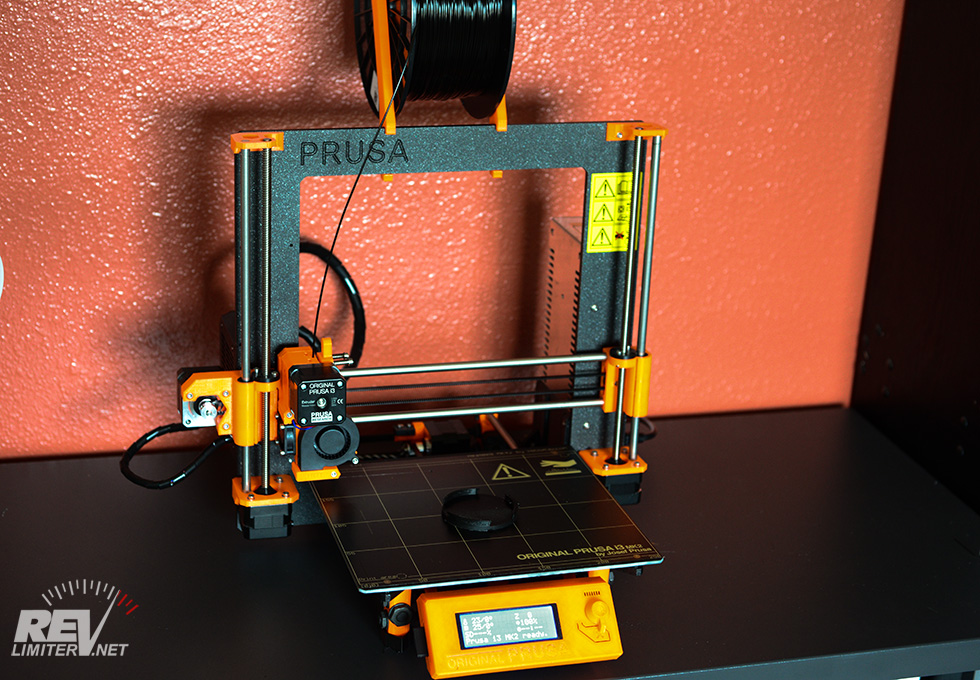
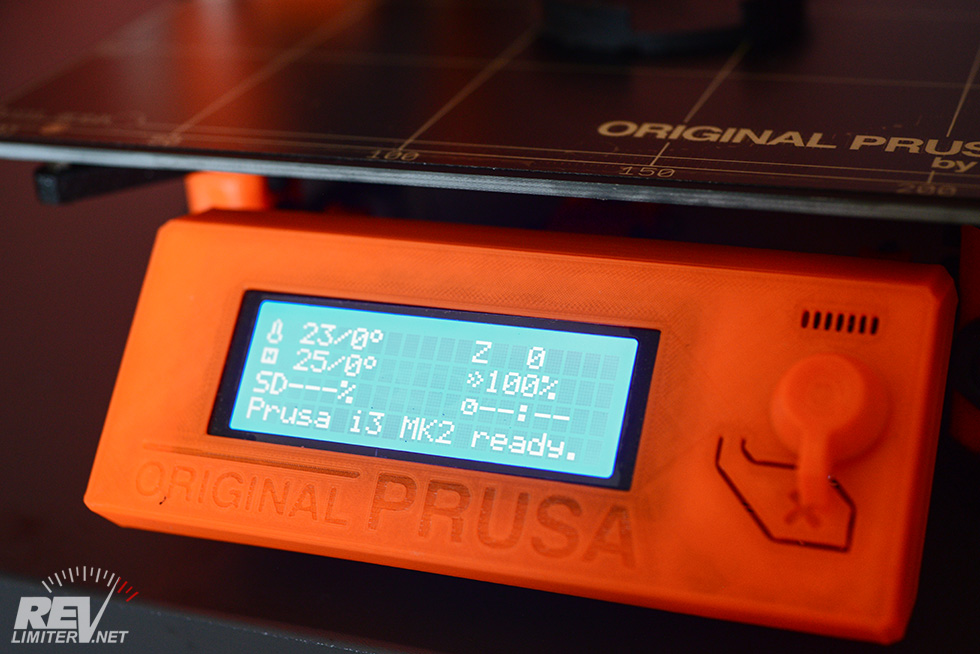
Last Black Friday, I was bitten by the 3D printer sales. I shopped and researched and consulted buddies into the 3D world. One winner emerged (which wasn’t actually discounted for Black Friday): The Prusa I3 mk2.
The youtube reviews convinced me. They were, in a word, glowing. It’s been called the Gold Standard of 3D printers. So many gushing reviews. So many features! And an affordable price tag. I was smitten.
About 2 months later, mine was built, delivered, and on a desk.
Guess I should start building those 3D modeling skills eh?
A few specs on the Prusa I3 mk2.
- Build volume: 25 x 21 x 20 cm
- Metal frame
- Integrated LCD and SD card controller
- Automatic mesh bed leveling and axis skew compensation
- Heated print bed
- 5 to 35 micron print layers
- Any 1.75mm filament works with it.
- Open source and hardware.
- Quiet printing
That ticks all the boxes for me.
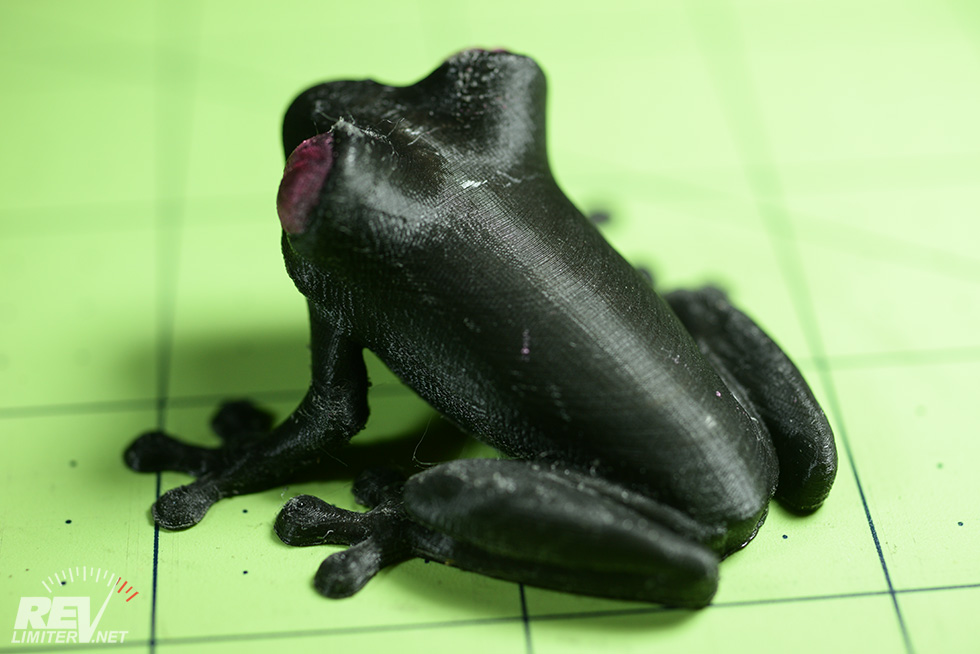
This was the first thing I tried to print. The Prusa comes with a bunch of test models loaded on an SD card. This is a tiny frog with a .05mm layer height. Took 3:30 to print. I didn’t clean or smooth it after printing and before taking this pic. I just sharpie’d the eyes.
It’s SILKY smooth. Like, amazing. I’ve never seen this kind of quality from a traditional FDM printer (the kind that adds multiple layers of melted filament to make an object). I mean, it took comparatively forever for this tiny print. Doing the frog at .35mm layers would have taken a half hour or less. But that smooth back. Impressive.
Yeah, this will make prototyping badges and stuff so much easier.
I’ve modeled a few things in 3D before in my life. I mean… not well, but I did it. I’ve used SketchUp for a few frustrating hours. It’s easy to draw with, but if you want to scale anything, it becomes exponentially more difficult, at least for me.
The idea of using Sketchup for many many more hours did not excite me, so I started trying out other programs. Autodesk Fusion 360 has come out in front as the winner (for me). It’s SUPER easy to draw with and scaling things is part of every step.
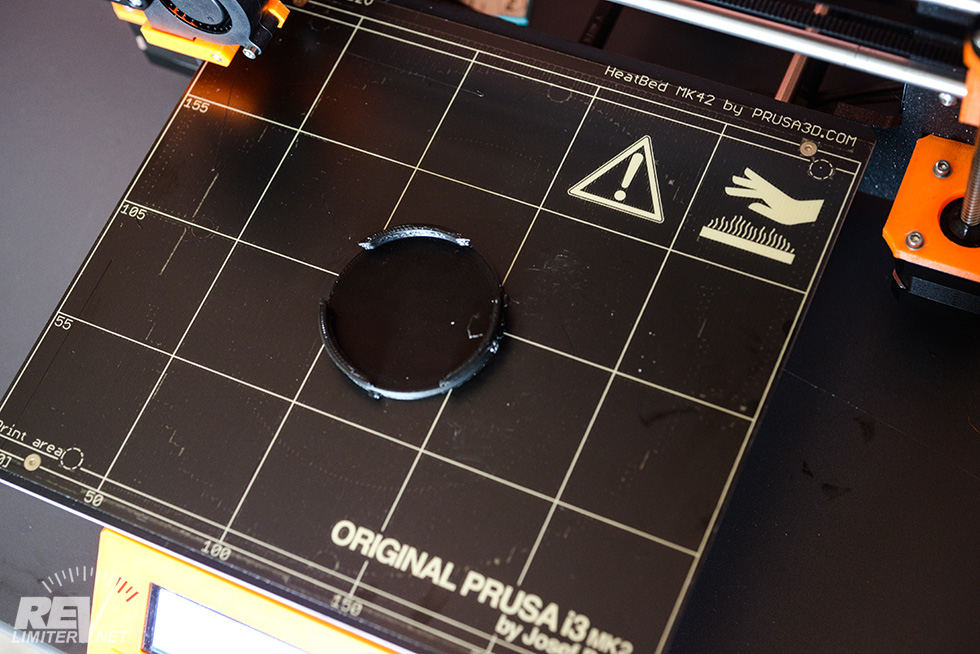
This 3D printed wheel center cap took me maybe an hour to draw up in Fusion 360. That’s with watching tutorials and fumbling around and stuff. I’ve re-drawn it several times since the one pictured above was printed. Just to get more practice and tweak the design. It takes me just a few minutes per model now.
Fusion 360 is a great program. I’m quickly becoming a junky.
And no, I do not plan on offering 3D printed center caps for sale. This was only a test object for me.
My thought process: “I could plane down the stock FD wheel center caps… OR I could print something with the new printer! OOH! Printing stuff!!” And so I spent a couple days arguing with the printer before I could show off the above pic.
Again, I am not offering 3D print services to make center caps. This was a test run for me to see if I could do it. A starting project to get a little comfortable with the new printer.
The whole 3D printer thing has quite a bit of a learning curve. For one, I learned that PLA doesn’t like high temperatures and doesn’t have any flex in it.
So… not the best material for wheel center caps that will get heated and cooled over and over and need to flex-fit into the wheel…
You live and learn, right?
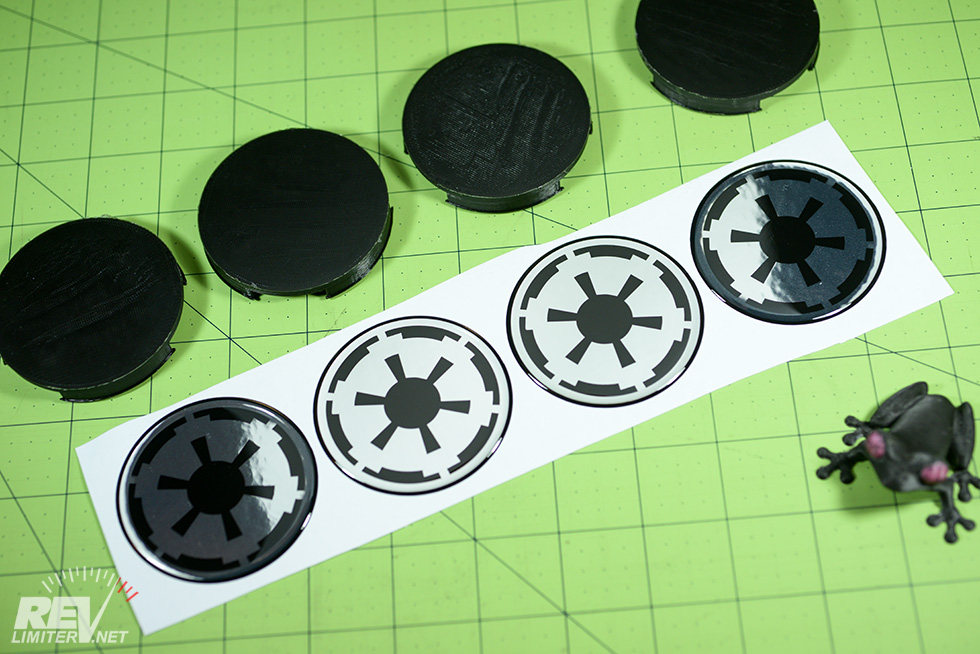
As I said… PLA doesn’t work for center caps. I learned this the hard way. Each one broke a tab off while pressing into the wheel. Then I actually googled what PLA should be used for (non structural stuff that stays at room temperature) and ordered some ABS filament.
But it was for the best. The chrome Imperial Logos were way way too bright for the Platinum Satin wheels on Stormy. Not good at all. I didn’t even take a photo of them.
And then one fell off.
heh. Oops.
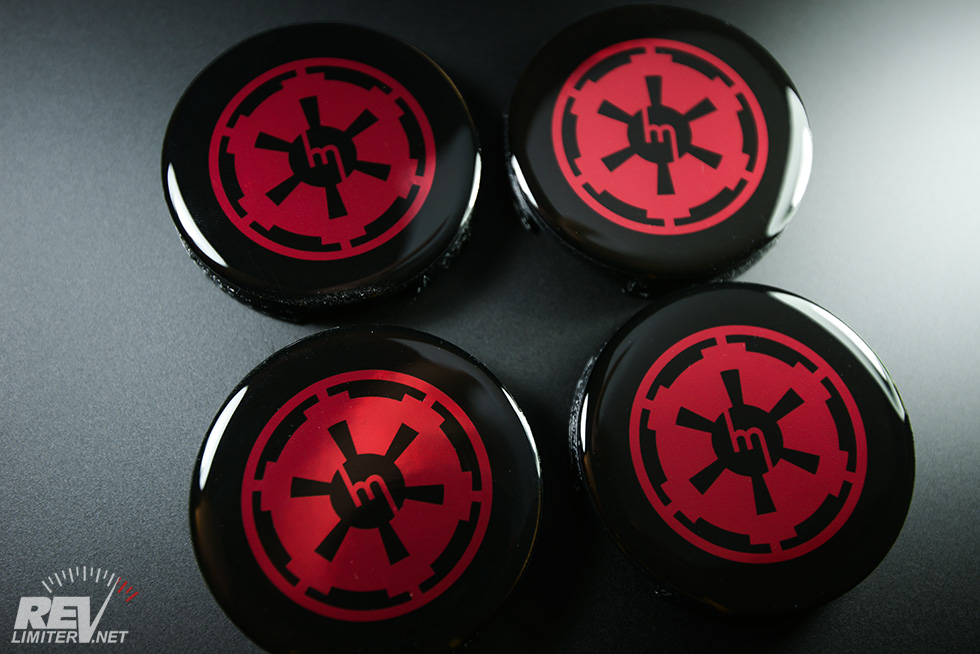
That's more like it. A smaller logo, red foil, and the Mazda M in the center of the Imperial roundel.
Printed in black ABS.
Perfect!
Just the thing.
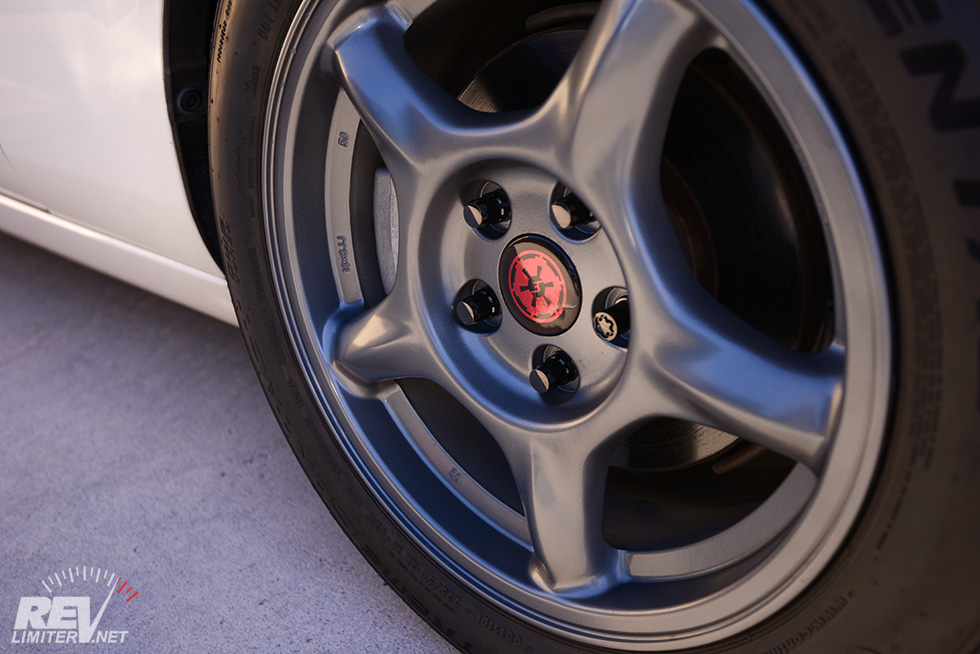
This looks really good. It’s subtle and sharp. And the red foil looks incredible in person. It’s got a really nice contrast to the dark wheels.
I also took care of the red toenails (brake calipers). Now they’re sprayed silver. Much better in my opinion. Red calipers should be reserved for actual decent hardware with names like Brembo and Wilwood. Stock calipers need not be red.
Agent☣Orange (03-09-2017),Greasemonkey2000 (03-08-2017),HarryB (03-08-2017),JamieH (03-09-2017),NCGreasemonkey (03-08-2017),Phatmiata (03-08-2017),RotorNutFD3S (03-08-2017),tsingson (03-08-2017)

Nvm! Looks great!
1990 Miata, she was red but now she is Spirit Green!
http://mazdaroadster.net/showthread....d-a-love-story <--- build thread!
Also check out the facebook page http://www.facebook.com/IHeartFlippyHeadlights !!! Its a facebook page dedicated to the awesomeness which is flippyheadlights! Not me, but the actual headlights! High time someone noticed how awesome these things are; check it out!
RuckkehrMiata (03-09-2017)
 Posting Permissions

 Reply With Quote